- Turn off the printer.
- Press and hold down the Feed button.
- Turn on the power while still holding the Feed button.
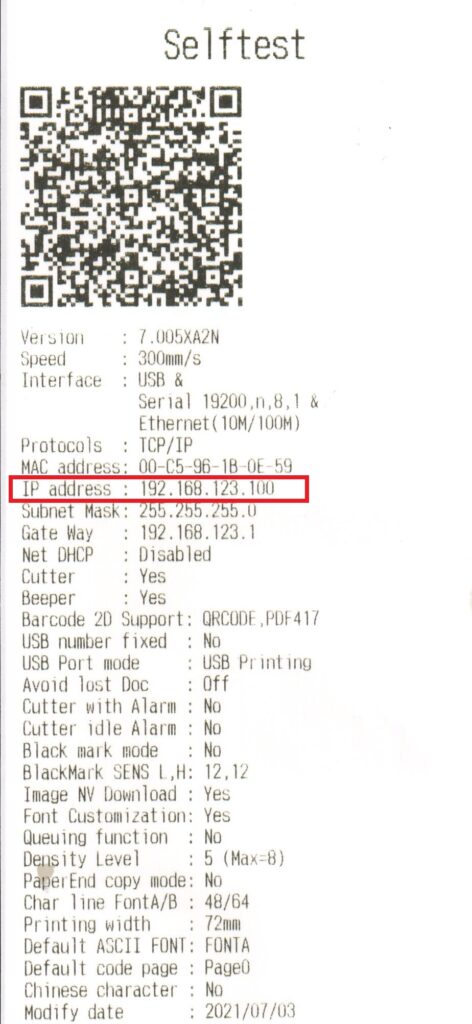
- Wait for 3-5 seconds and then release the Feed button. A receipt will print out, displaying the printer’s IP address along with other configuration settings. Refer to the provided diagram for more details.

- On your POS machine or computer, open a web browser. Make sure it is connected to the same network as the printer.
- Enter the current IP address that you obtained from the printer’s configuration receipt.
- Navigate to the Configuration section.
- Enter the new desired IP address for the printer in the IP Address field. Each IP address on the network must be unique.
- Click on the “Save” button to save the changes.
- Finally, click on the “Restart” button. You will hear a beep sound from the printer, indicating that the IP address has been successfully changed.

Change Printer IP Address
Updated on July 9, 2023
