Dine in Order #
- Select Dine In icon in Home Screen of Adoluna

- Select a table to open menu and begin taking orders

- White color indicates table is vacant and ready to be sat.
- Yellow color indicates table is vacant and not clean
- Red color indicates table is occupied
- Continue to Creating Order
Take Out Order #
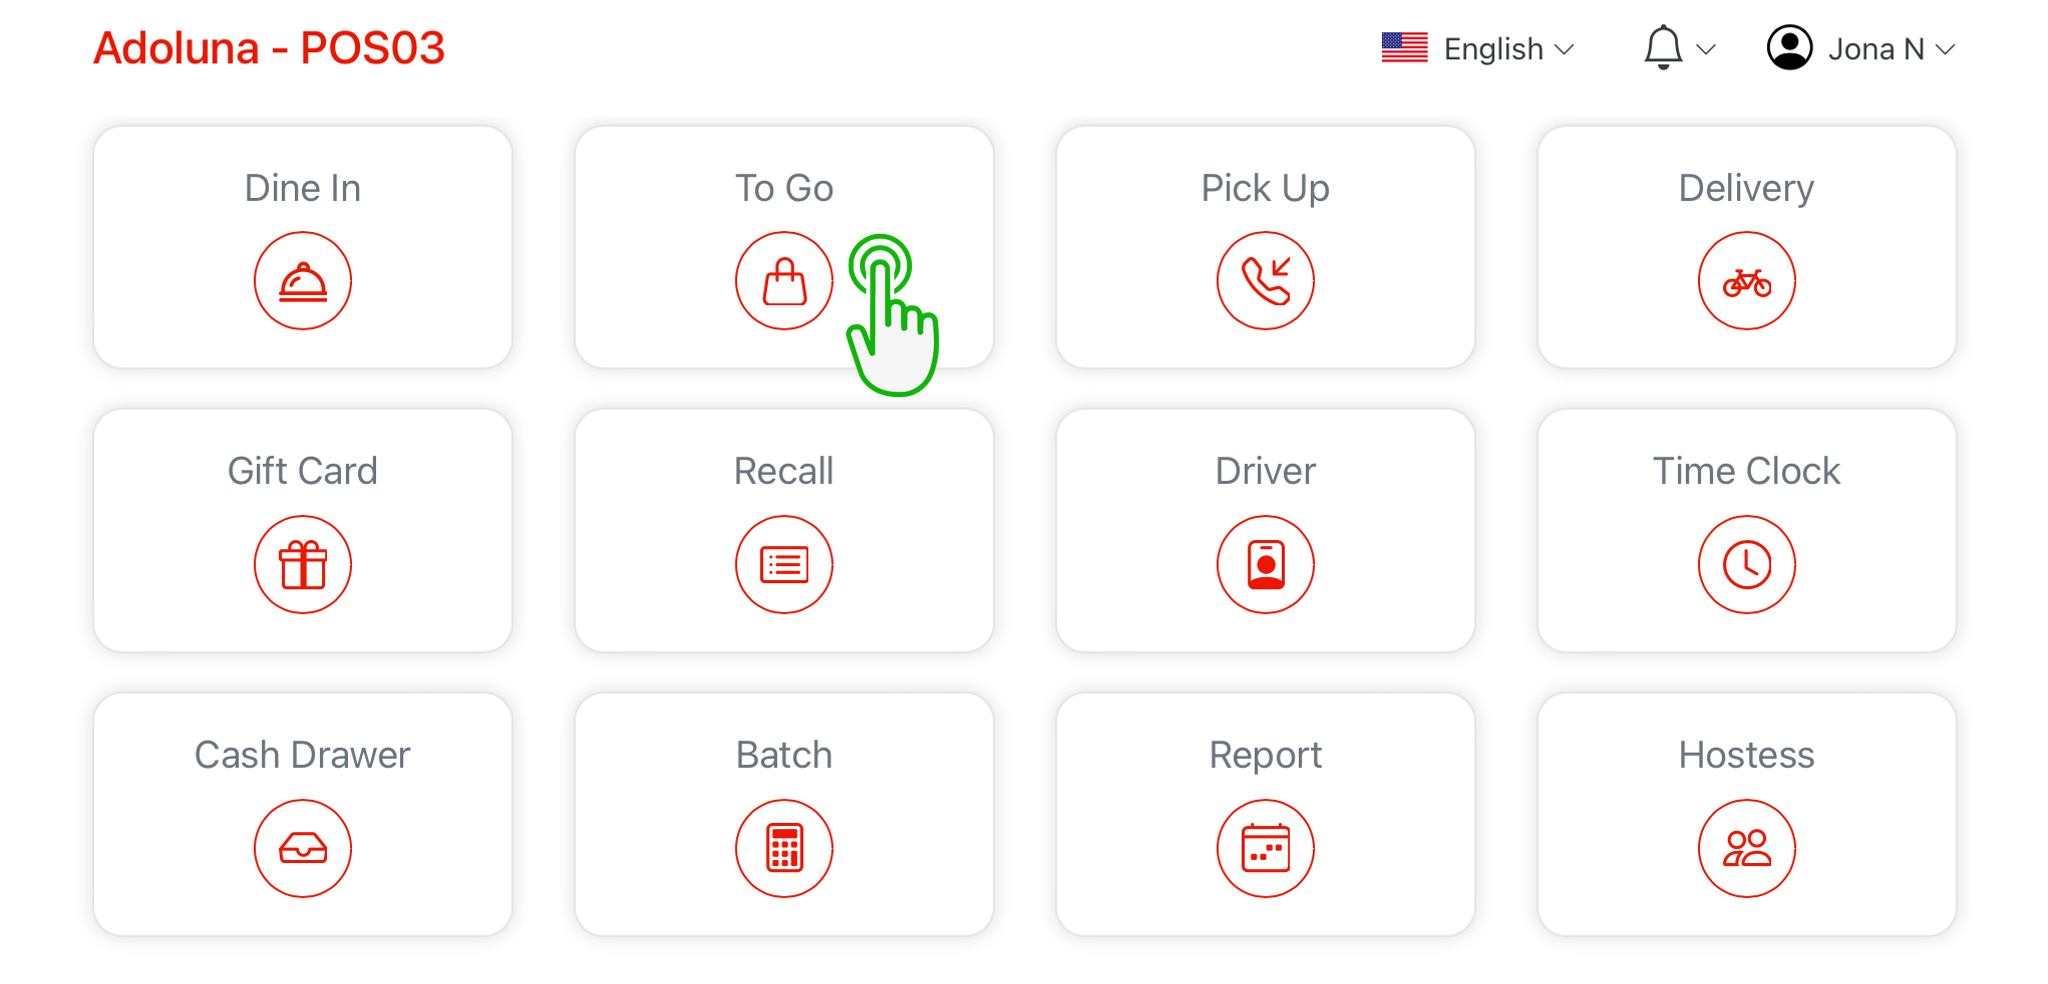
- Select To Go icon in Home Screen of Adoluna
- Continue to Creating Order
Pick Up Order #
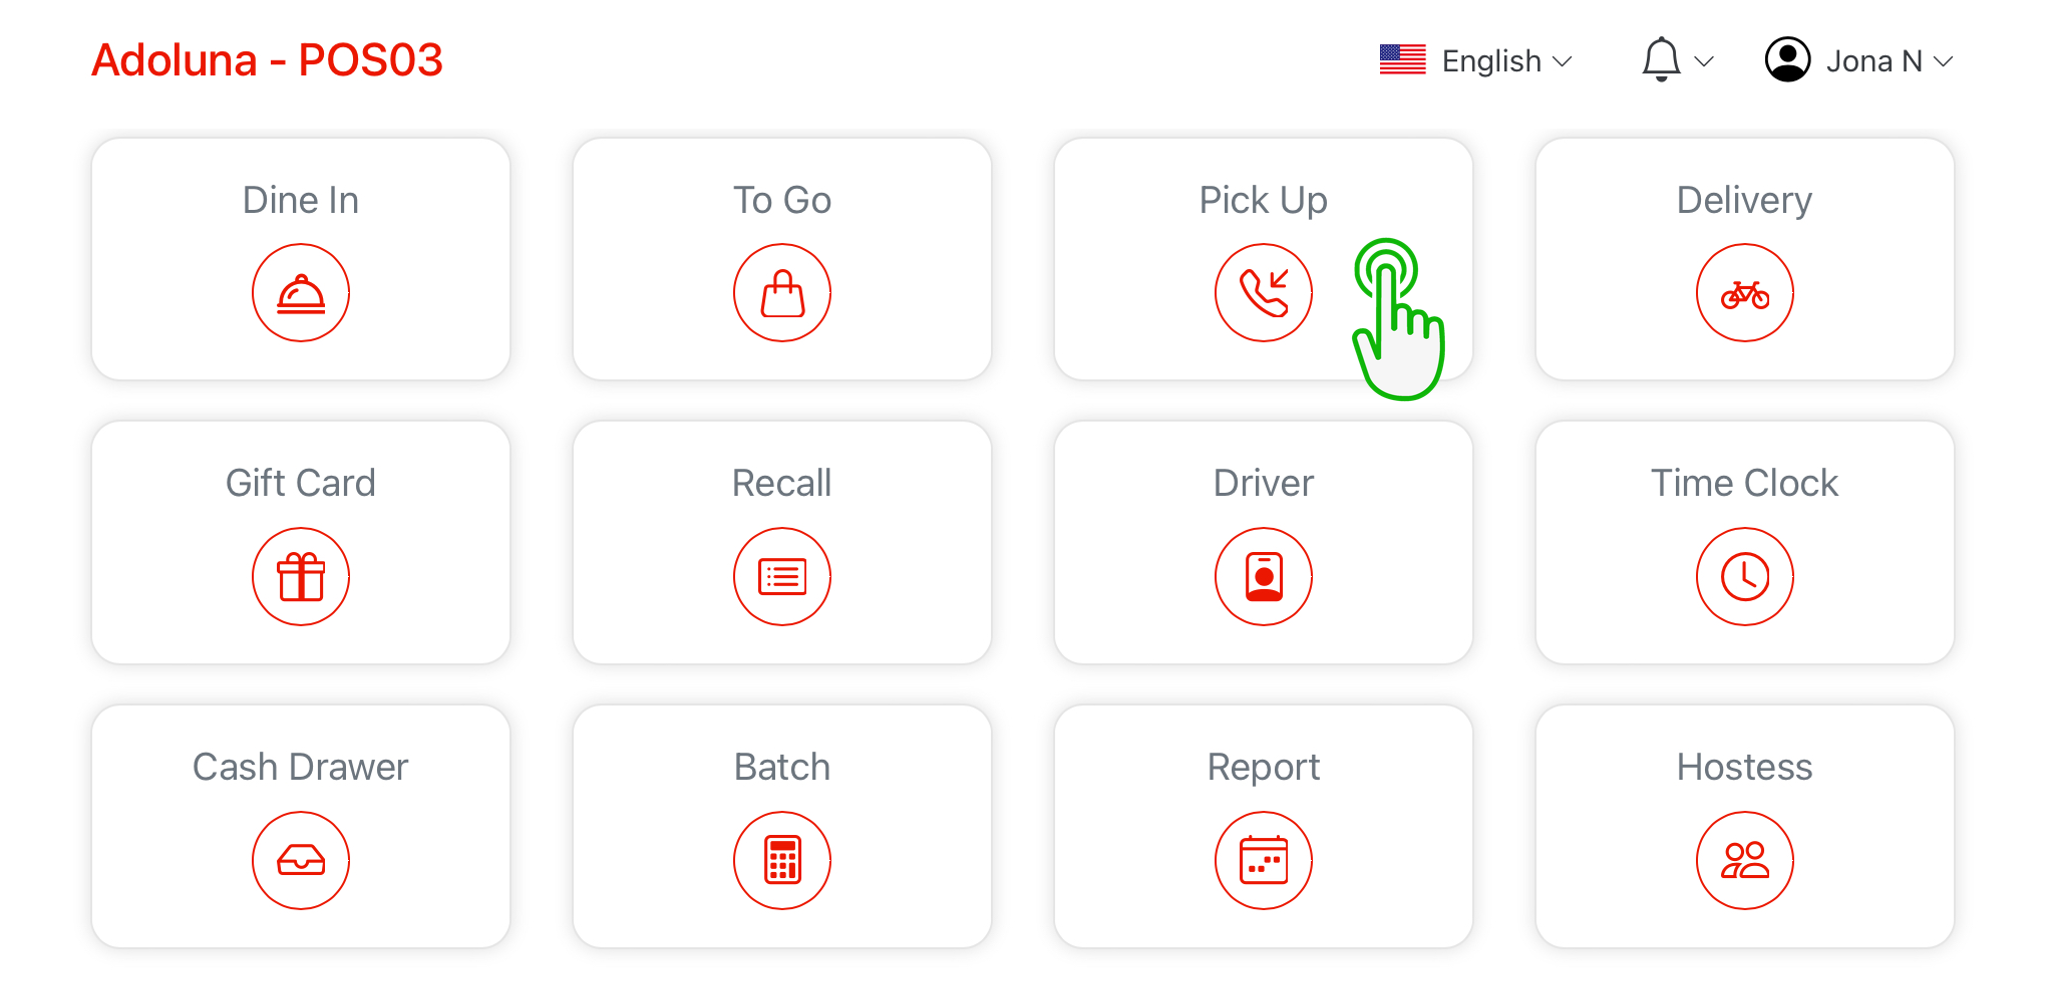
- Select Pick Up icon in Home Screen of Adoluna
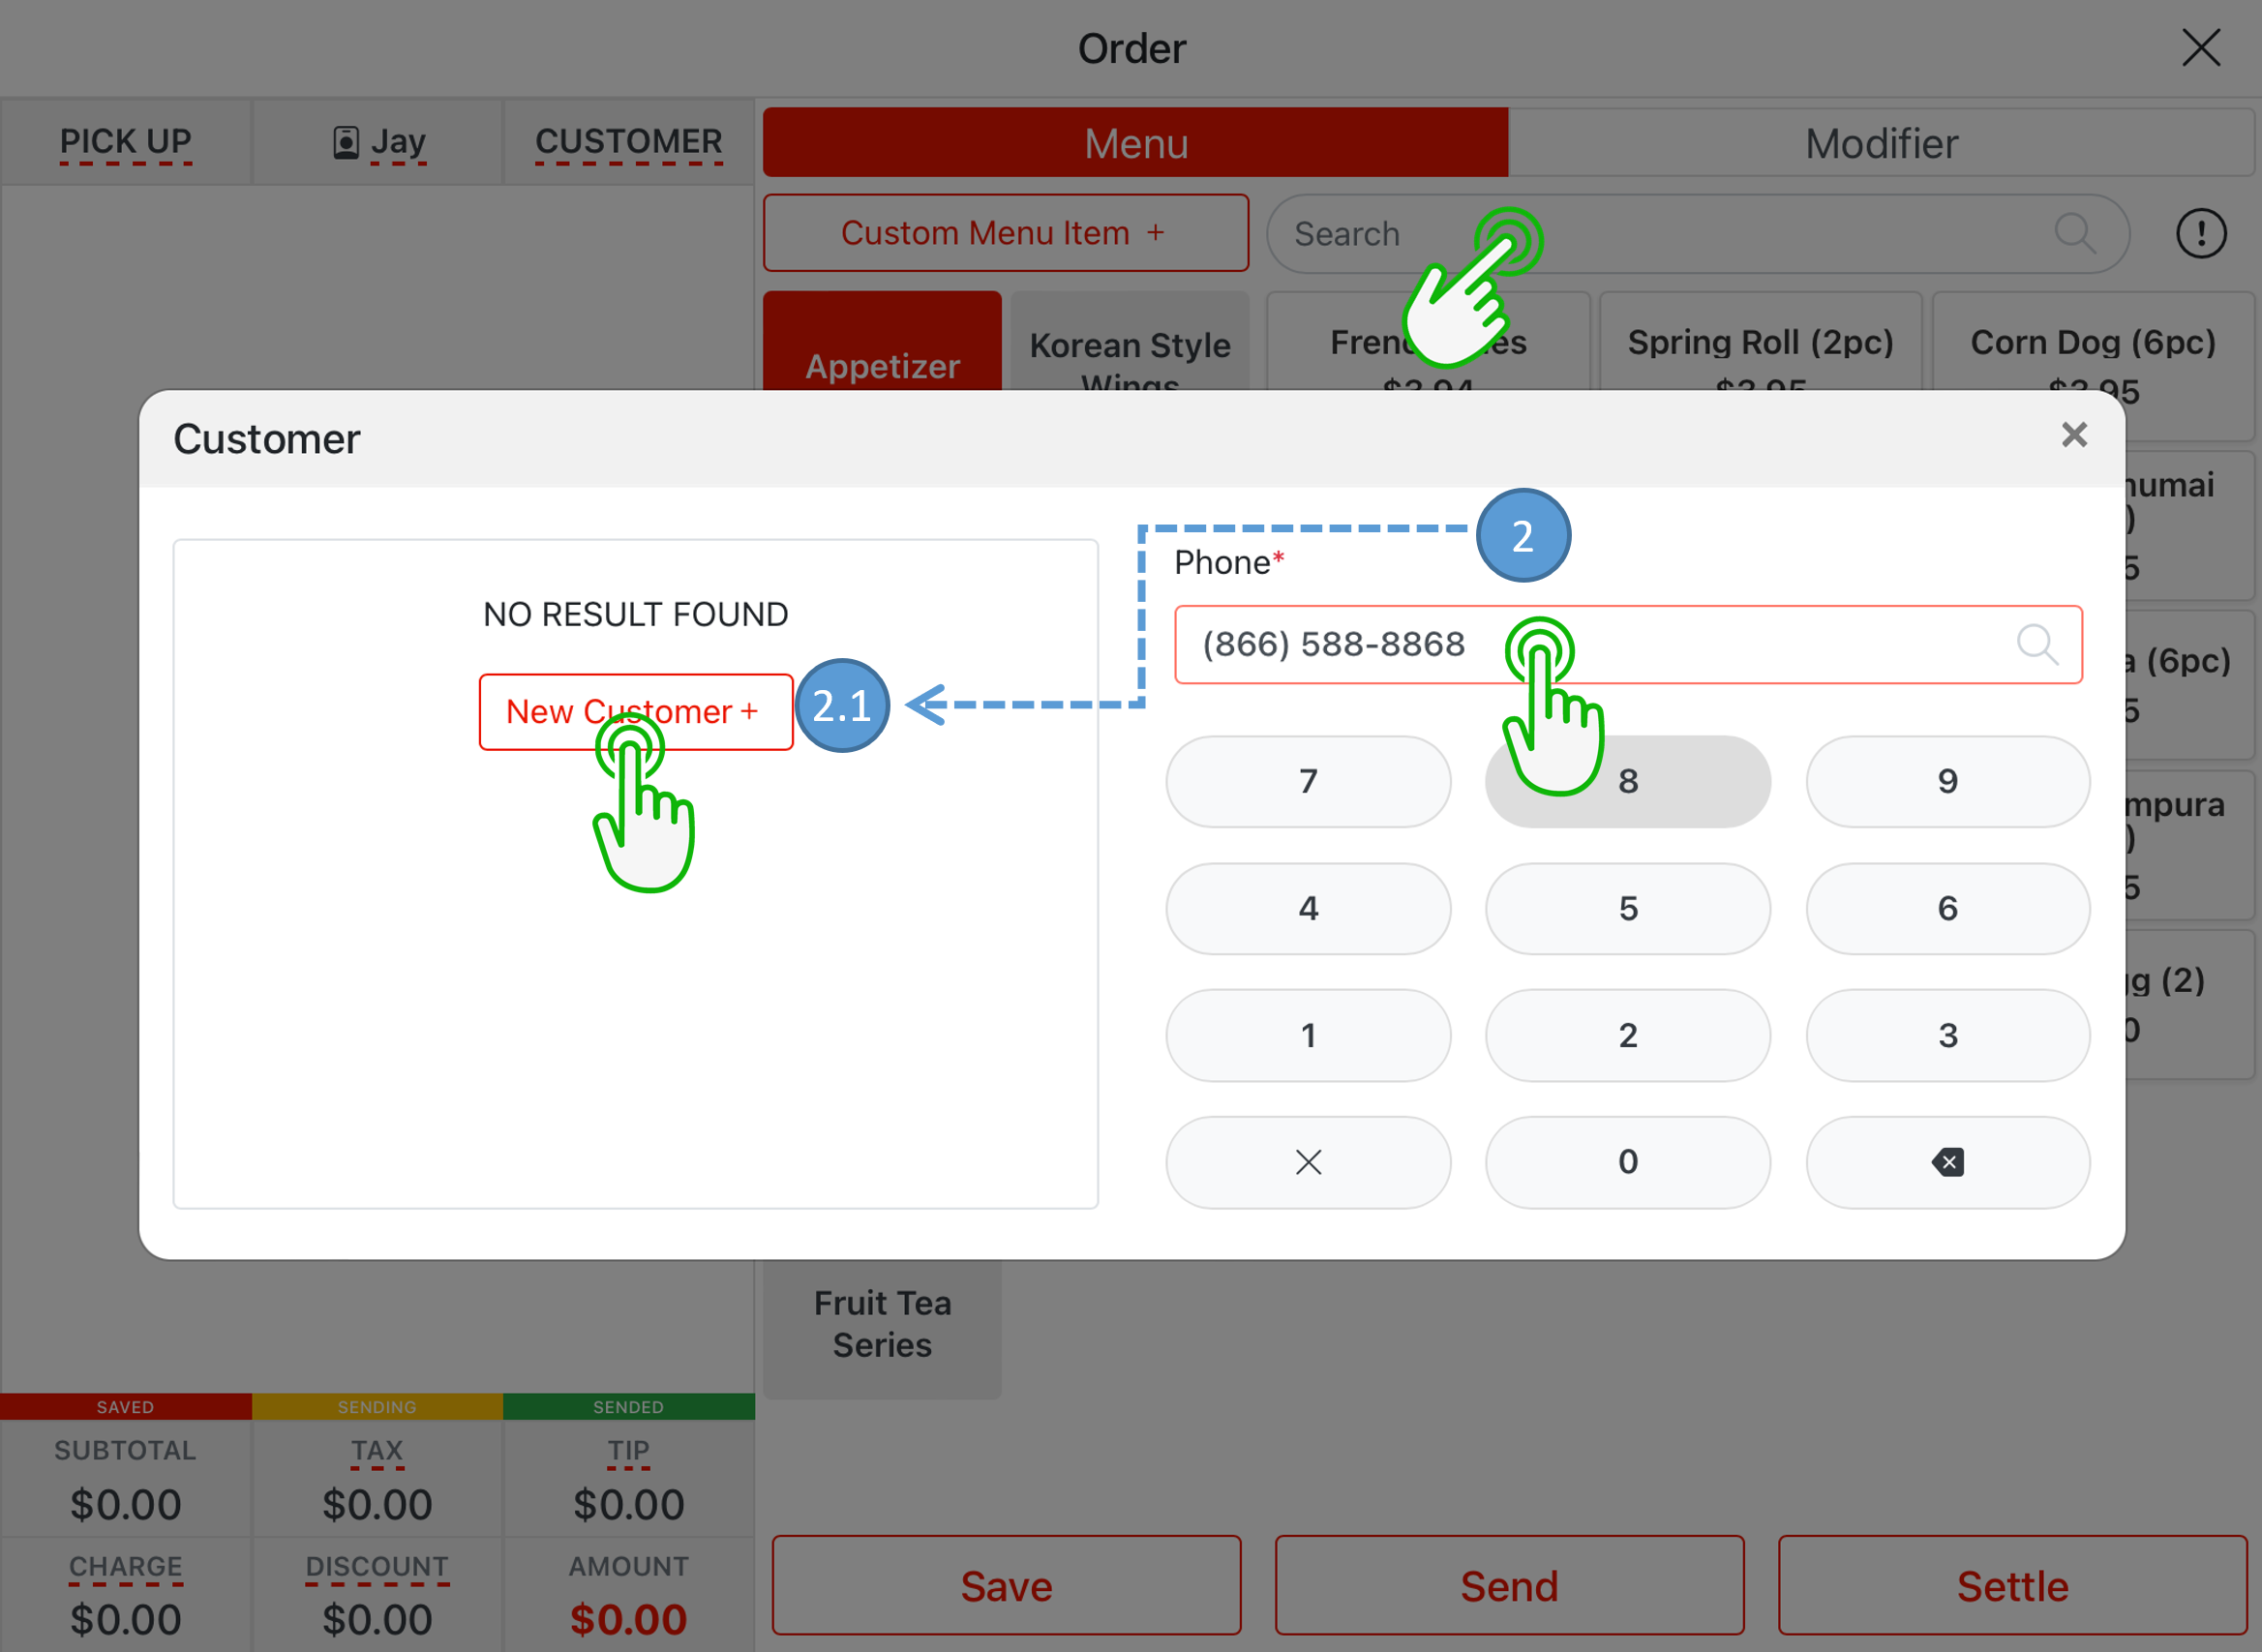
- Under Phone type in the customer’s phone number
- New customer select New Customer icon
- Existing customer
- Tap Customer information area to continue creating order
- Tap the Pen icon in order to edit customer information
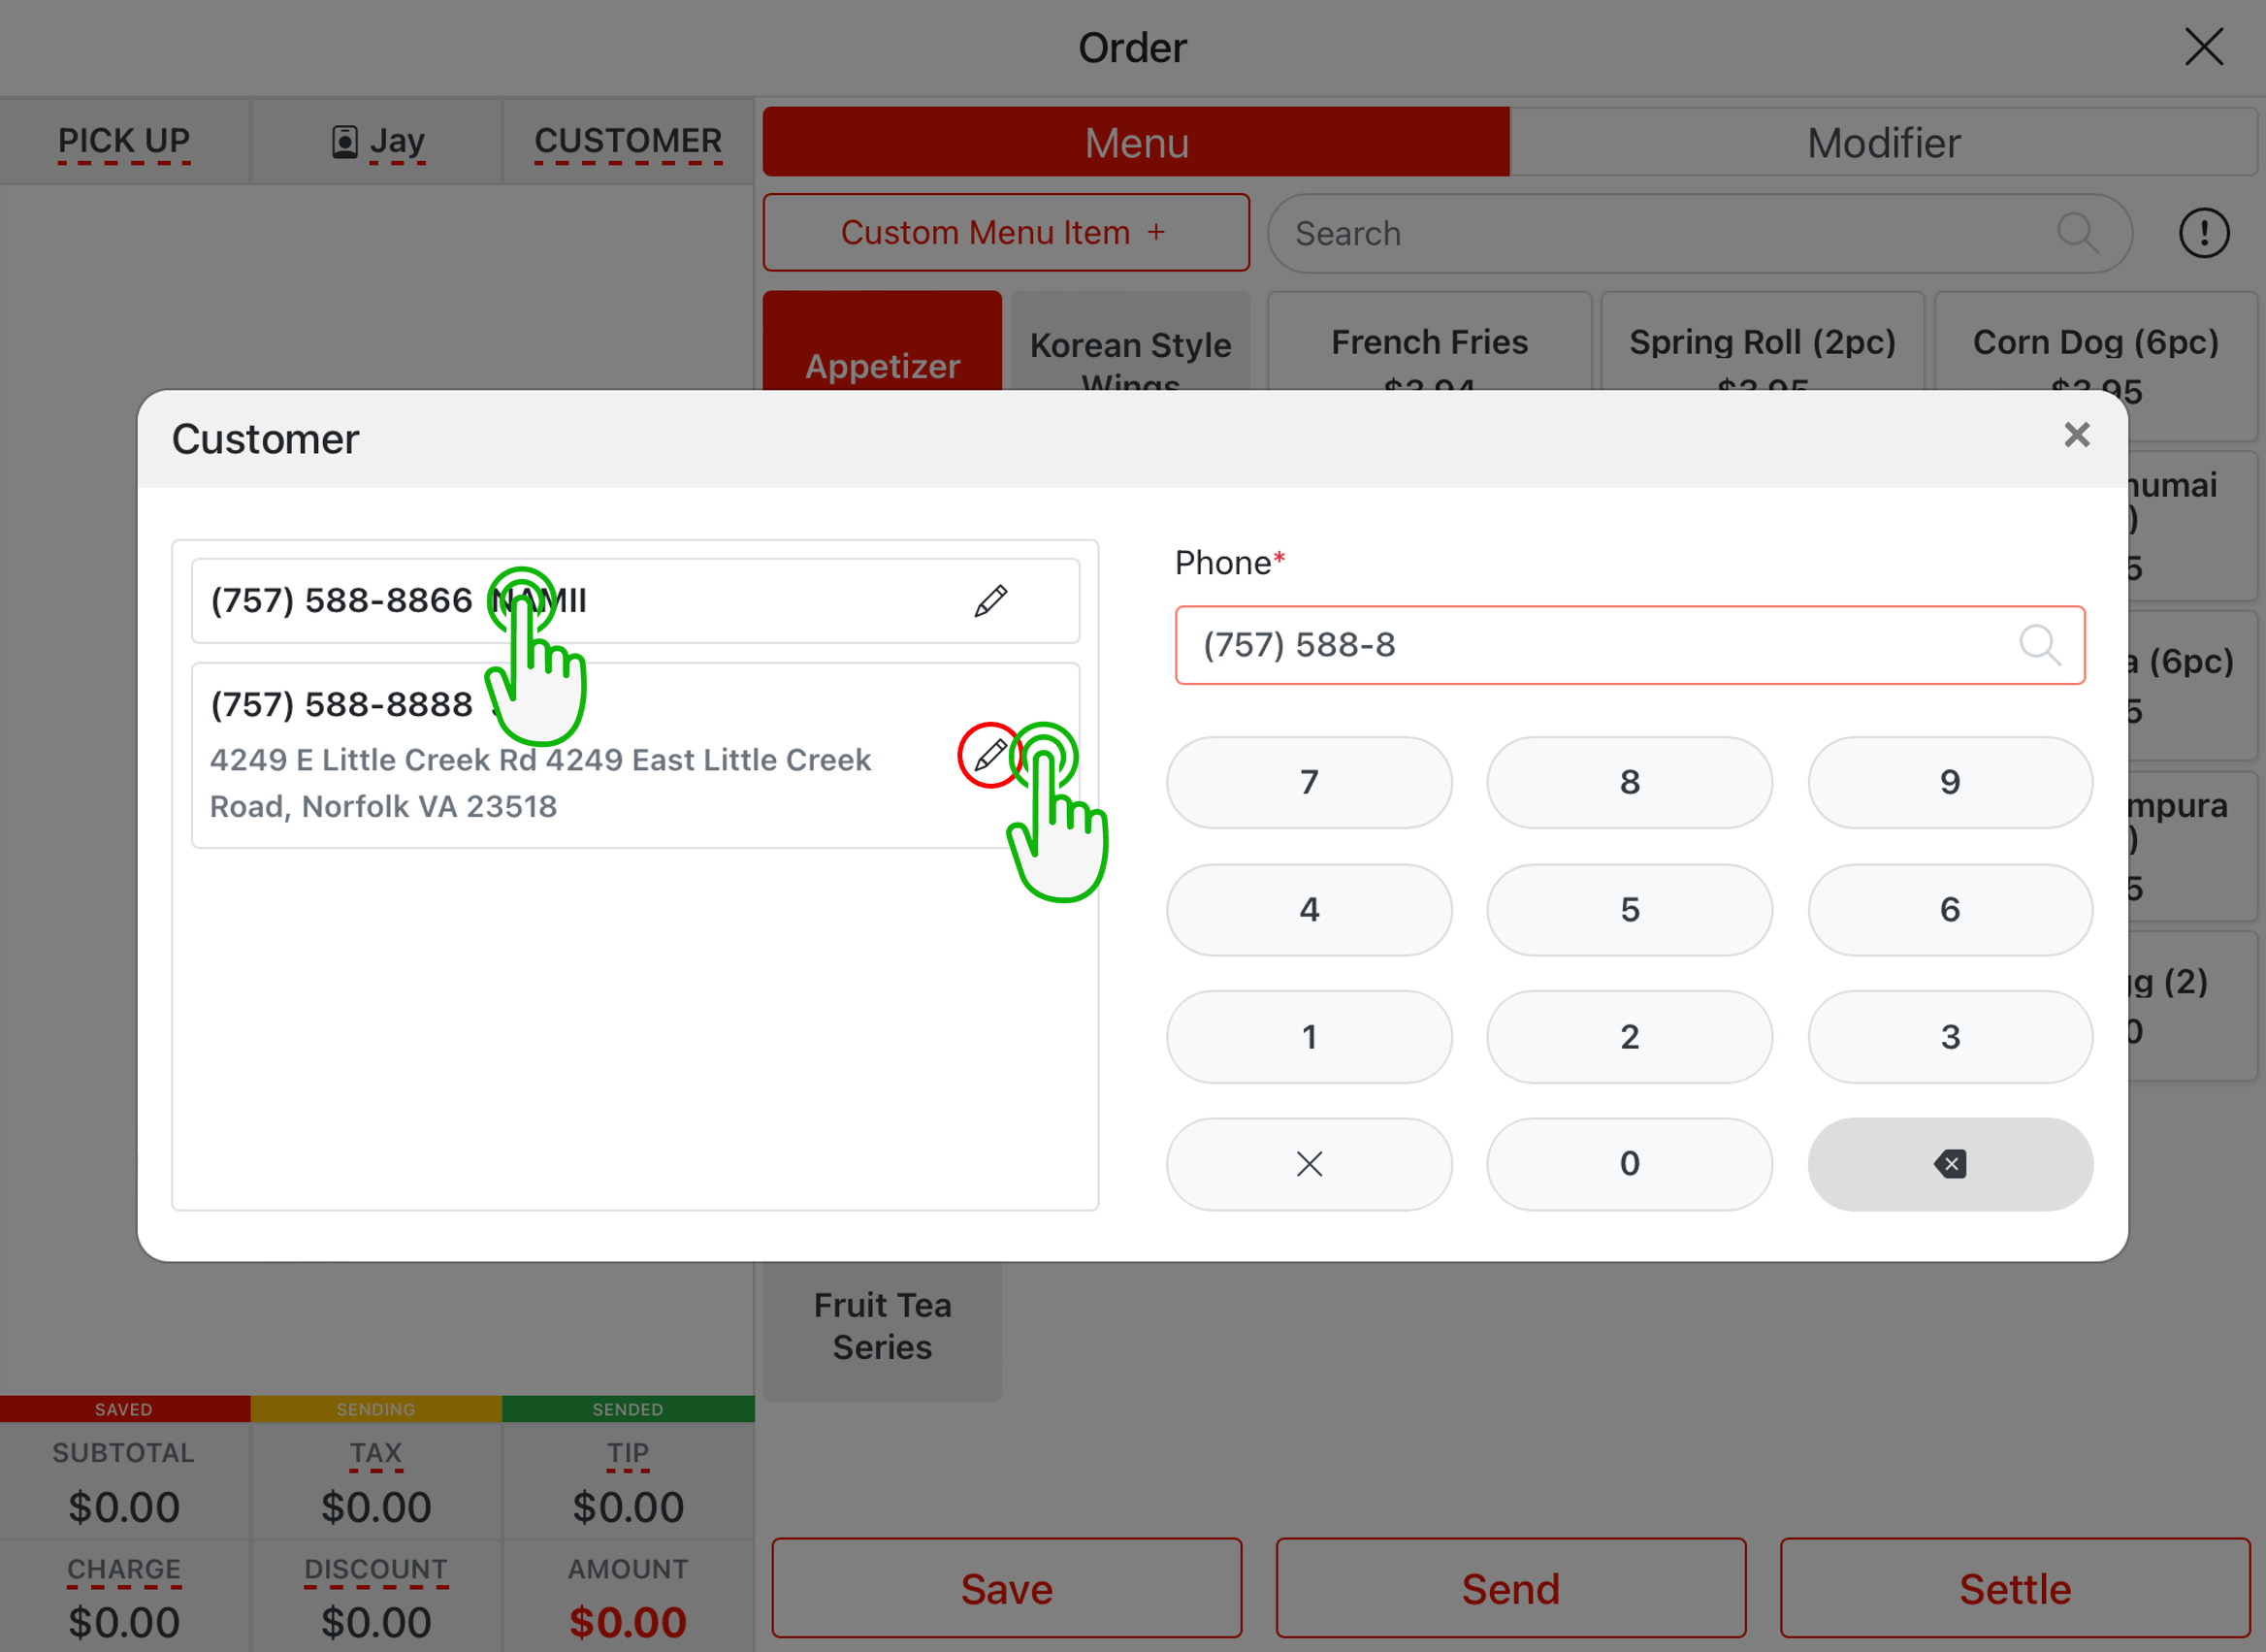
- New customer select New Customer icon
- Editing pick up Customer Information

- Tap Skip to skip enter in customer information
- Tap Cancel to exit
- Tap Confirm to save the changes and continue to Creating Order
- Tap Order History to check past orders

- Select a past order to display
- Tap Cancel to exit
- Tap Copy Order to copy current displayed order to menu ordering screen
- Continue to Creating Order
Delivery Order #
- Select Delivery icon in Home Screen of Adoluna
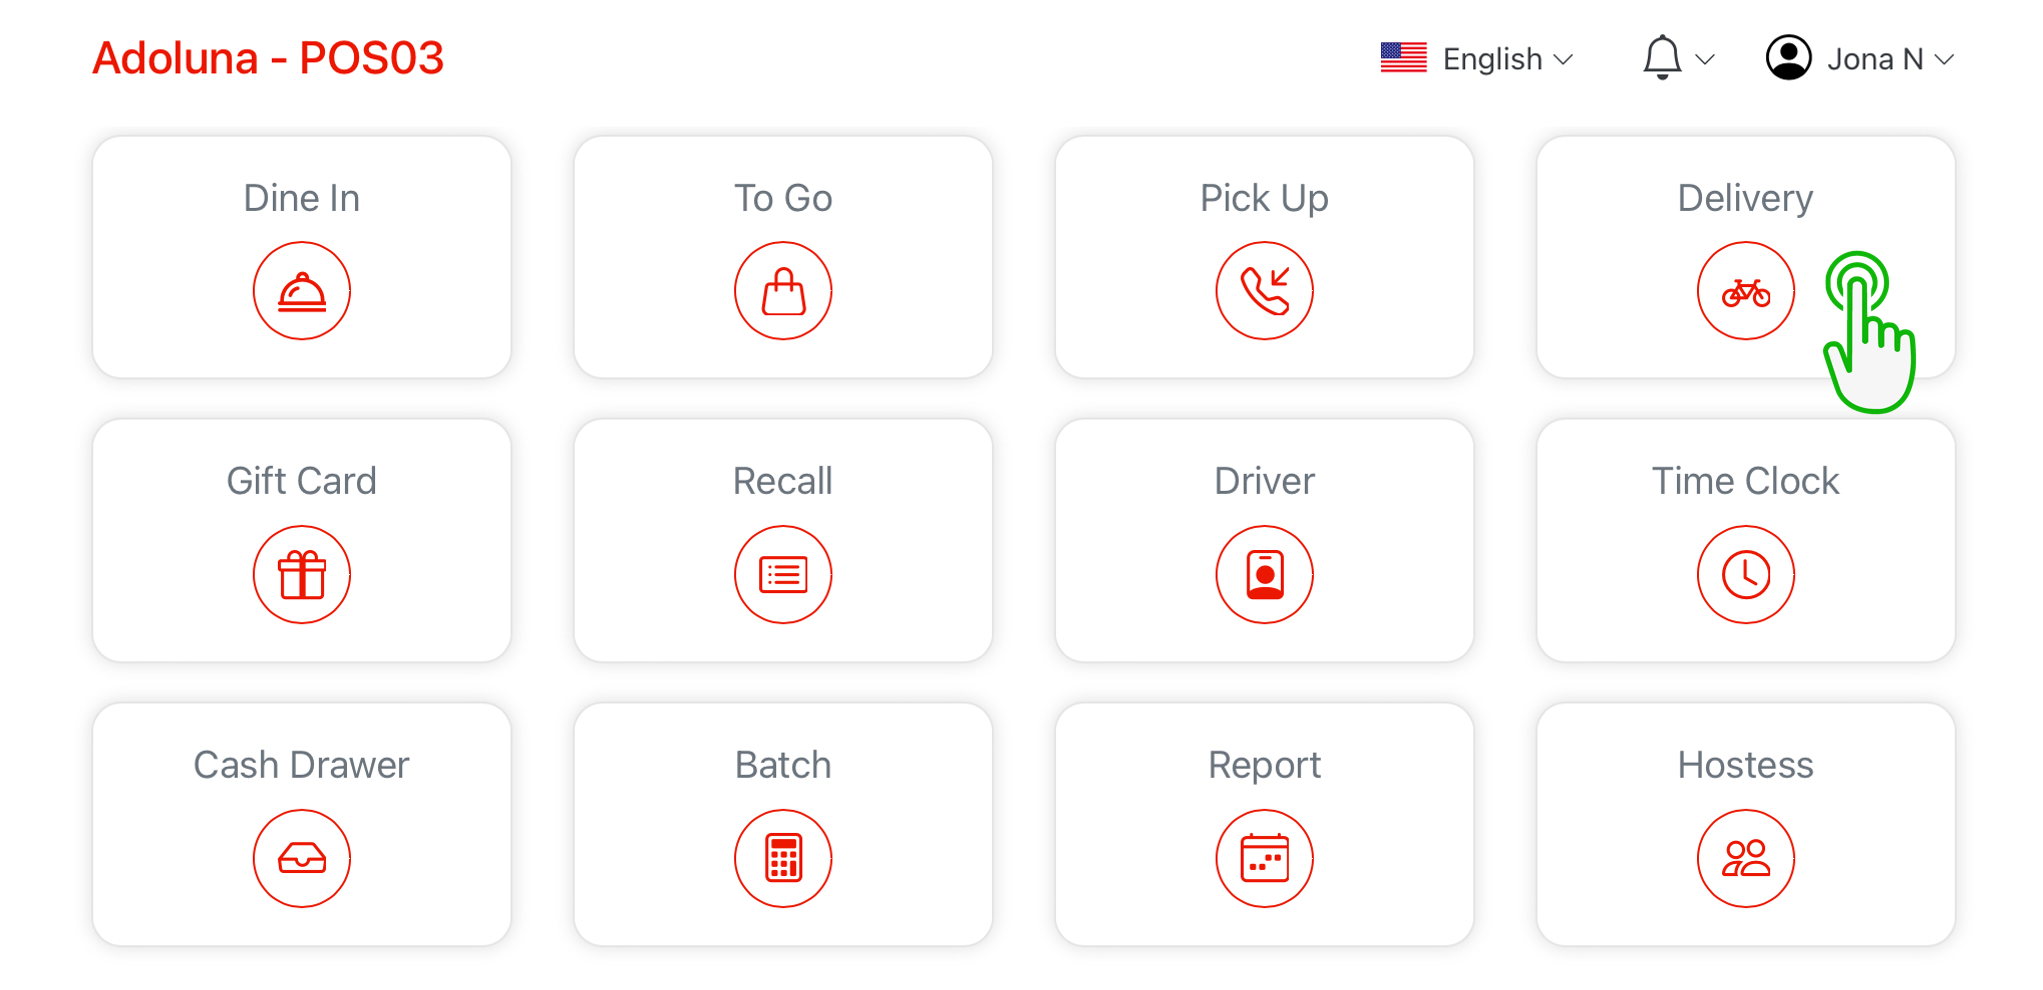
- Under Phone type in the customer’s phone number
- New customer select New Customer icon

- Existing customer
- Tap Customer information area to continue creating order
- Tap the Pen icon in order to edit customer information

- Editing Delivery Customer Information

- Tap Cancel to exit
- Tap Confirm to save the changes and continue to Creating Order
- Tap Order History to check past orders

- Select a past order to display
- Tap Cancel to exit
- Tap Copy Order to copy current displayed order to menu ordering screen
- New customer select New Customer icon
Creating Order #
Ordering Screen #
#
- Order type
- Server’s name
- Table Number (when the order type is Dine In) or Customer’s name (when the order type is To Go, Pickup or Deliver)
- Show menu category and menu items
- Show modifier category and modifier items
- Tap X icon to exit without saving
- Search items
- Tap ! icon show menu item description
- Menu category or Modifier category
- Menu items or Modifier item
- Tap Save icon to save the order
- Tap Send icon to send the order to kitchen and save
- Tap Settle icon to save the order and process payment
Add item to cart #
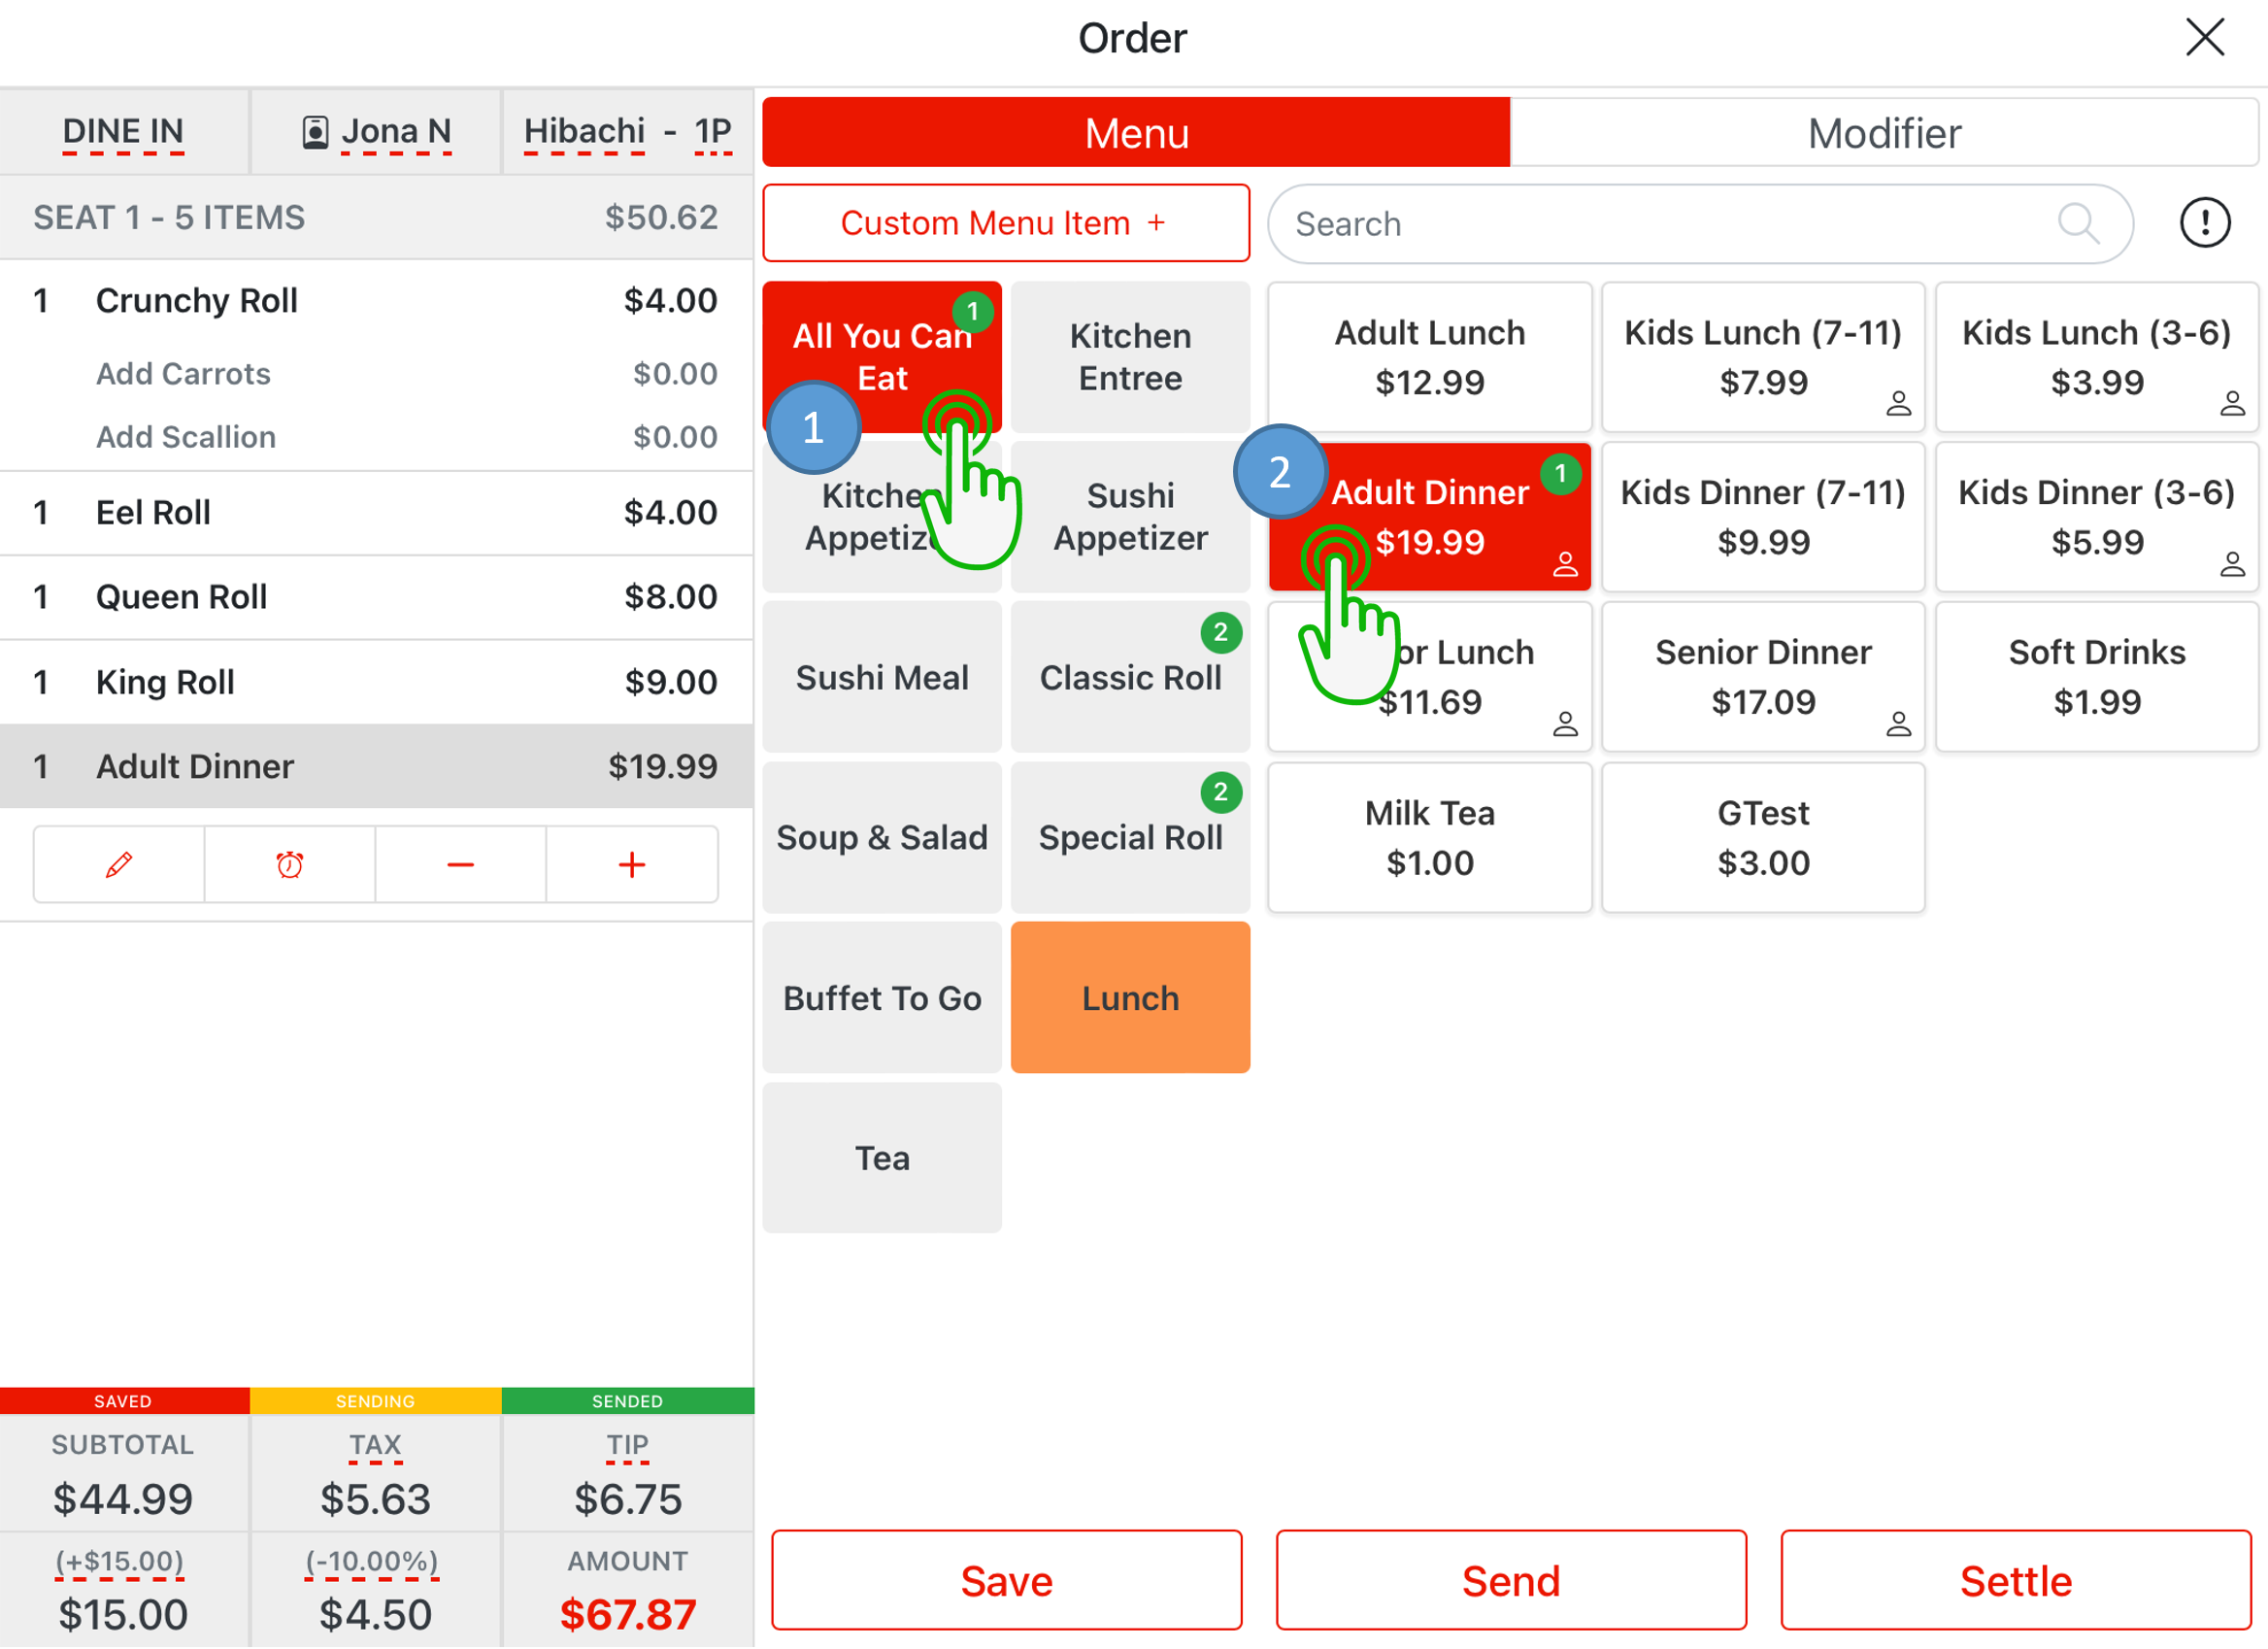
- Select menu category to show all menu items in the selected category
- Tap a menu item to add it to the cart
Custom Menu Item #
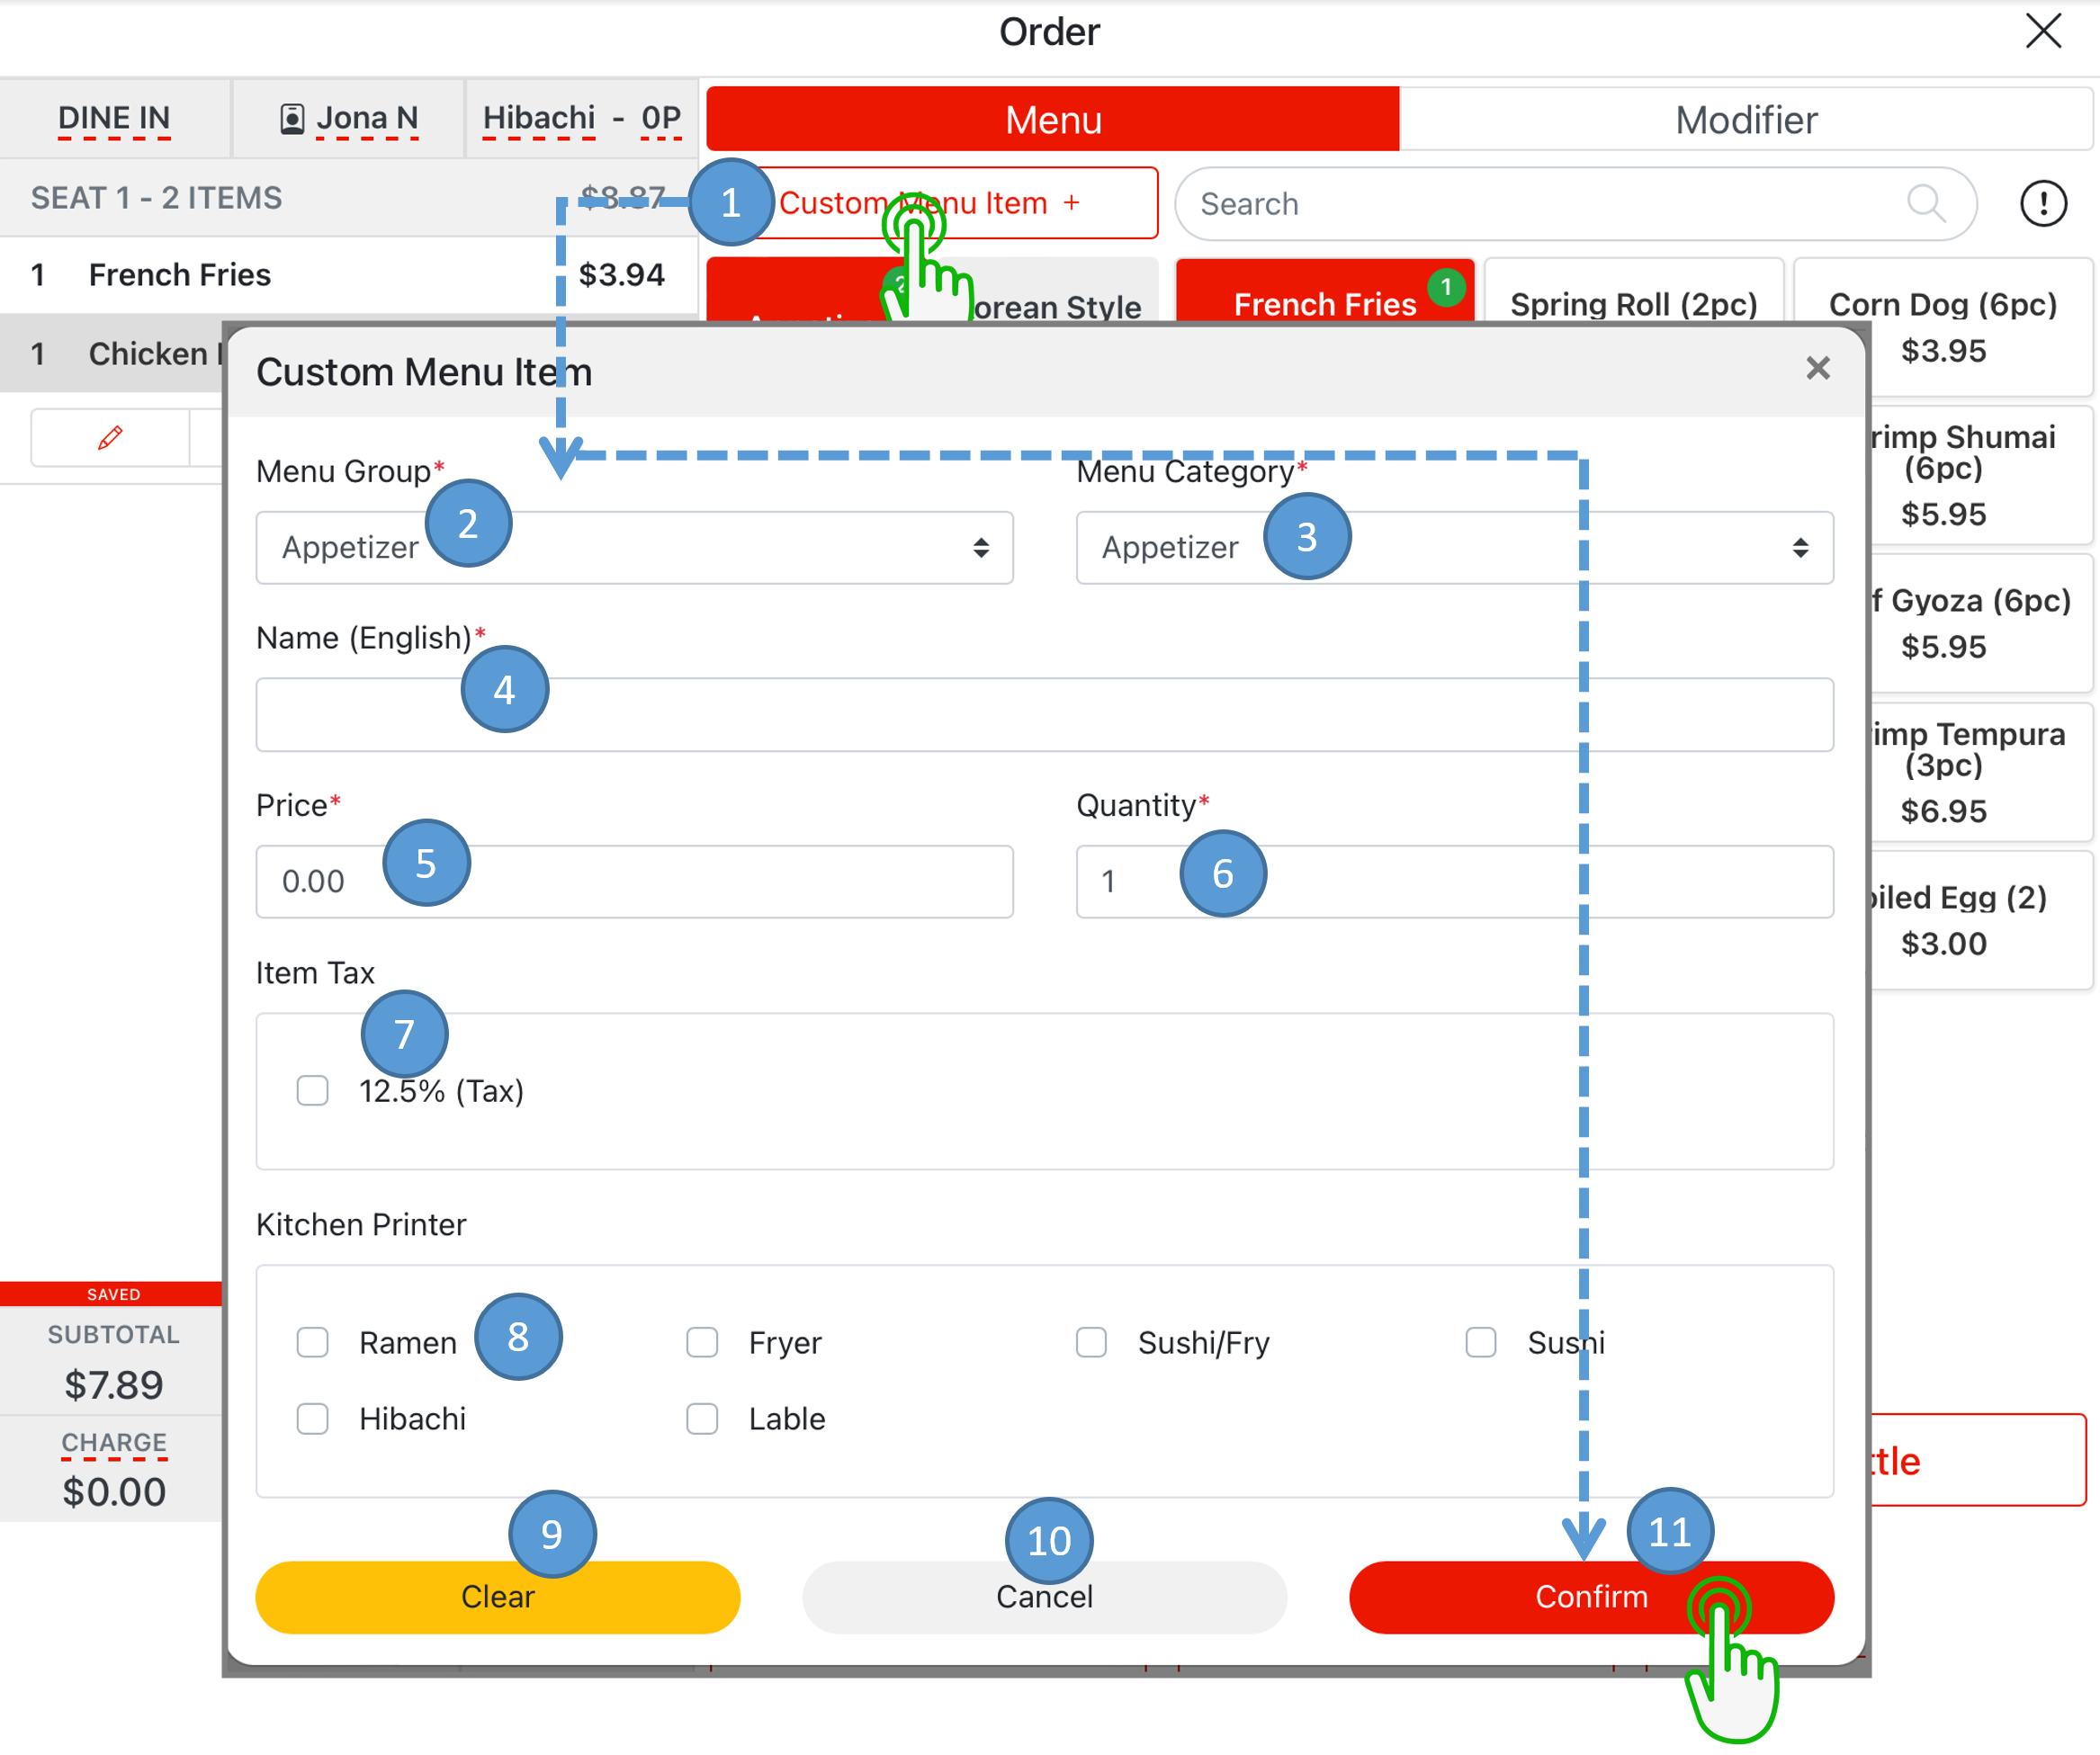
- Tap the Custom Menu Item to manually enter a menu item
- Select desired menu group as needed
- Select desired menu category as needed
- Enter in item name
- Enter in item price
- Enter in item quantity
- Select in item tax
- Select kitchen as needed
- Tap the Clear to clear all entries
- Tap the Cancel to exit
- Tap the Confirm to add the custom menu item to the cart
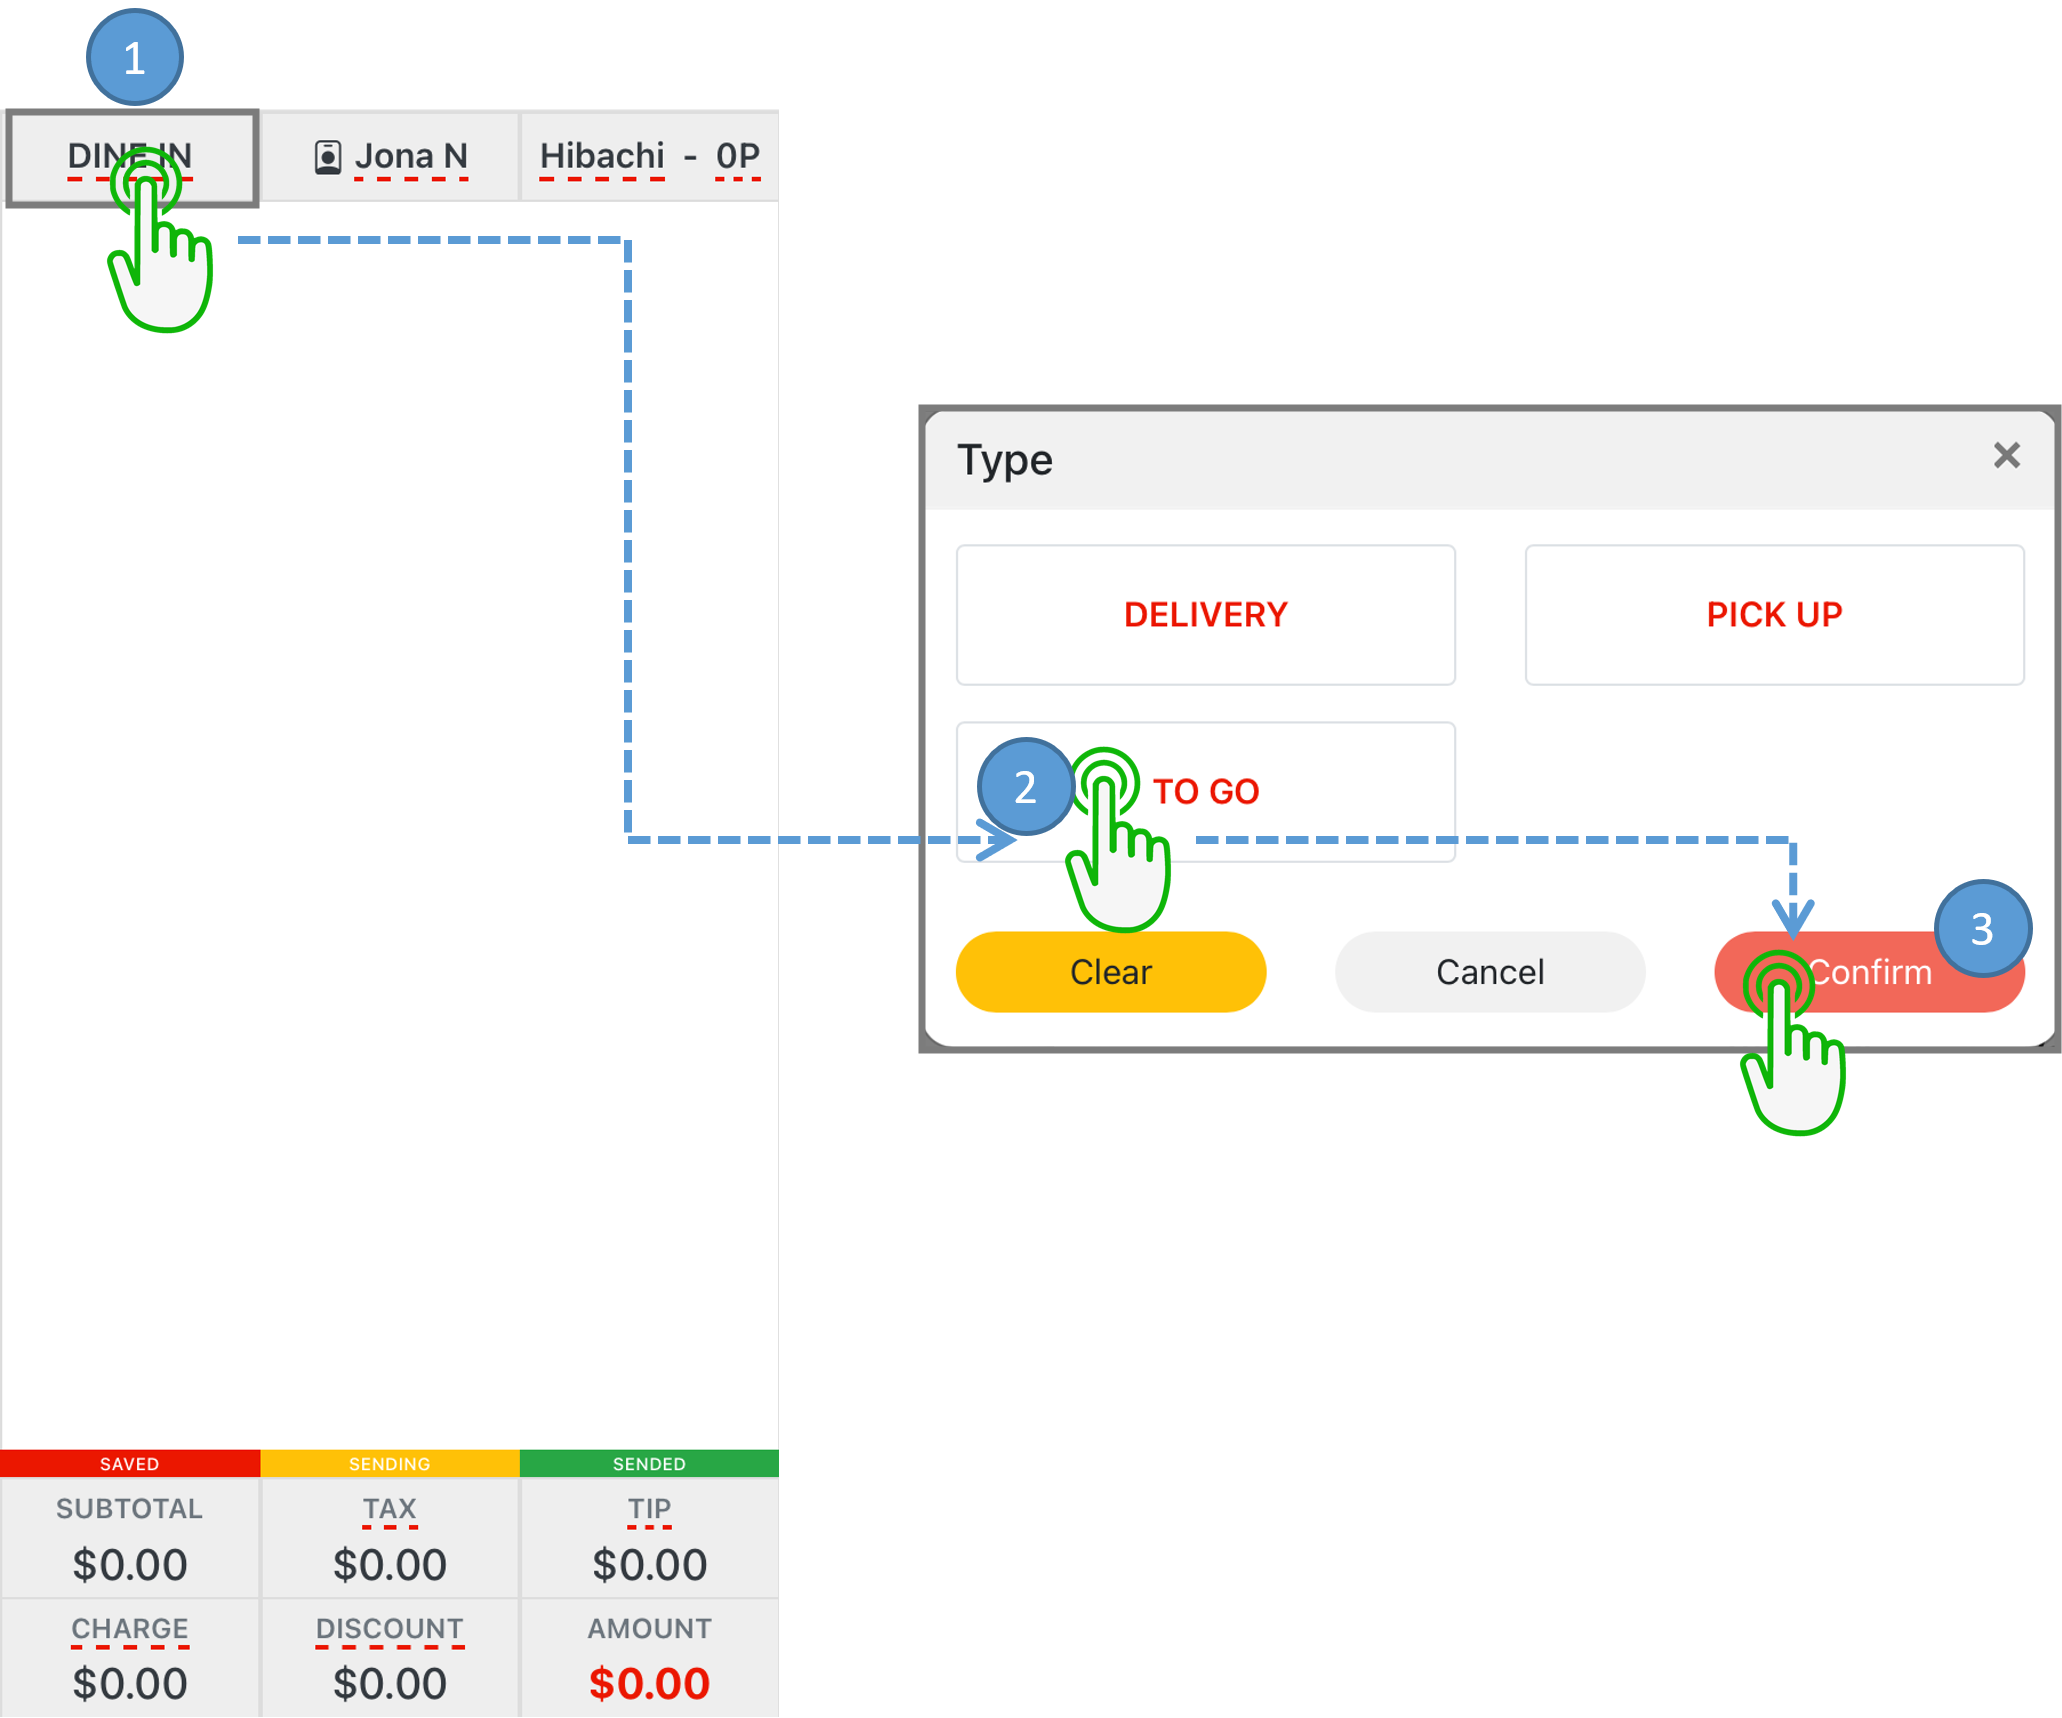
Change Order Type #
- If the order type needed to be changed from existing, tap the current Order Type
- Select Order Type and choose new type desired
- Select Confirm
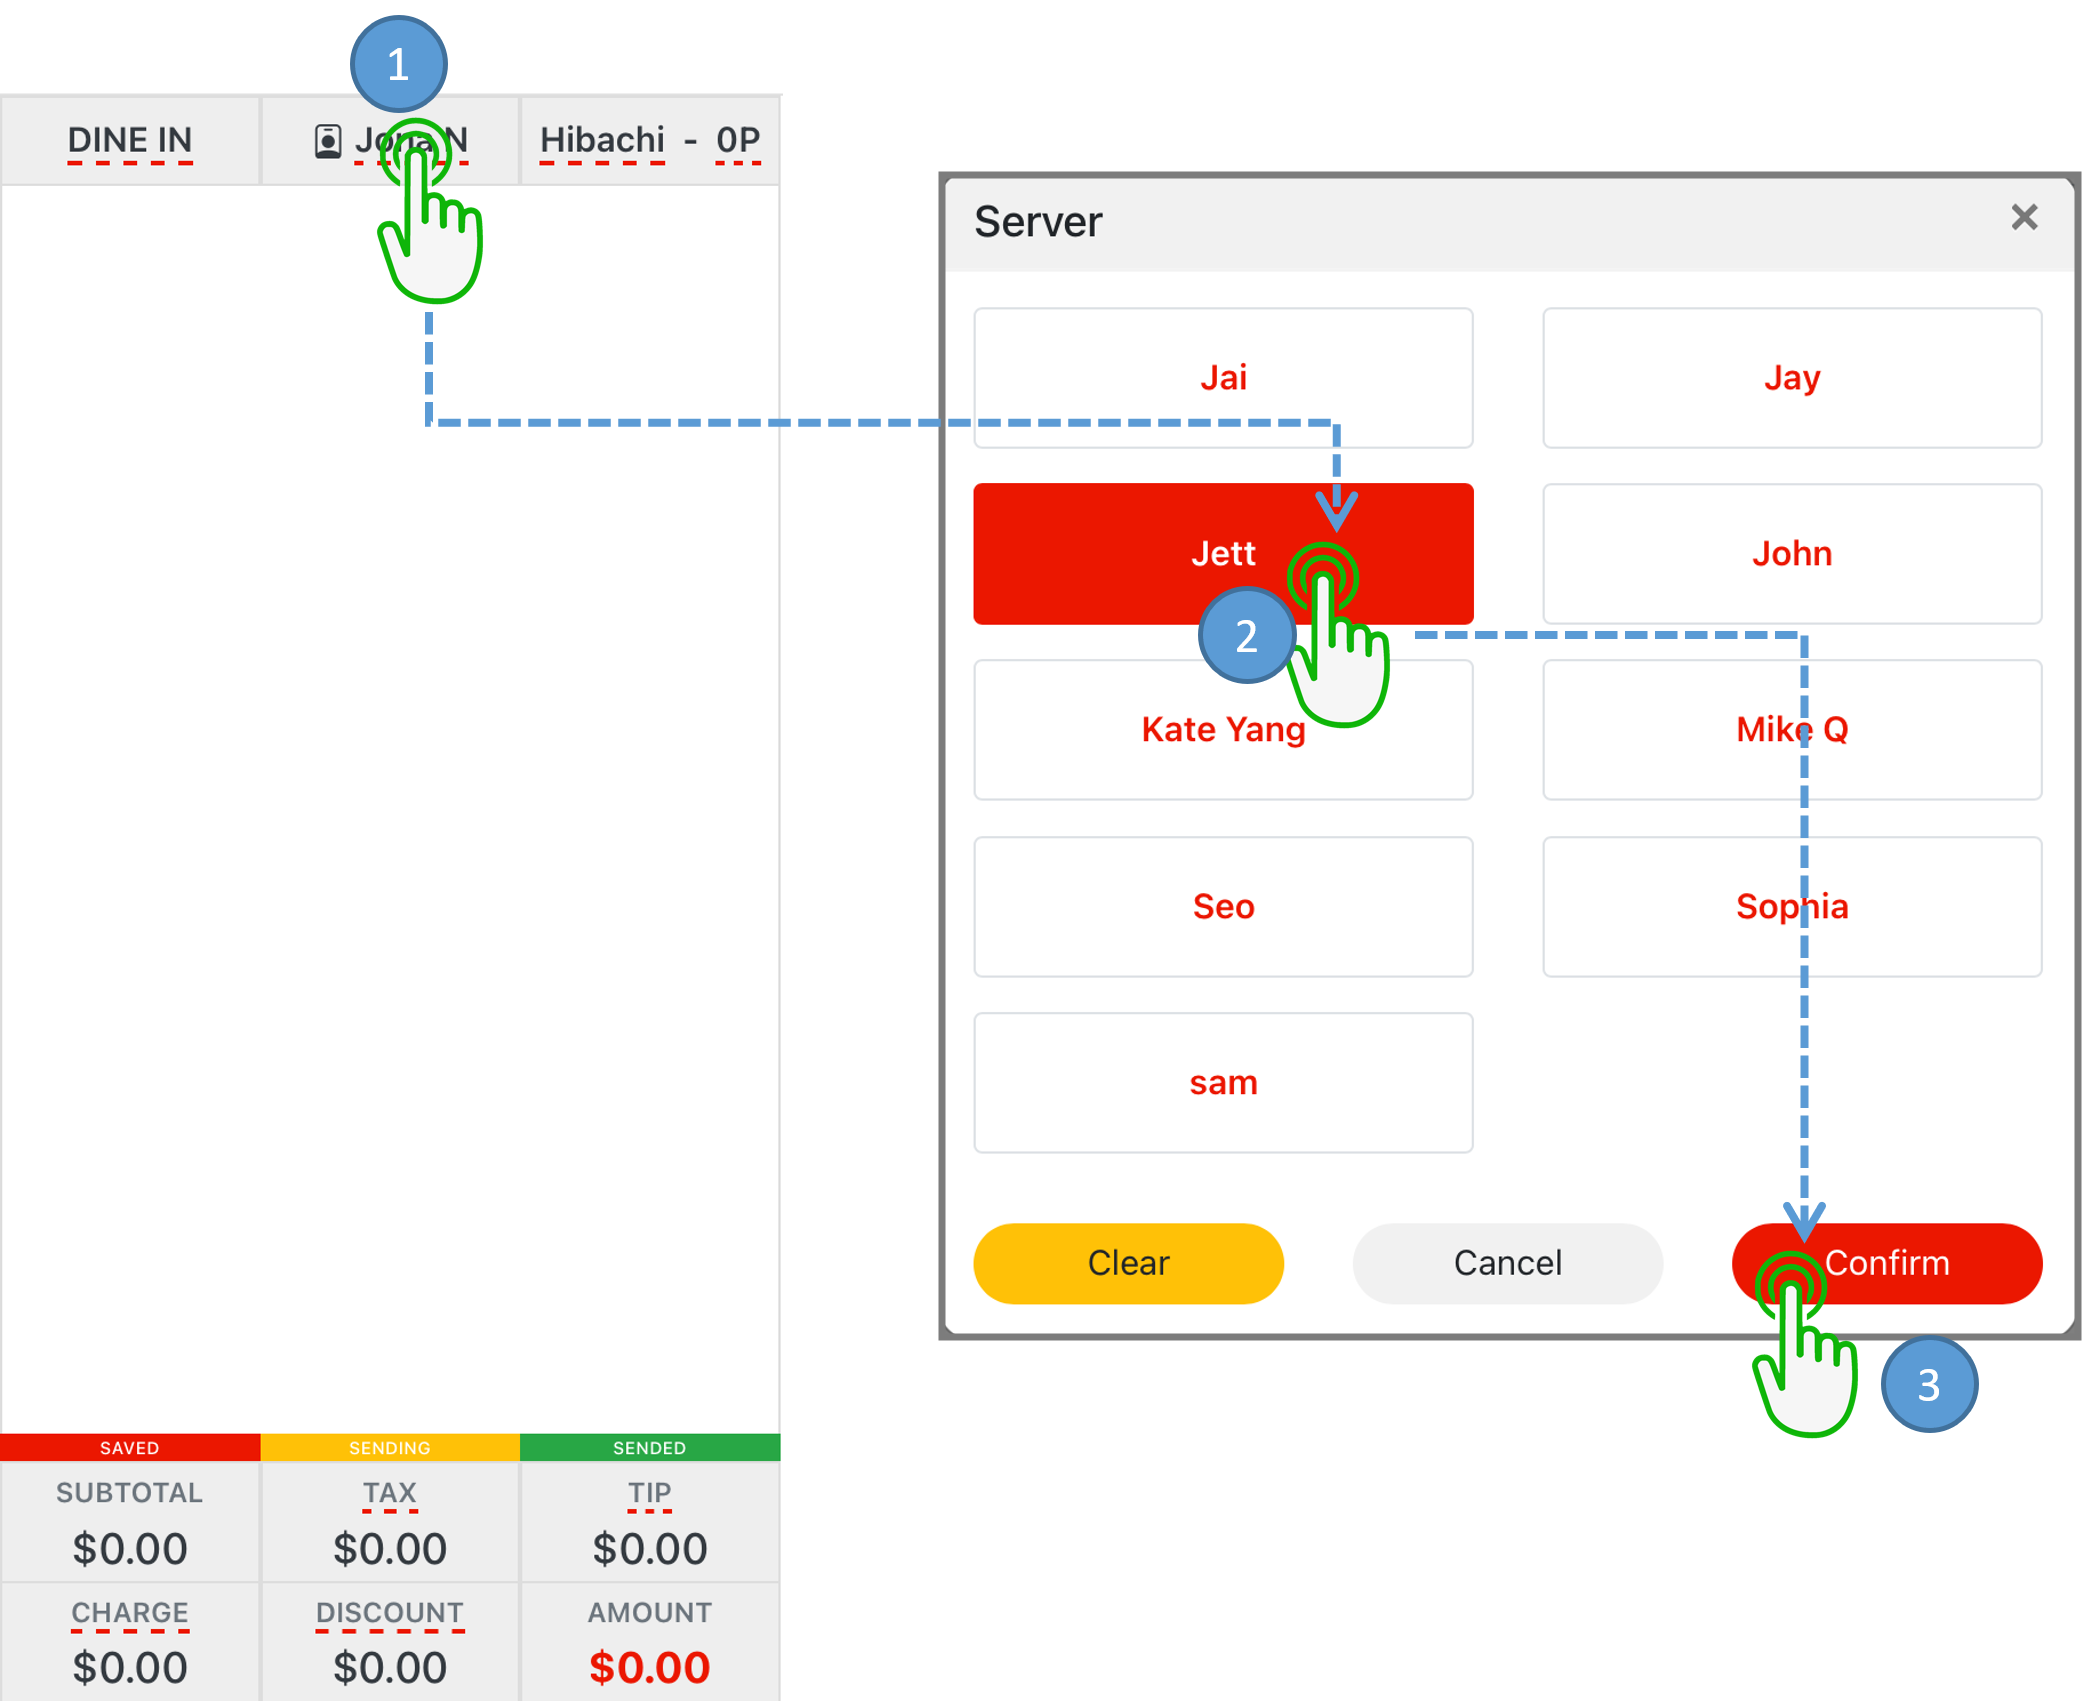
Change Server #
- In order to change server’s name tap the current Server’s Name
- Select the desired server
- Select Confirm
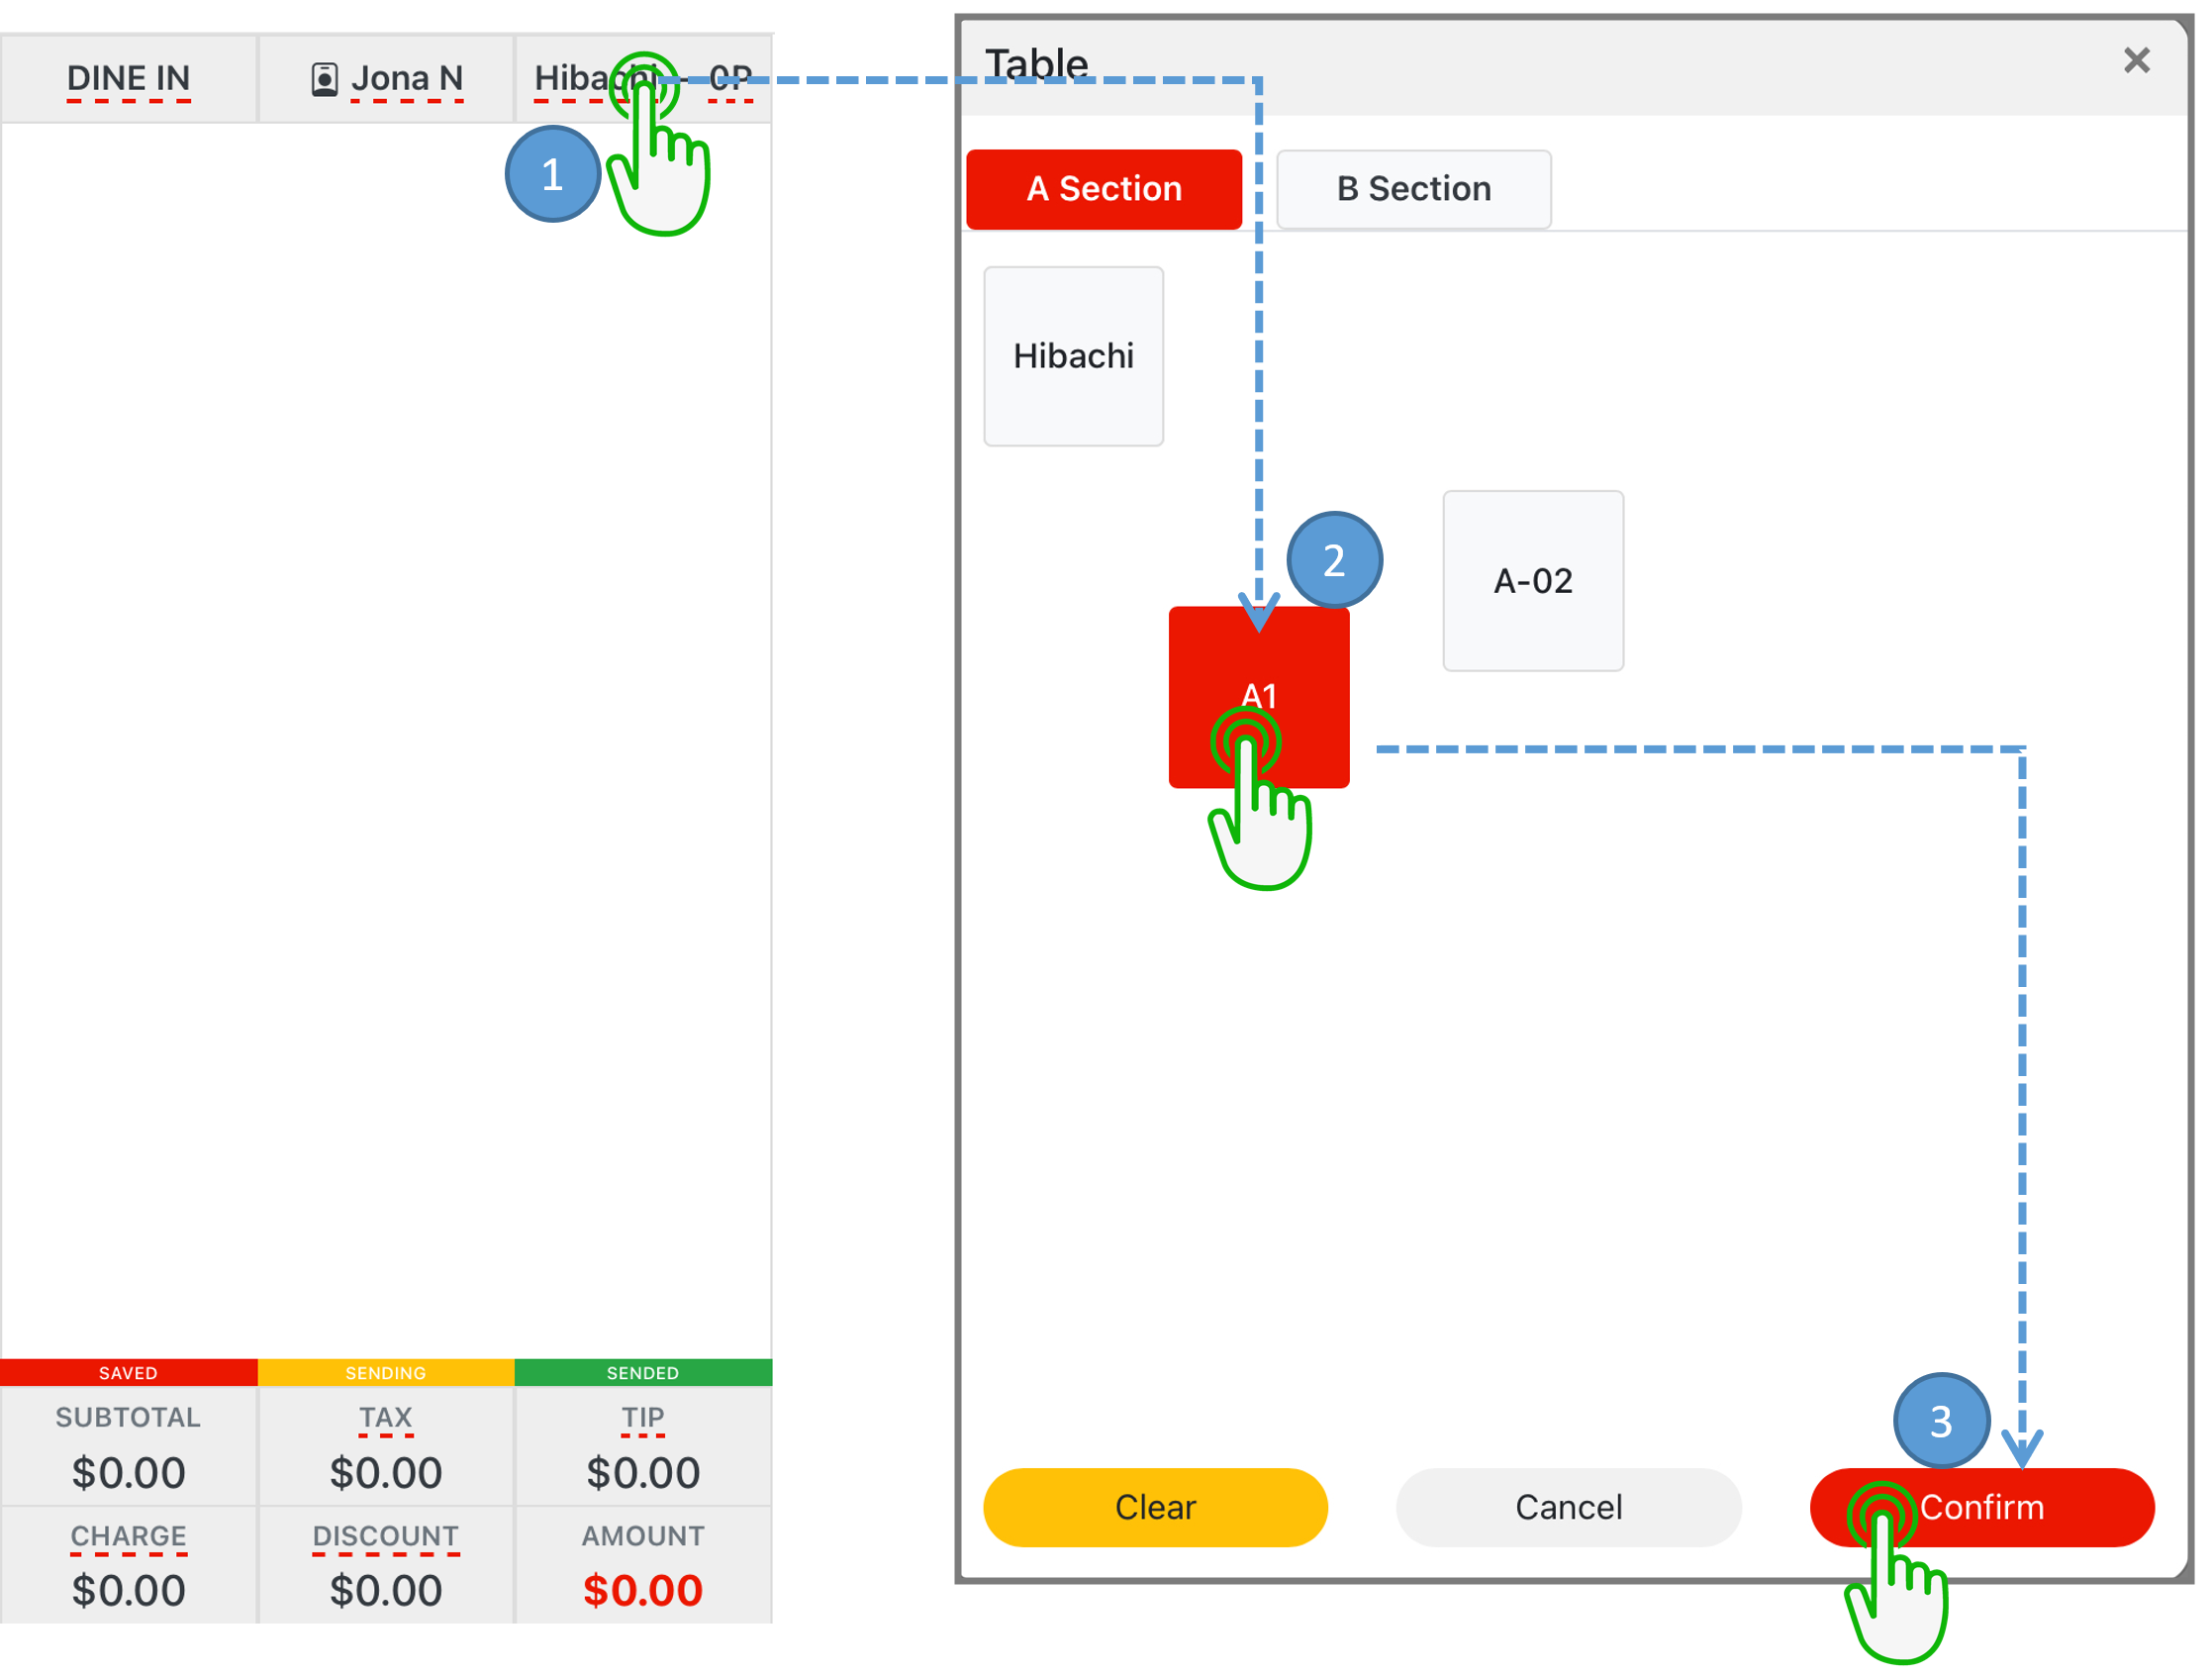
Change Table #
- In order to change the desired table tap the current Table Number
- Select replacement table
- Select Confirm
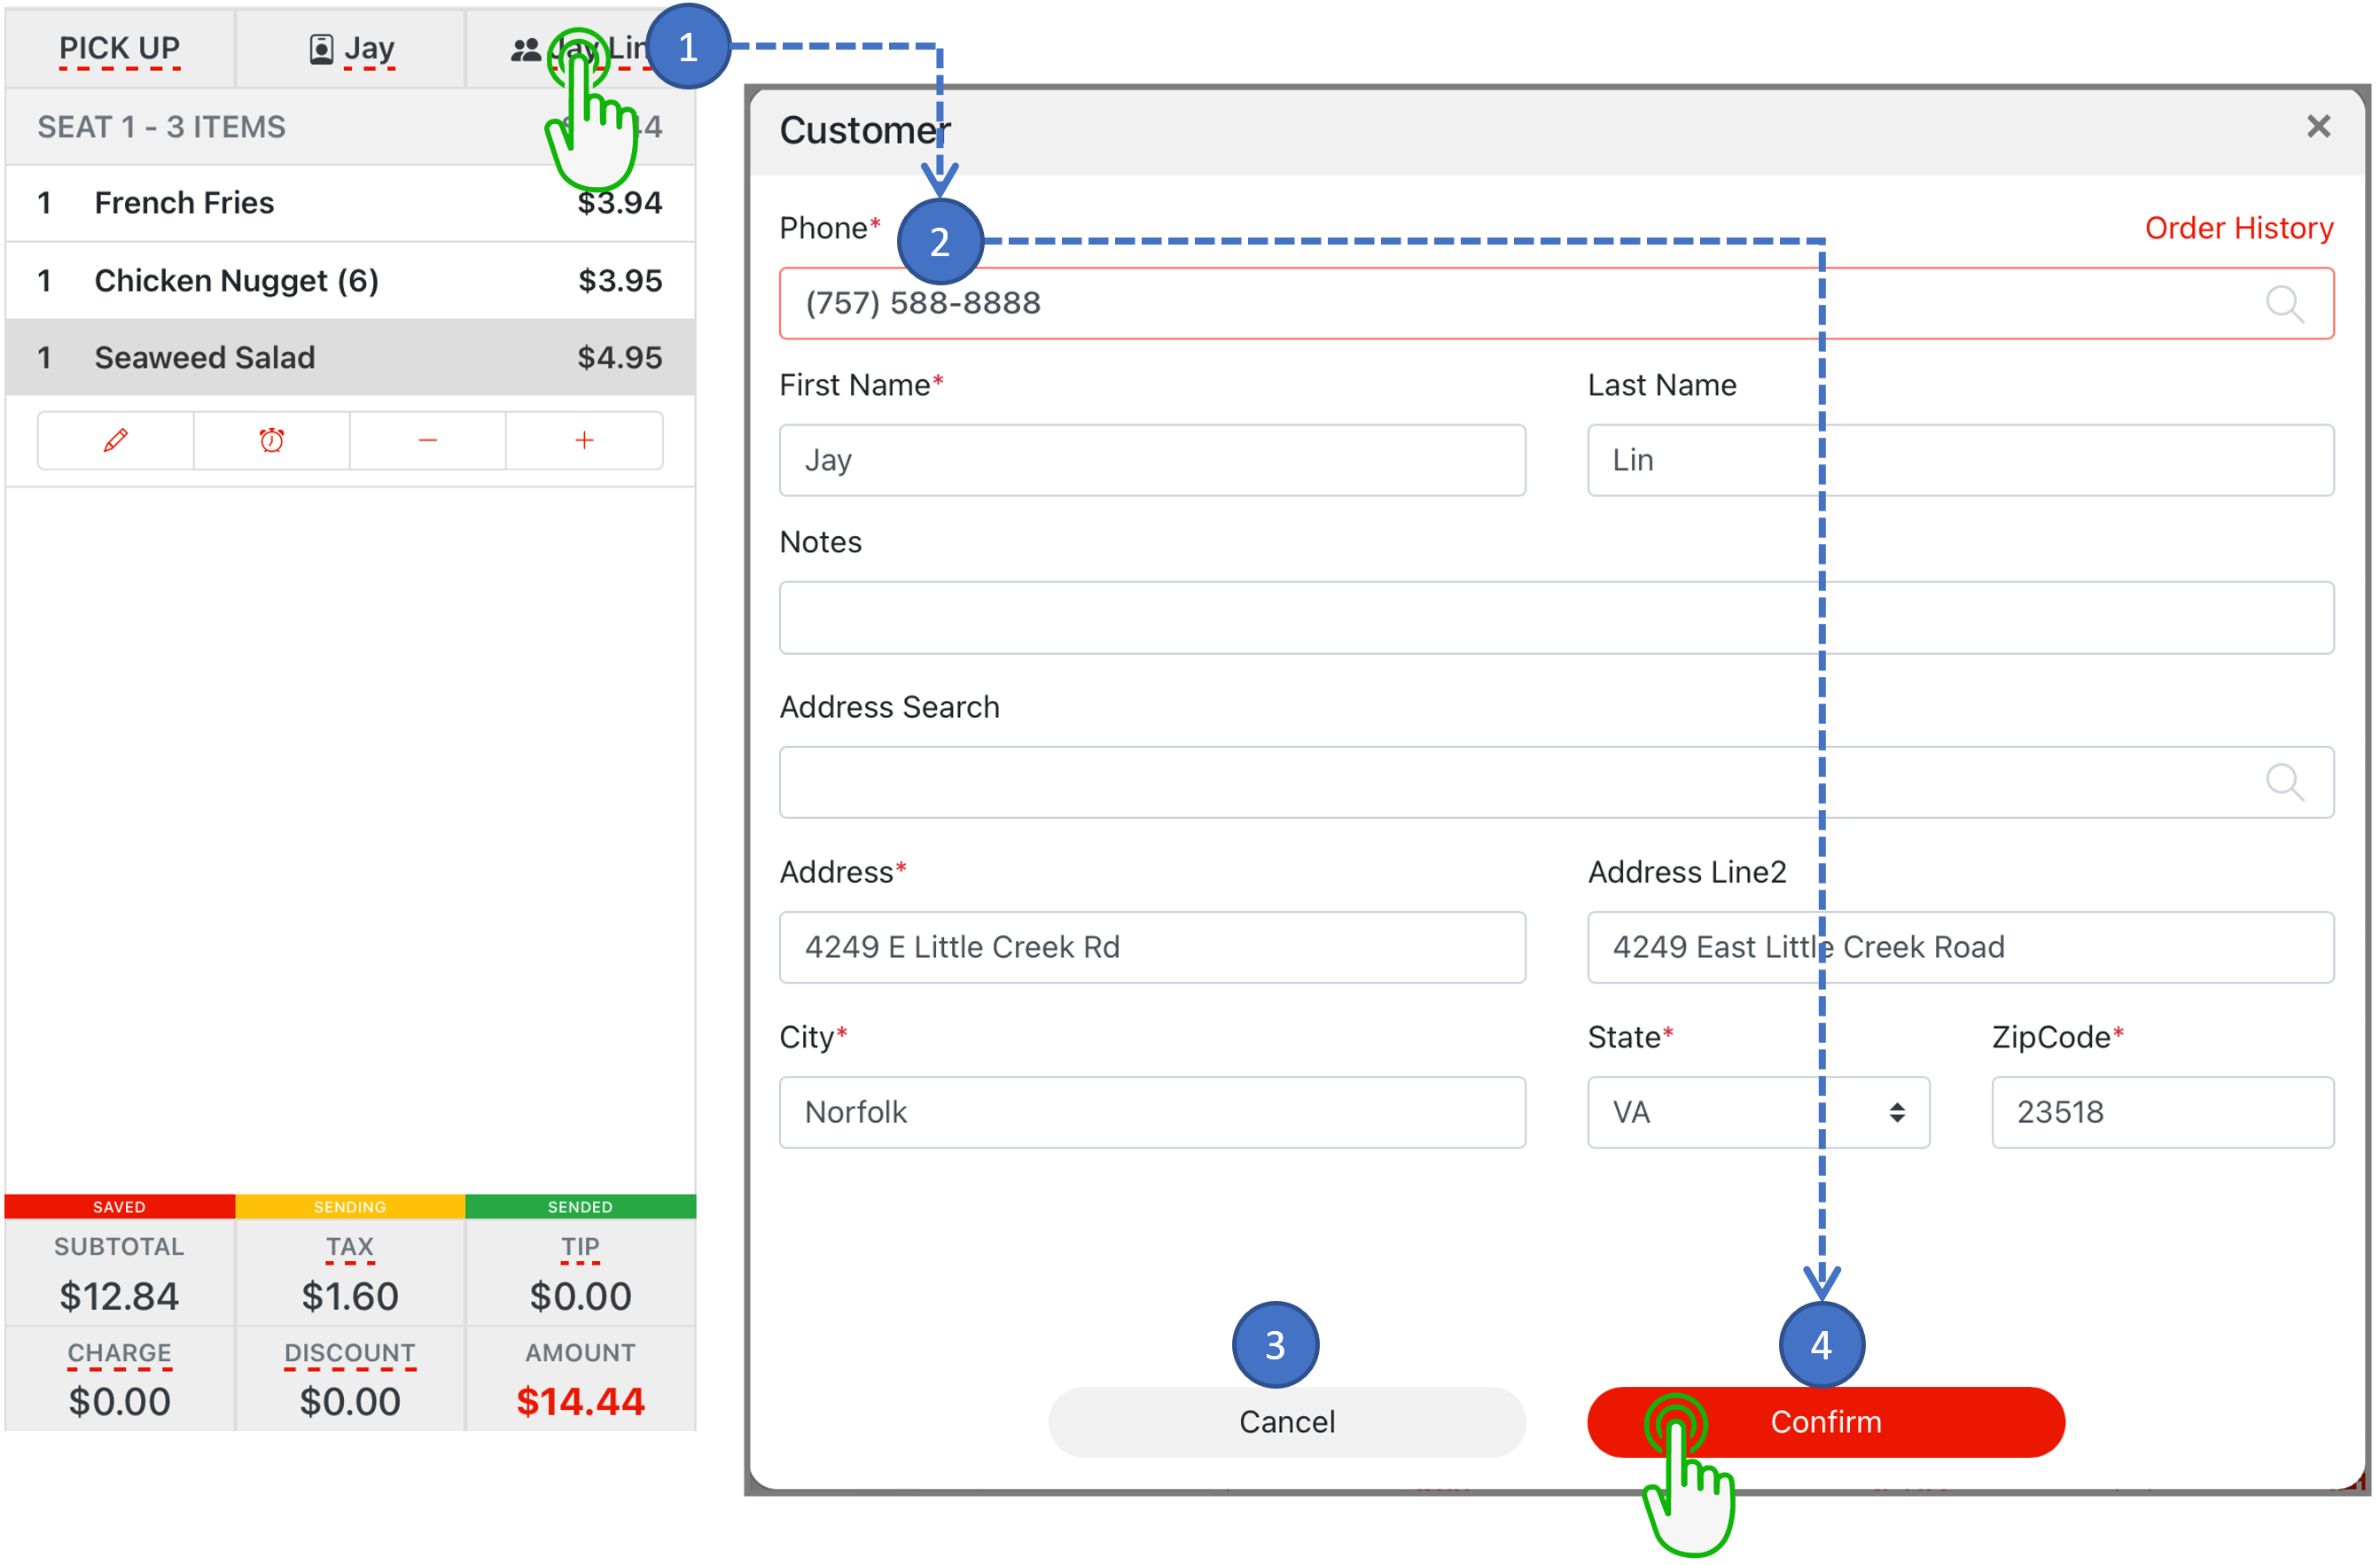
Edit Customer #
- In order to edit customer tap the customer’s name
- Edit any information if needed, or change customer by enter in new customer’s phone number in the Phone search field
- Select Cancel to exit
- Select Confirm to apply changes
Edit Menu Item #
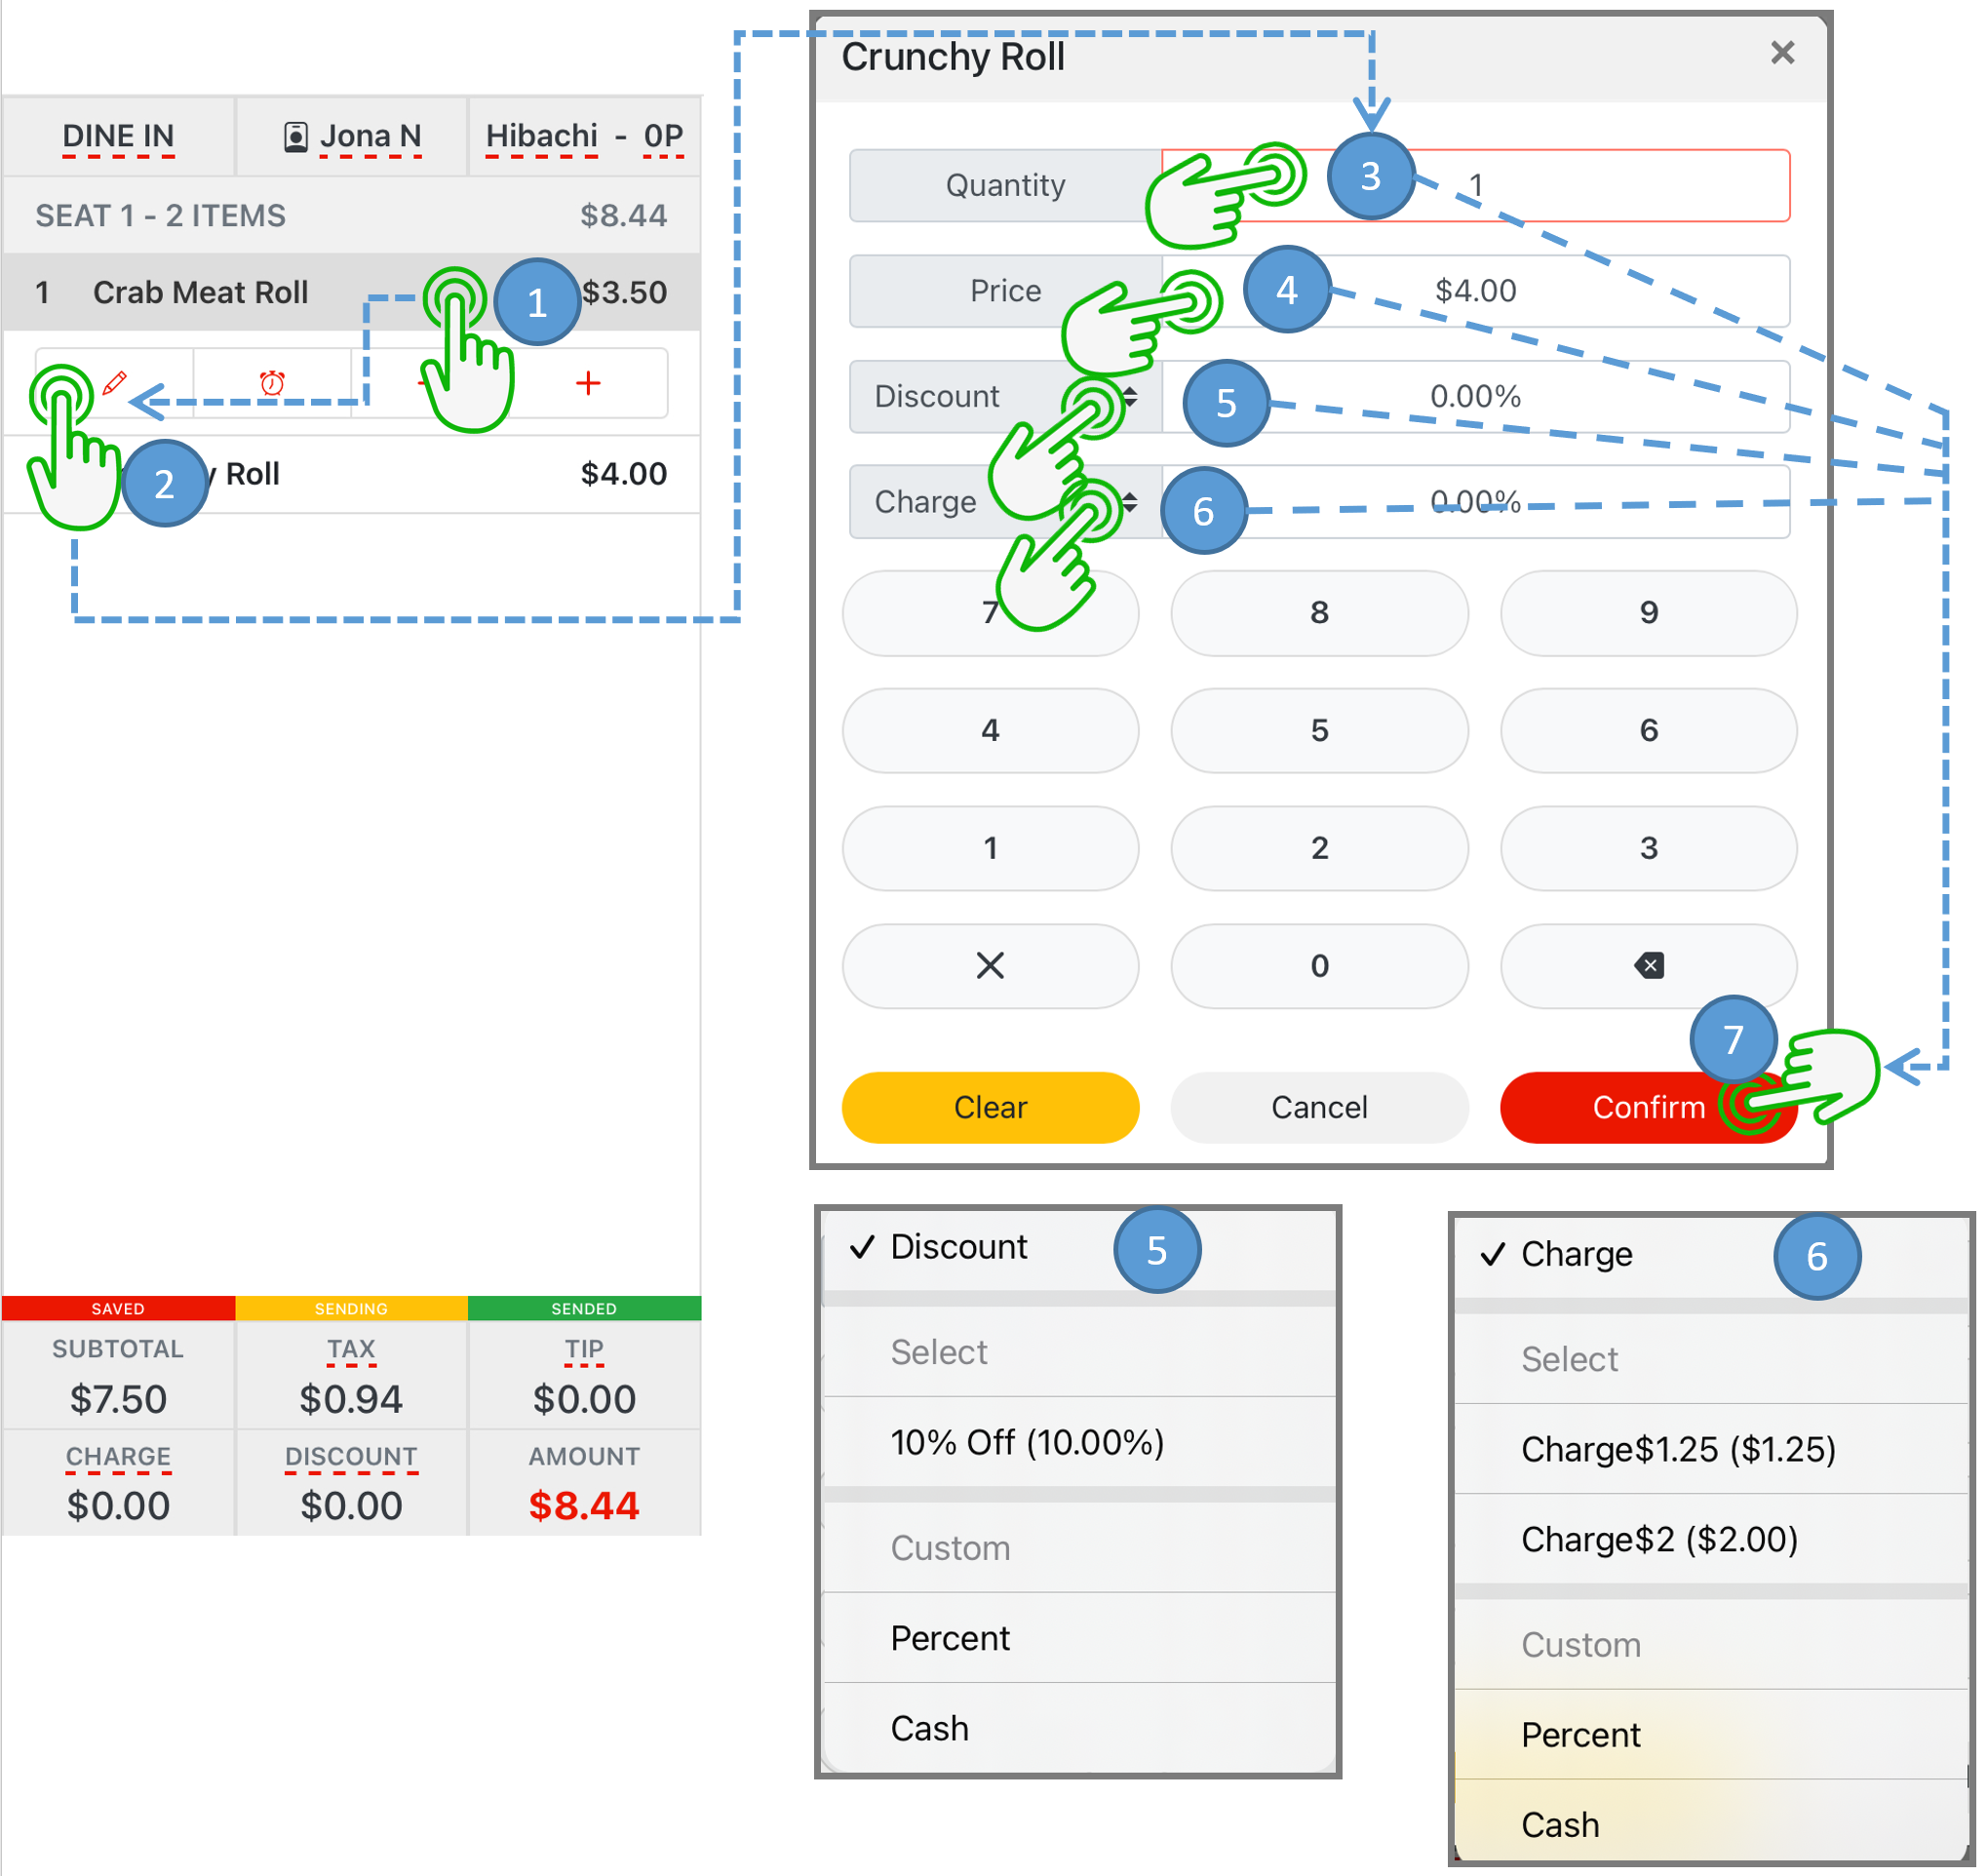
- Select the menu item desired to edit
- Tap the Pencil icon to access the submenu
- Select Quantity to change item quantity
- Select Price to change item price
- Select Discount than Percent or Cash to discount menu item
- Select Charge than Percent or Cash to add charge to menu item
- Select Confirm to apply all the changes
Hold Menu Item #
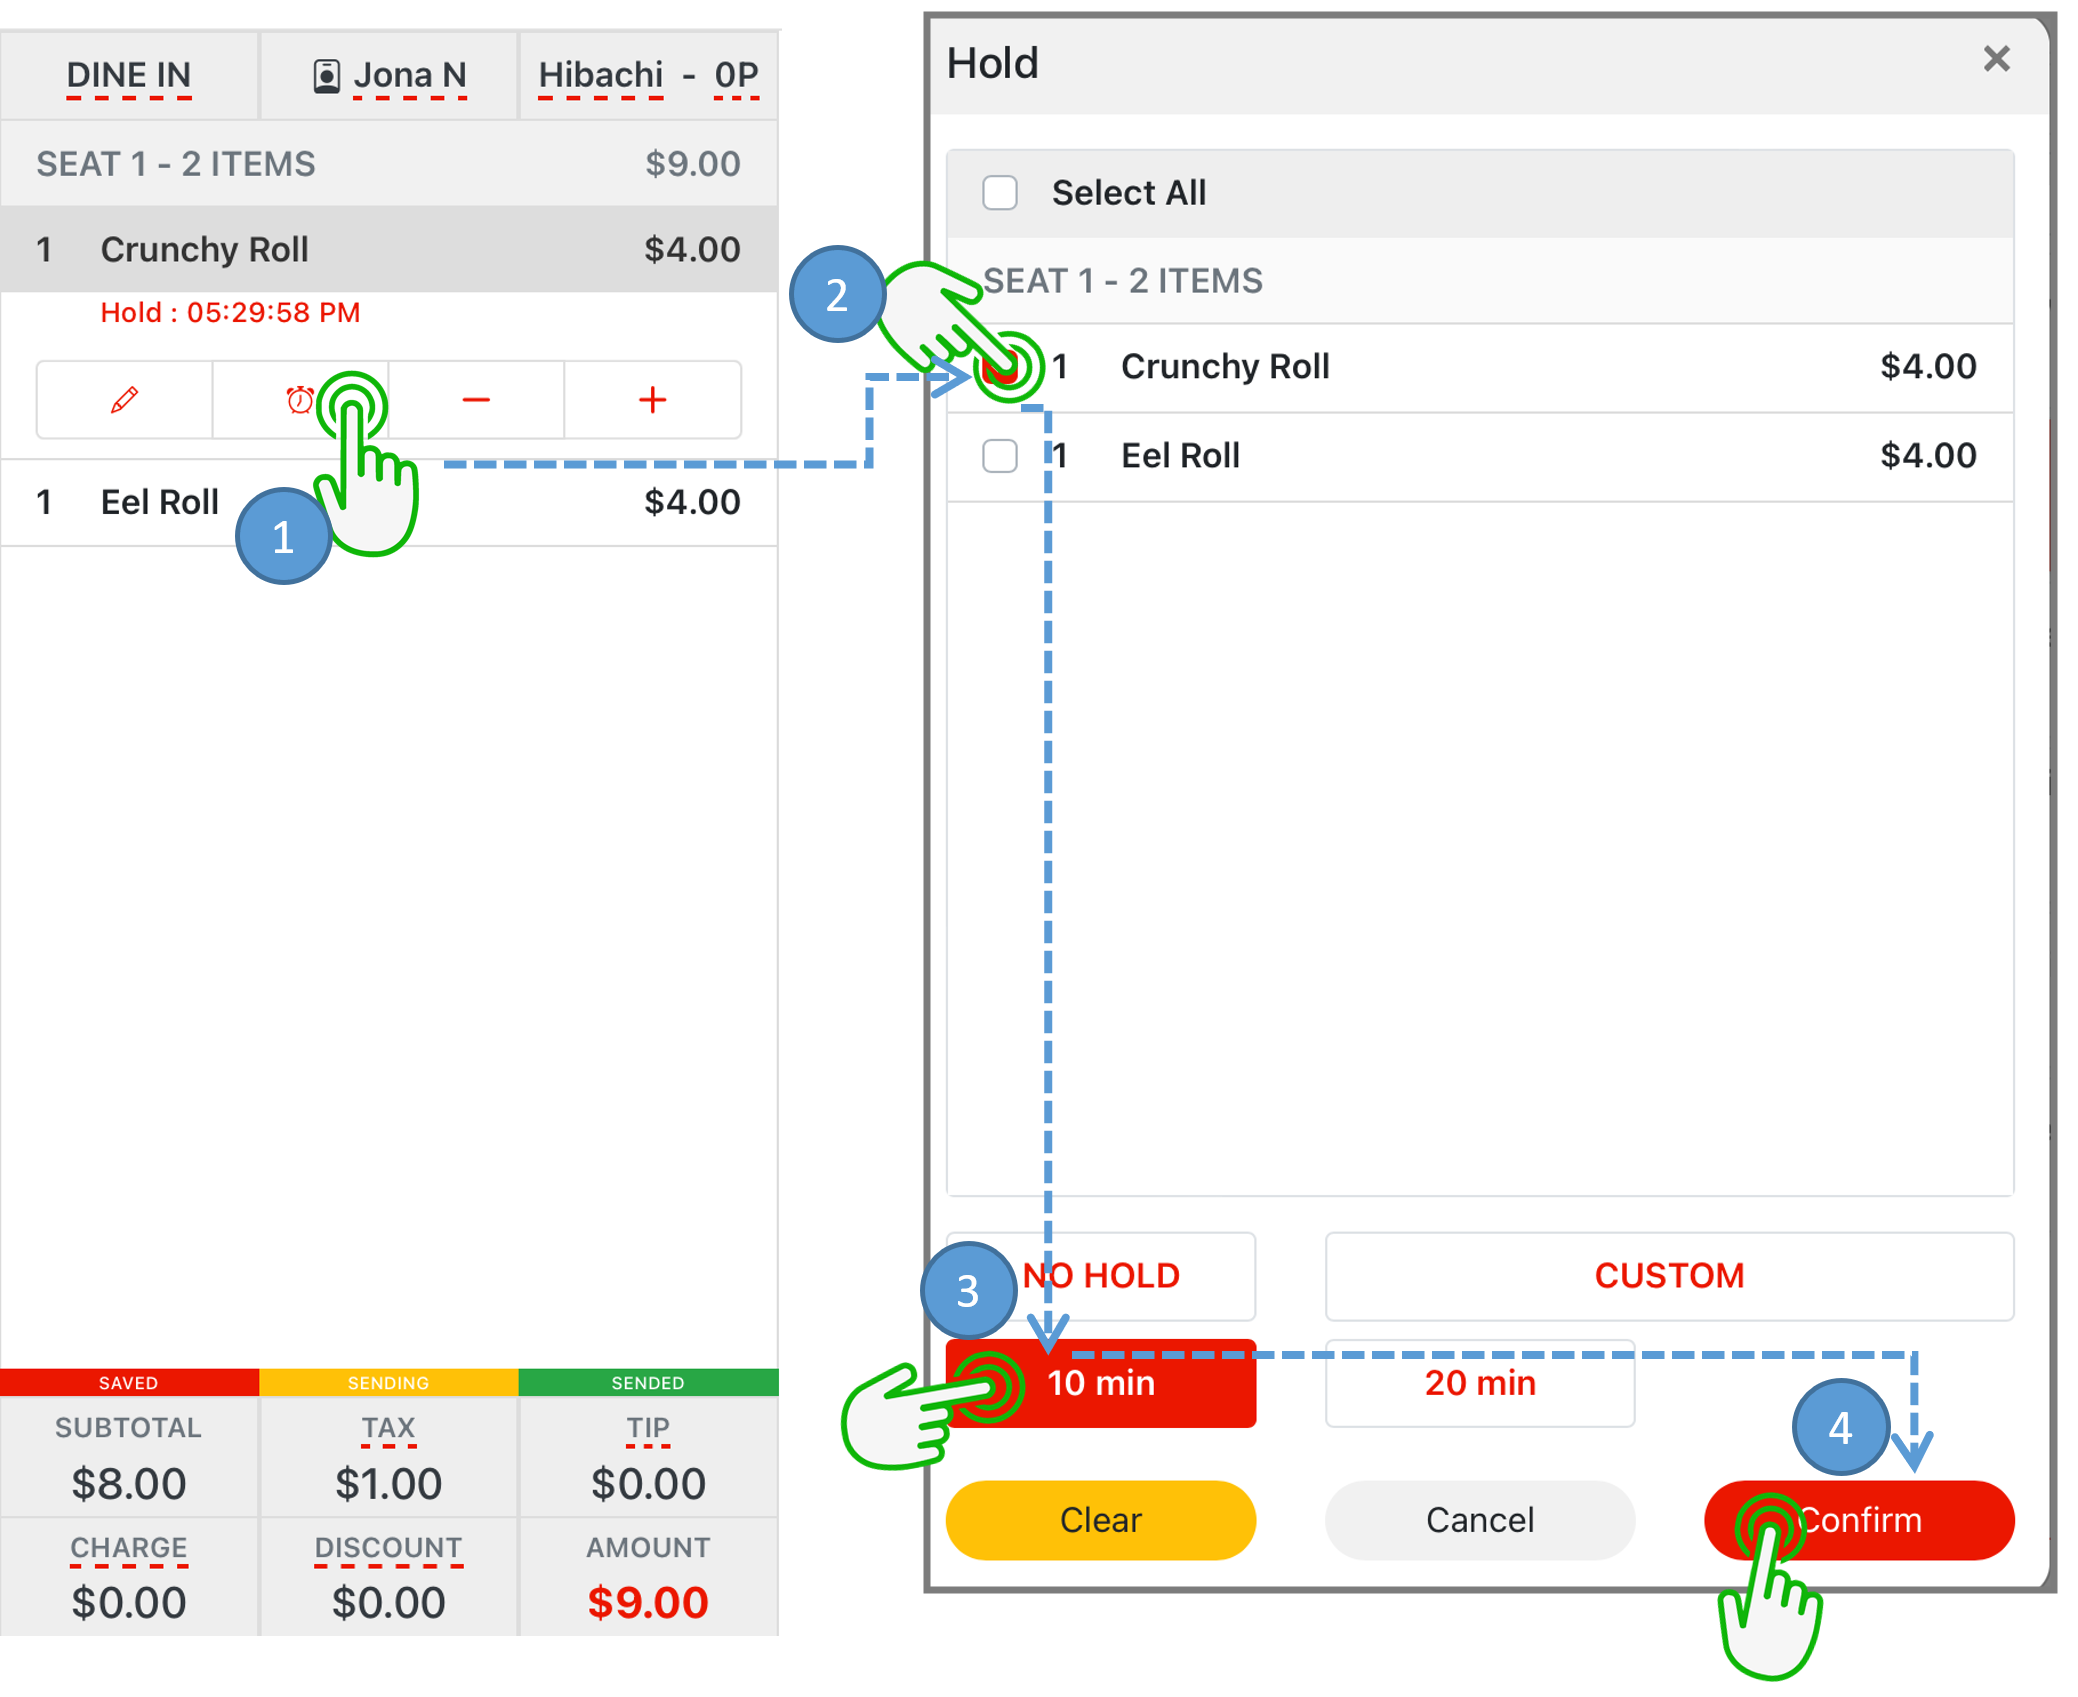
- In order to place a hold on a specific menu item select the menu item then tap the Clock icon
- Select the submenu and select the menu item needed to be held. (If all items need to be held check the Select All)
- Select the time desired to hold menu item
- Select Confirm
Reduce or Increase Selected Menu Item #
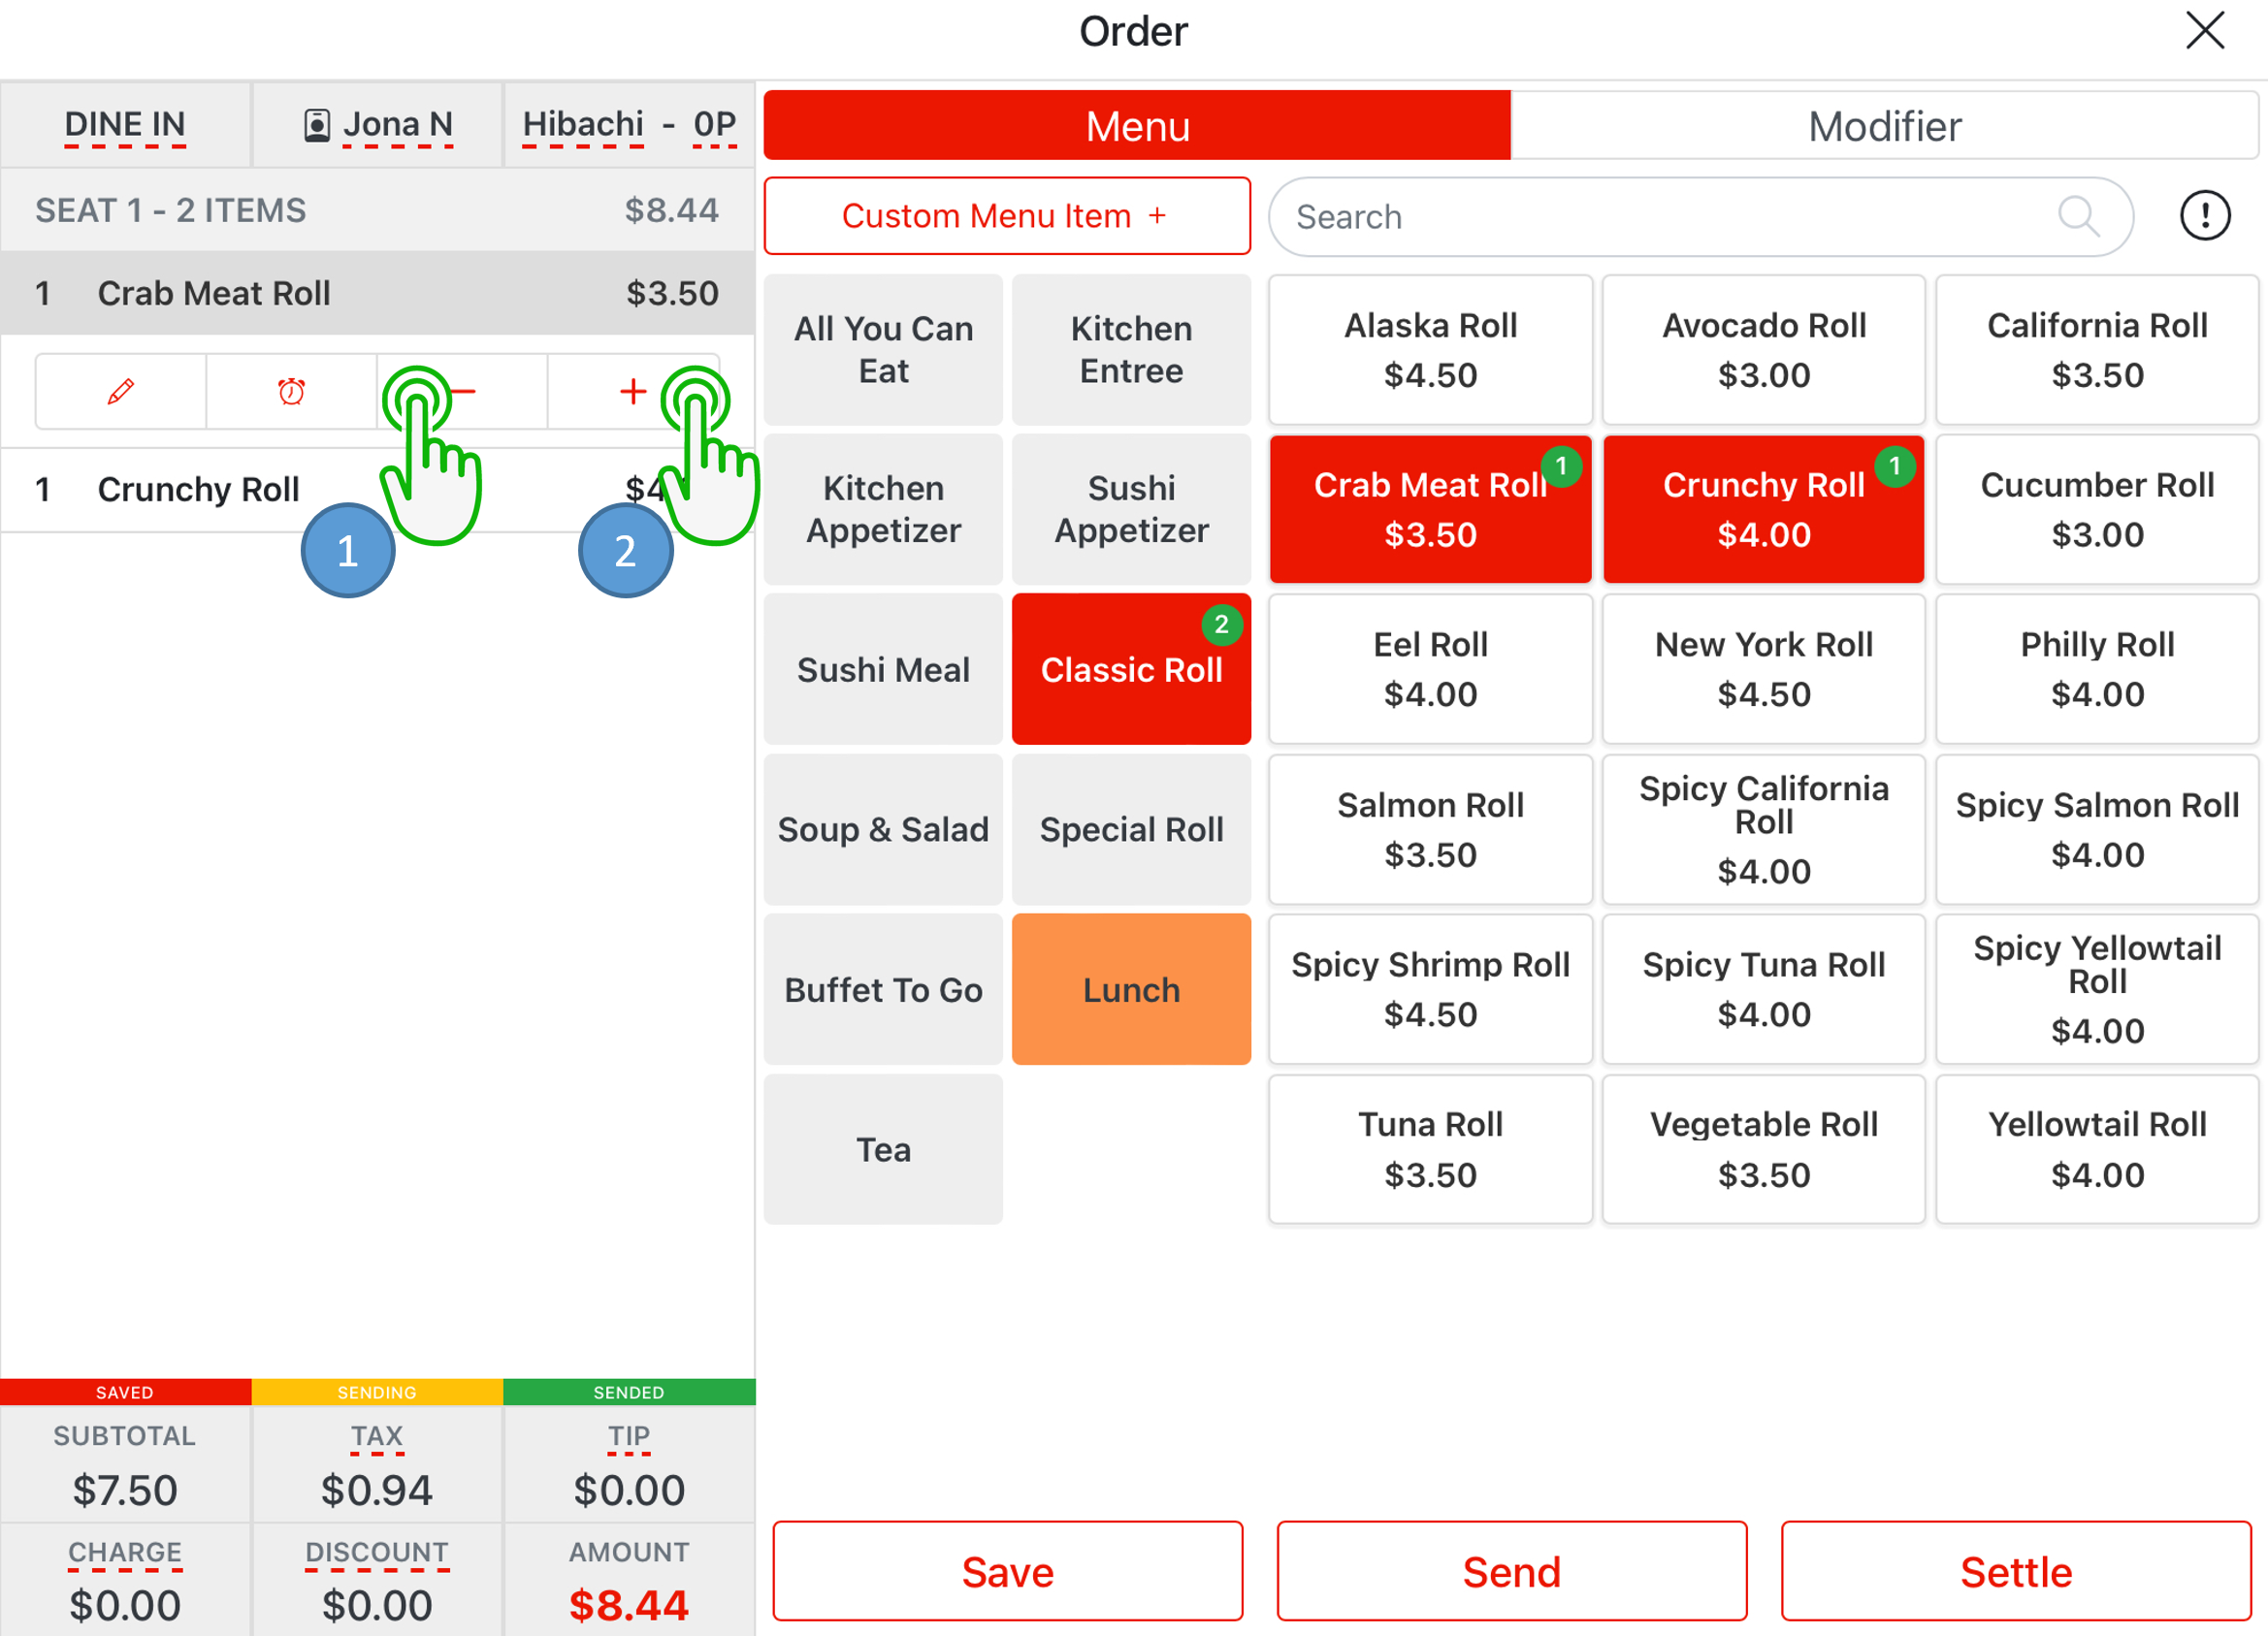
- Tap the ( – ) icon to reduce selected menu item
- Tap the ( + ) icon to increase more of selected menu item
Modify Selected Menu Item #
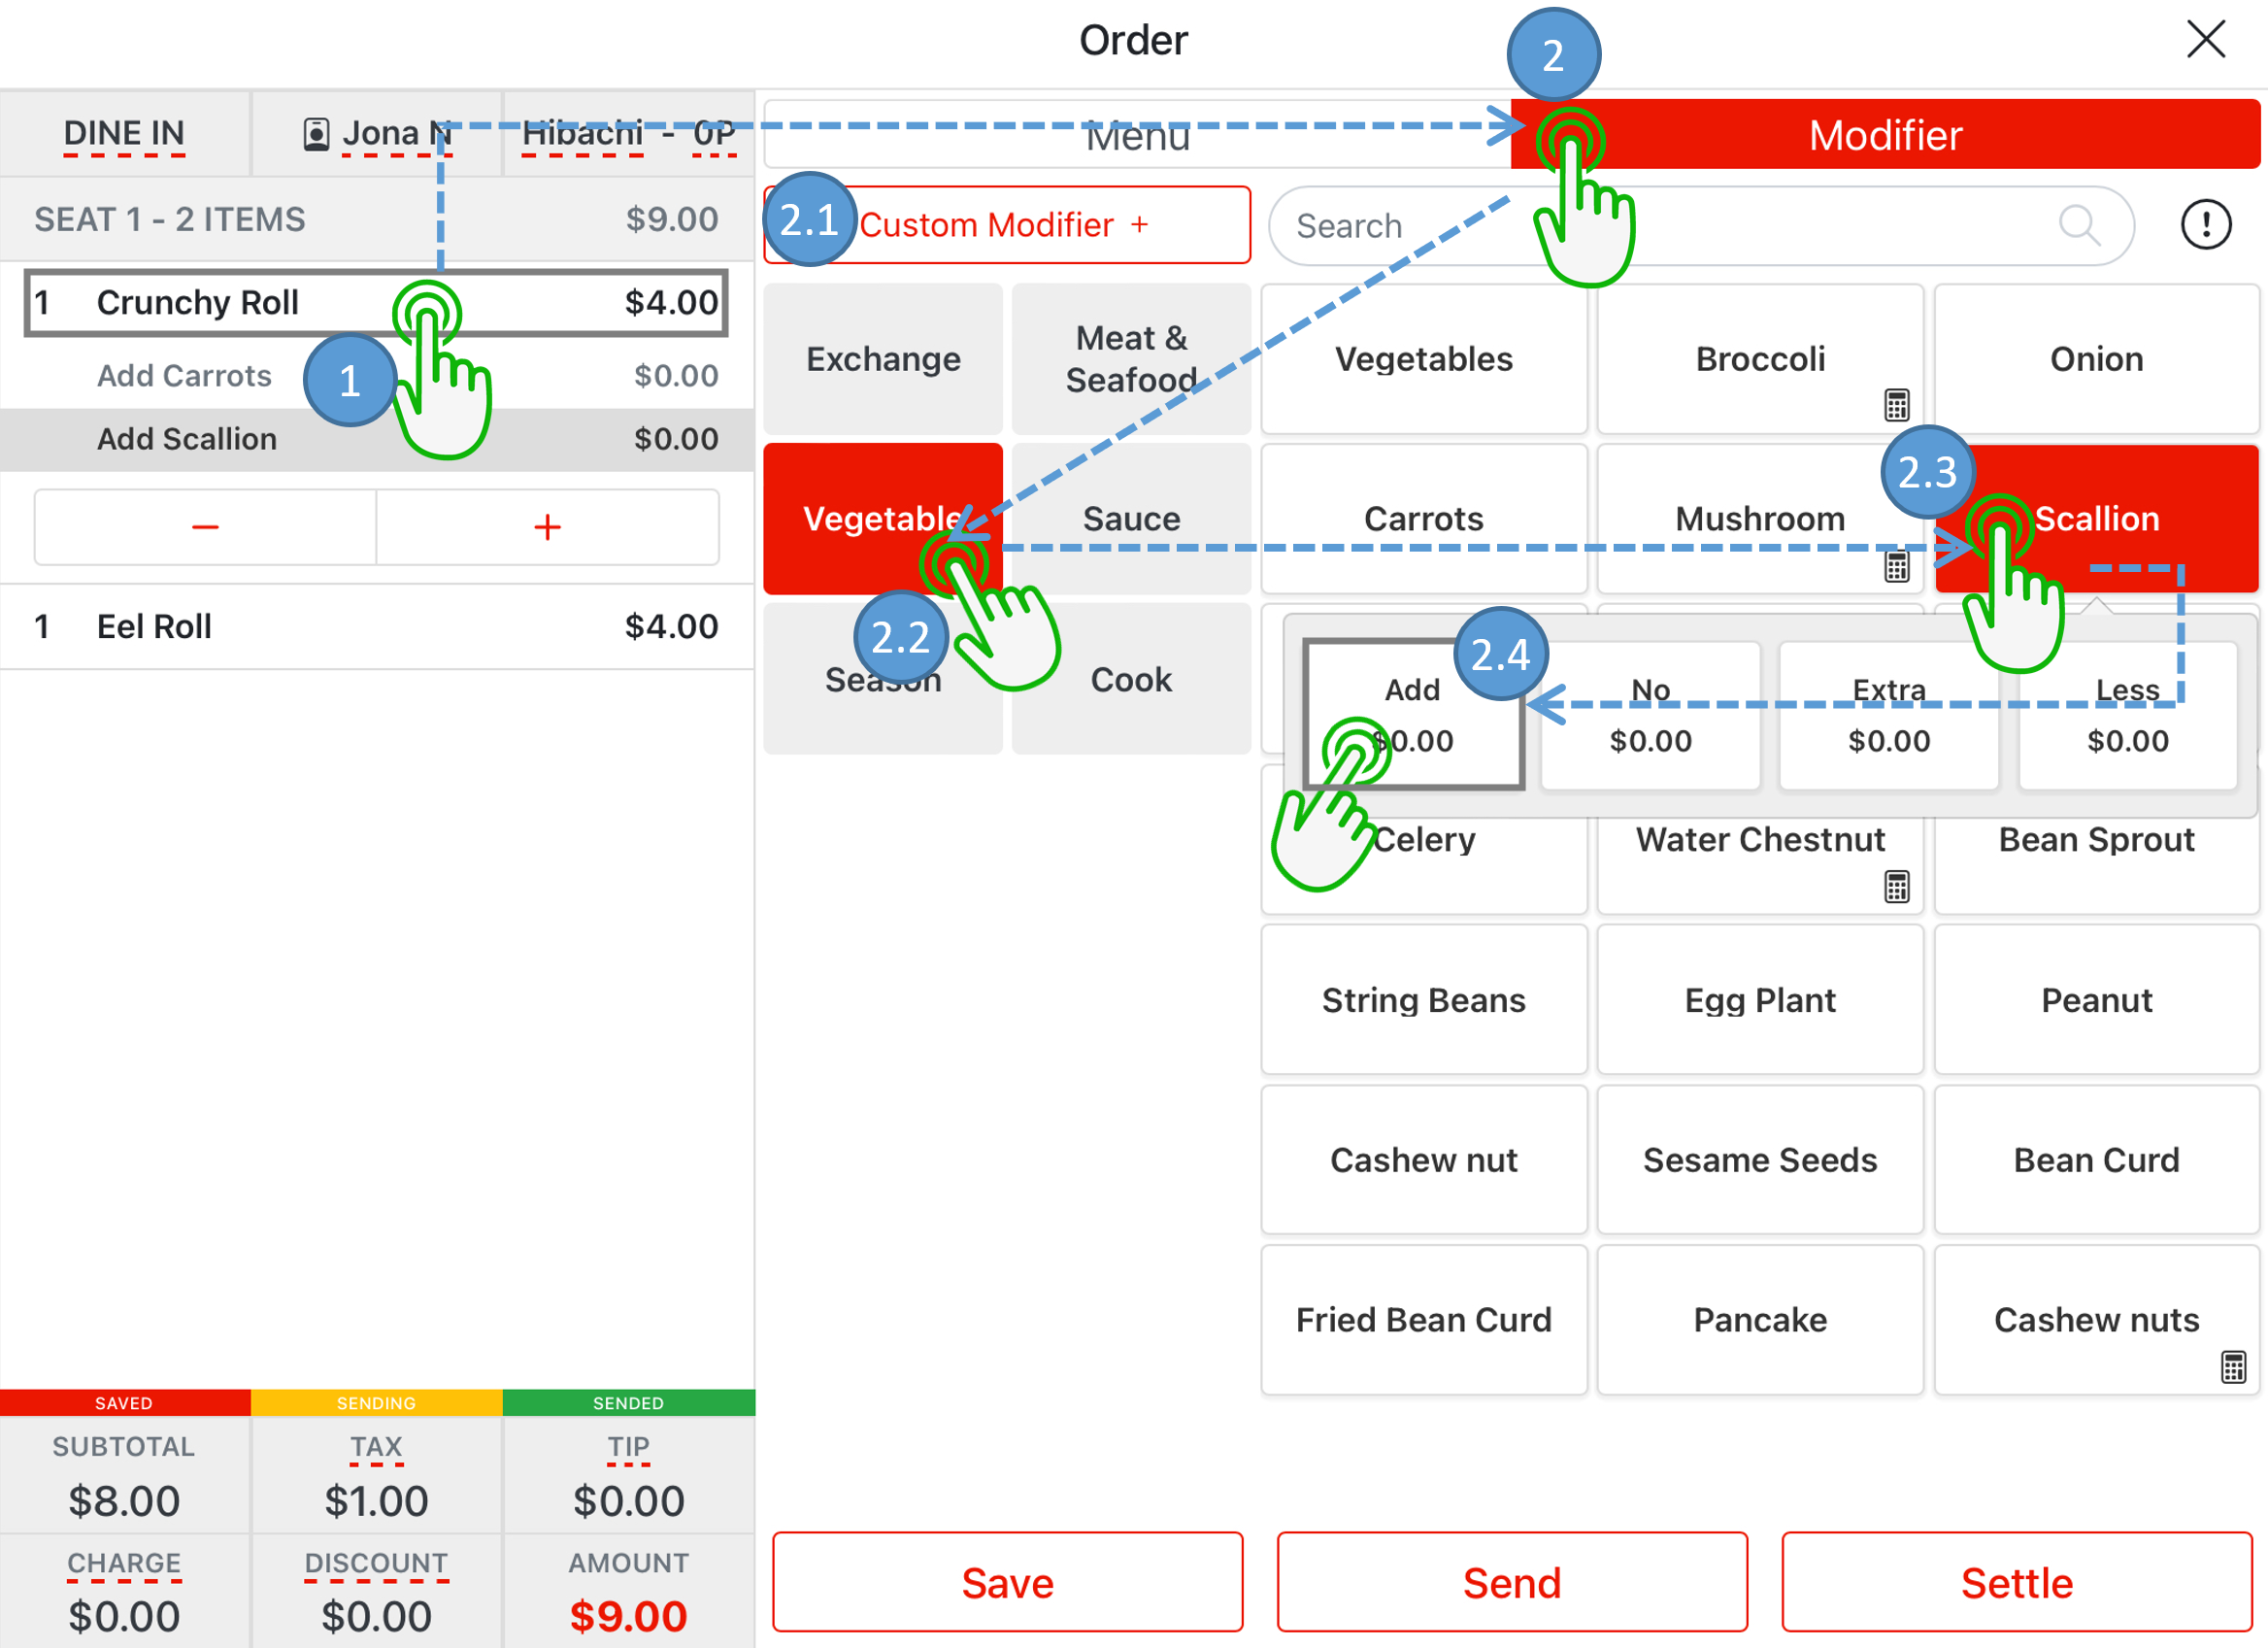
- Select menu item desired to modify
- Select Modifier to show options of modification
- Tap the Custom Modifier to manual entry modifier
- Select modifier category to show all modifier items in the selected category
- Select the modifier item to show options
- Tap the modifier item option to apply to the selected menu item
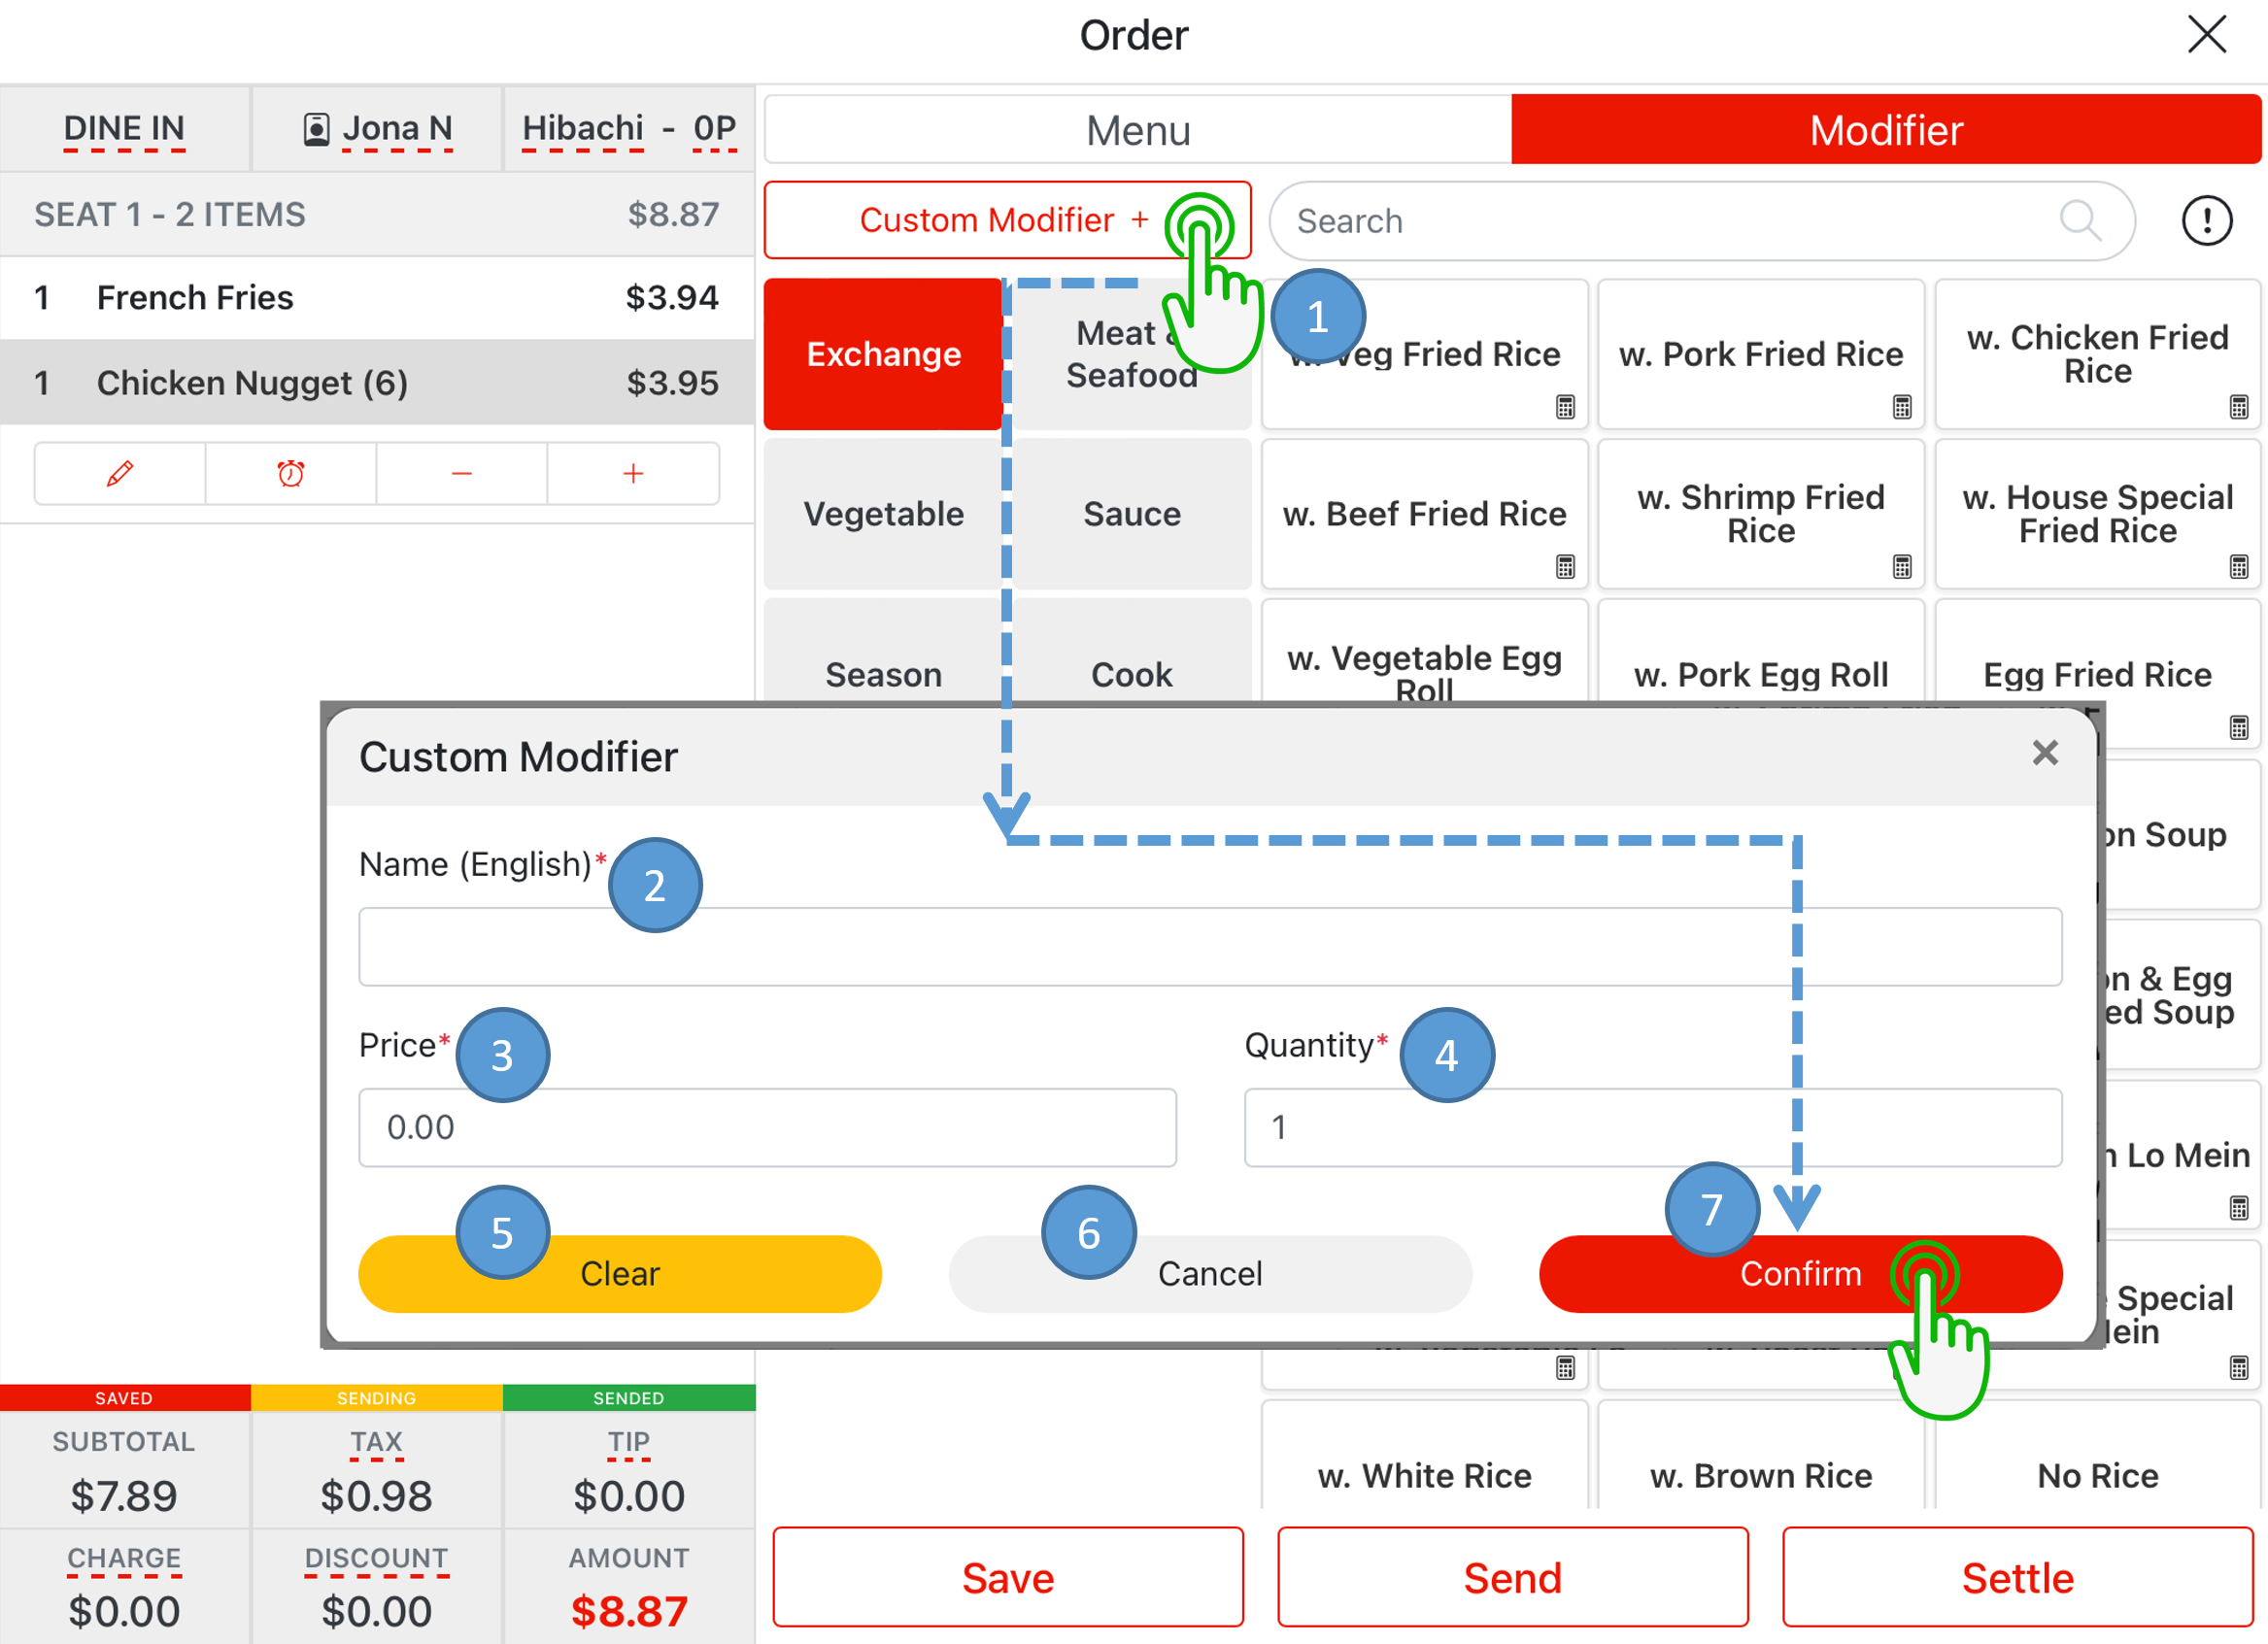
Custom Modifier #
- Tap the Custom Modifier to manually enter a modifier
- Enter in modifier name
- Enter in modifier price
- Enter in modifier quantity
- Tap the Clear to clear all entries
- Tap the Cancel to exit
- Tap the Confirm to apply the custom modifier to the selected menu item
Tax Exempt #
- Tap the Tax
- Tap the Cancel to exit
- Select Confirm to tax exempted
- Tap the Tax again to taxed
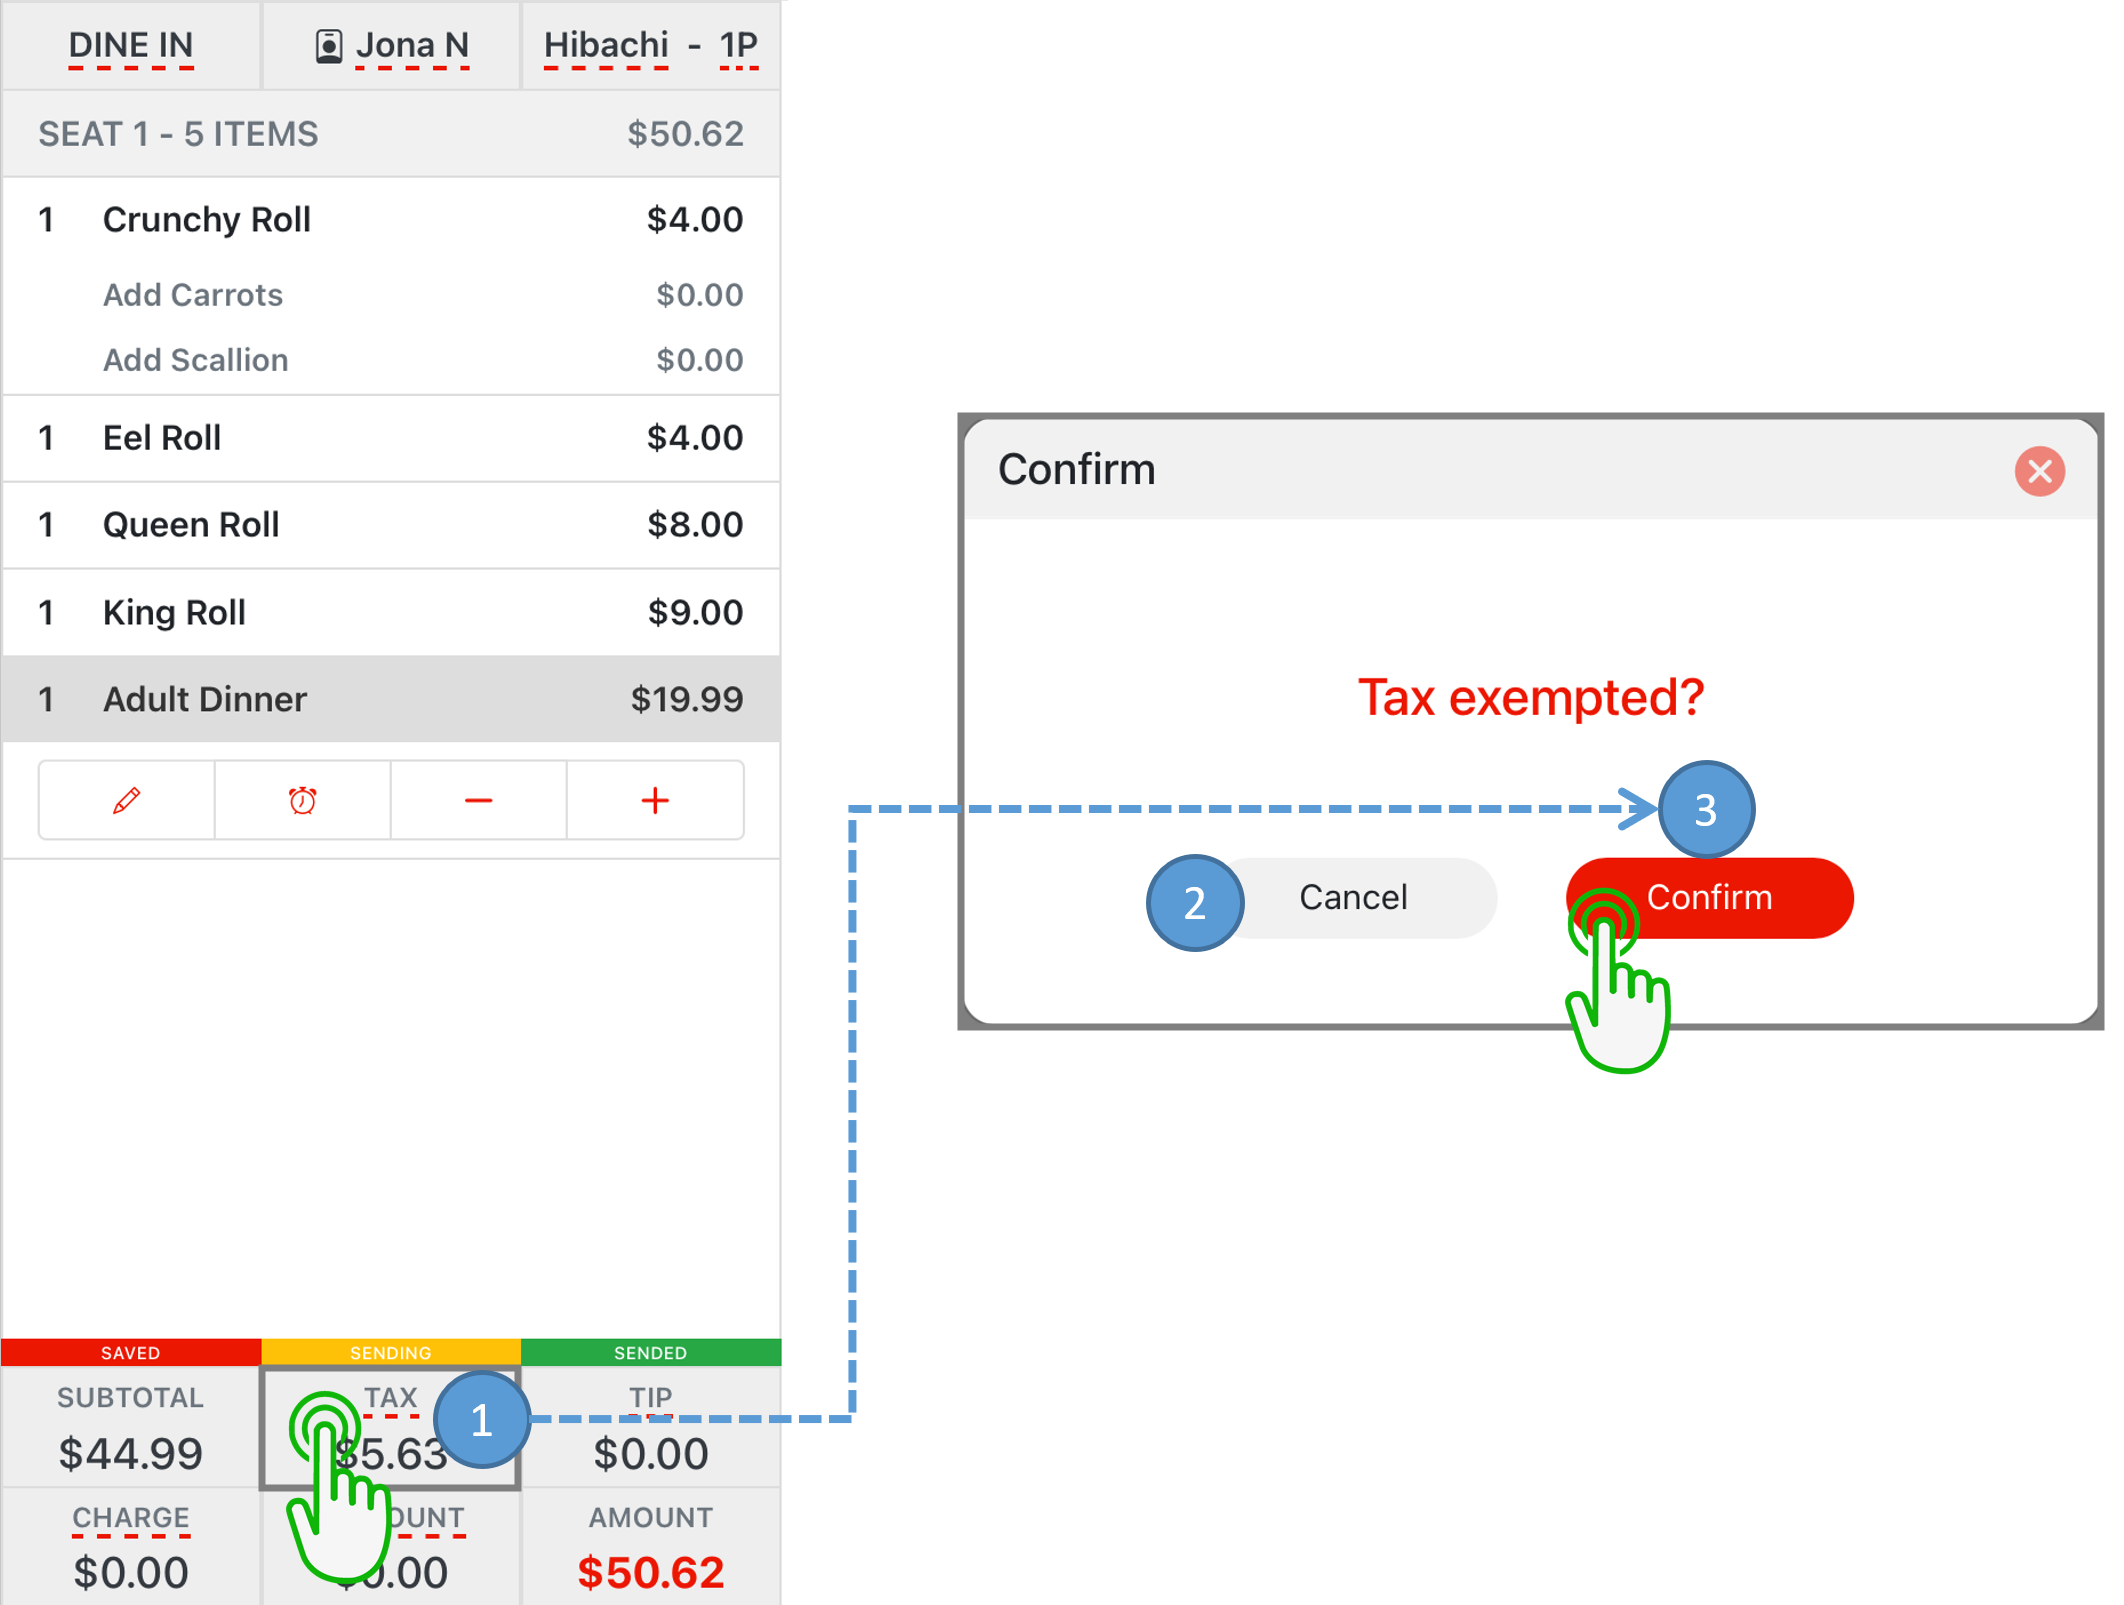
- Tap the Tax again to taxed
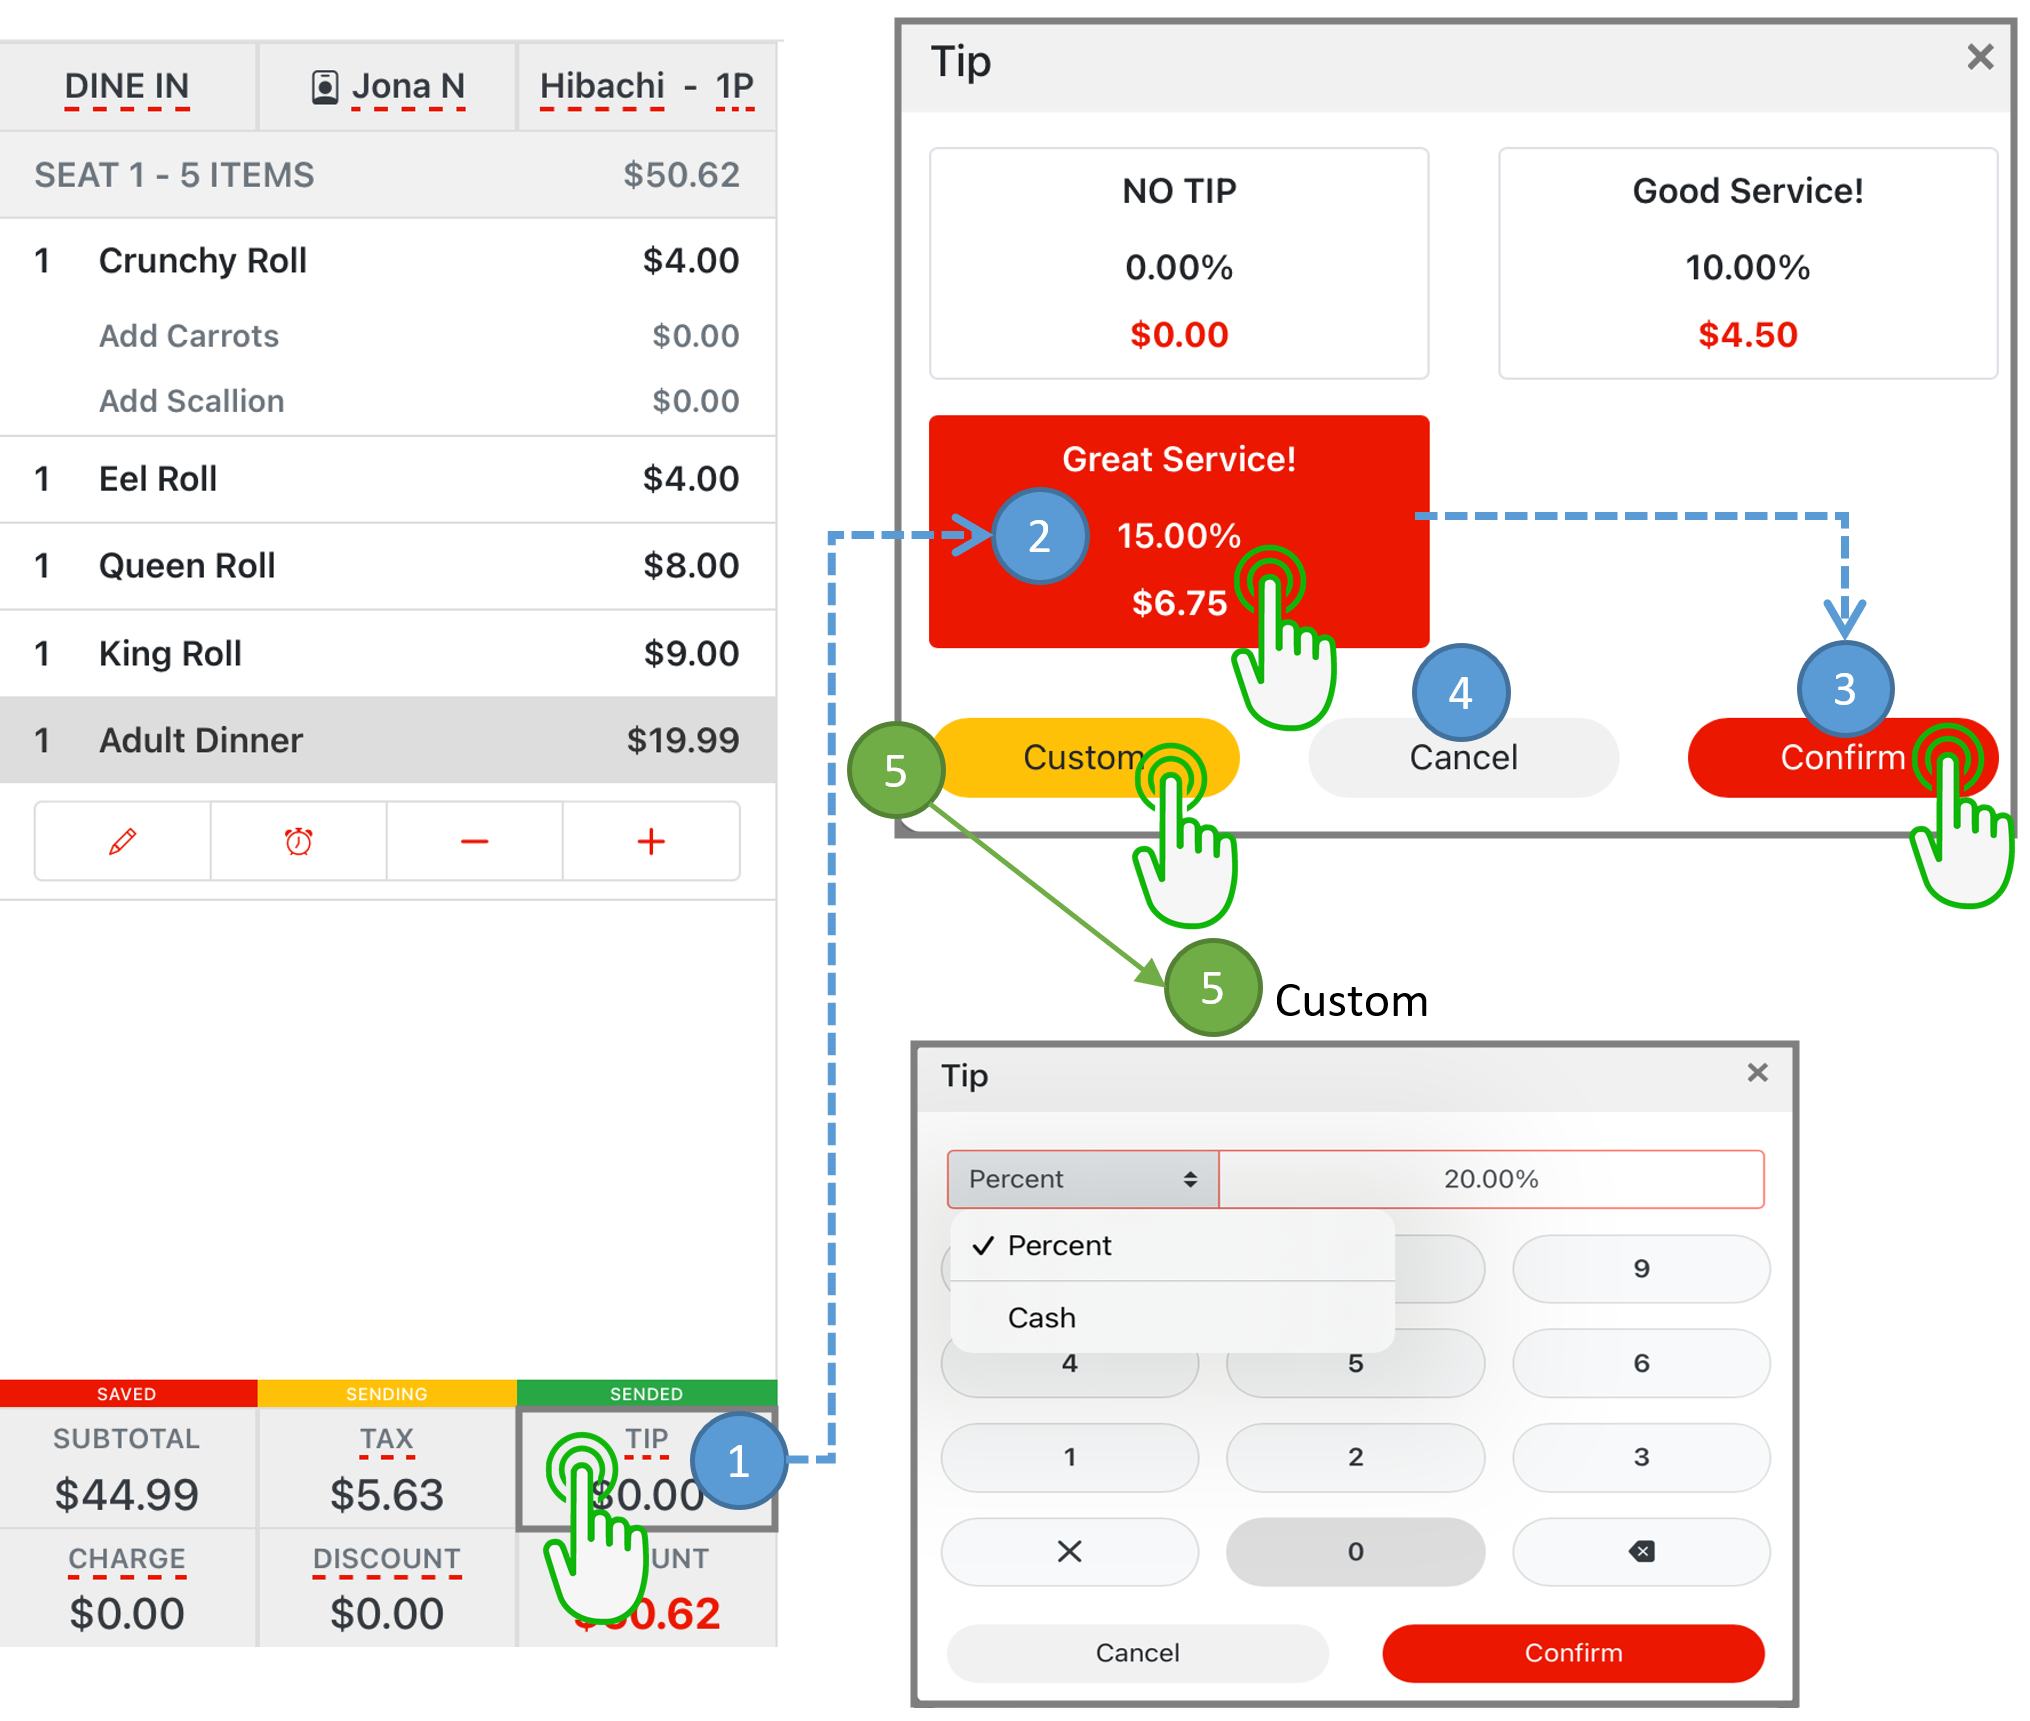
Add Tip to Receipt #
- Tap the Tip icon
- Select which desired tip icon from submenu
- Select Confirm to apply the tip
- Tap the Cancel to exit
- Select Custom to customize tip, capable to customize tip percent or cash tip
Apply Charge to Receipt #
- Tap the Charge
- Select the desired charge from the submenu
- Select Confirm to apply the charge
- Tap the Cancel to exit
- Select Custom to customize specific charge

Apply Discount to Receipt #
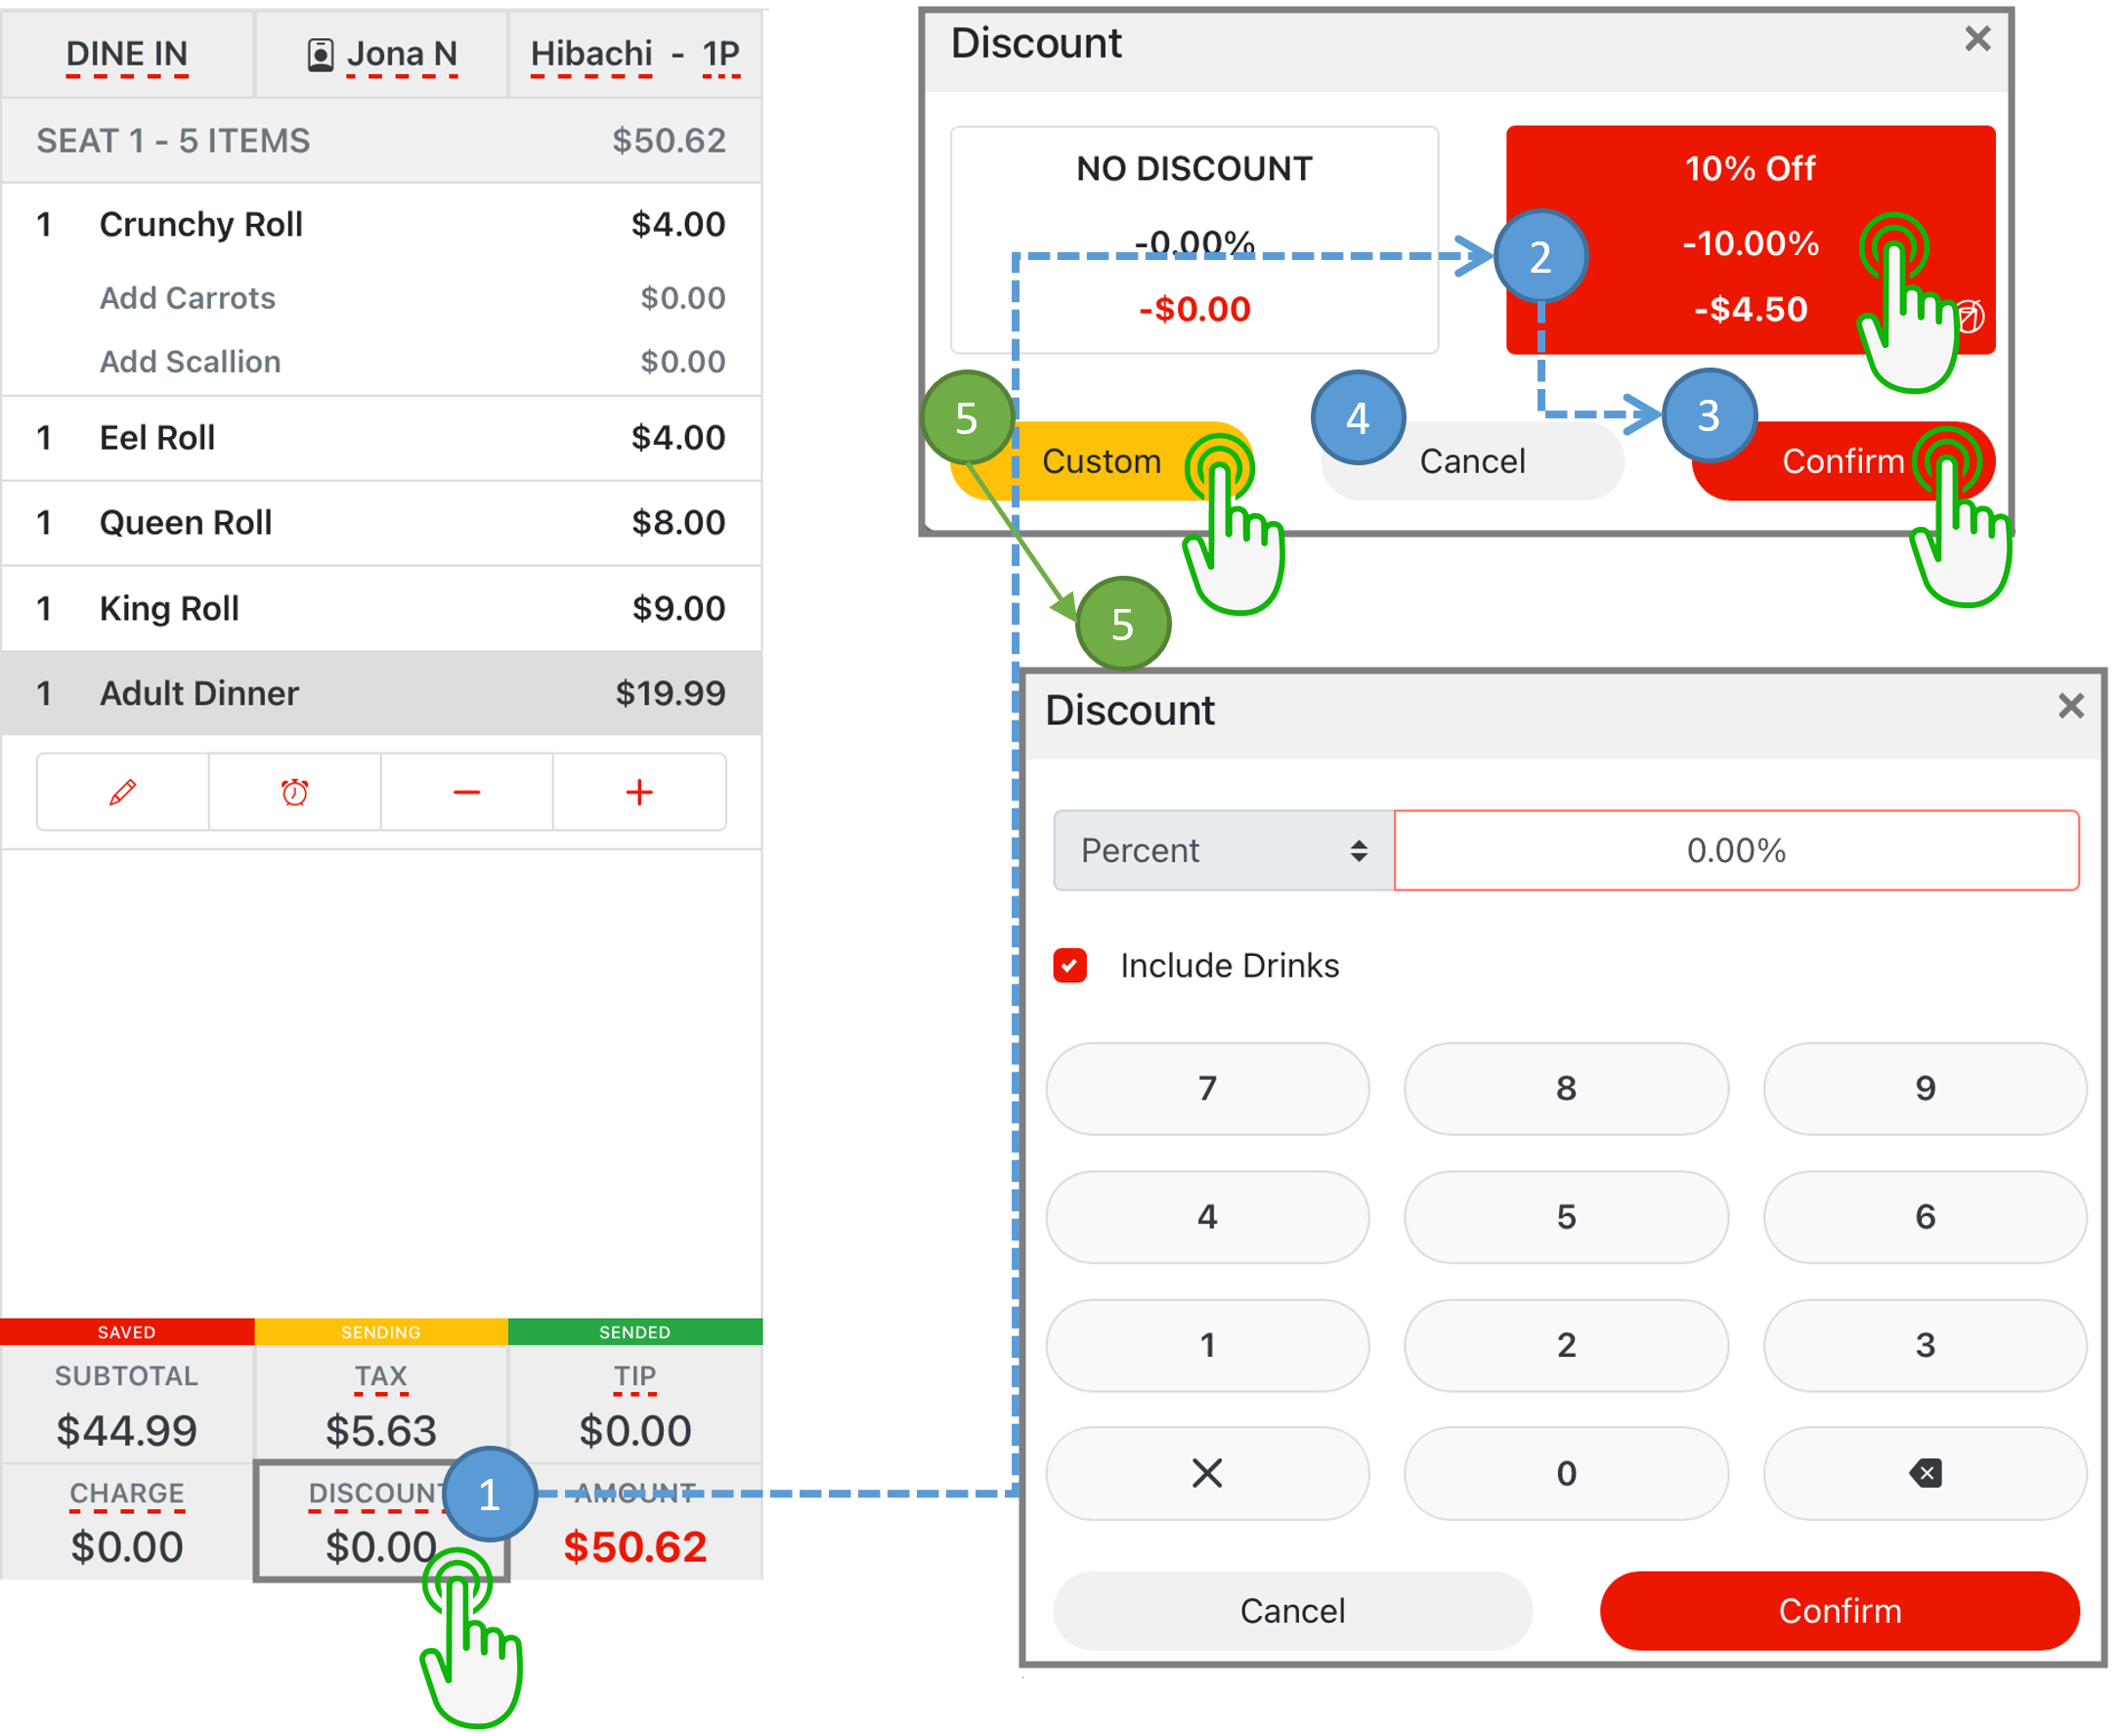
- Select the Discount
- Select the desired discount from the submenu
- Select Confirm to apply the discount
- Tap the Cancel to exit
- Select Custom than select desired customization percentage discount
