Purpose: When no table is free, add the party to the waitlist on the POS; the system texts them a confirmation automatically. For: hosts, front counter, managers.
Before you start: guests can also add themselves at a waitlist self check-in kiosk (see 3.5.3 How to set up a Waitlist self check-in kiosk). After a party is added, the system automatically texts them a confirmation with a link to check their place in line or cancel (see “What the guest receives” below).
Steps #
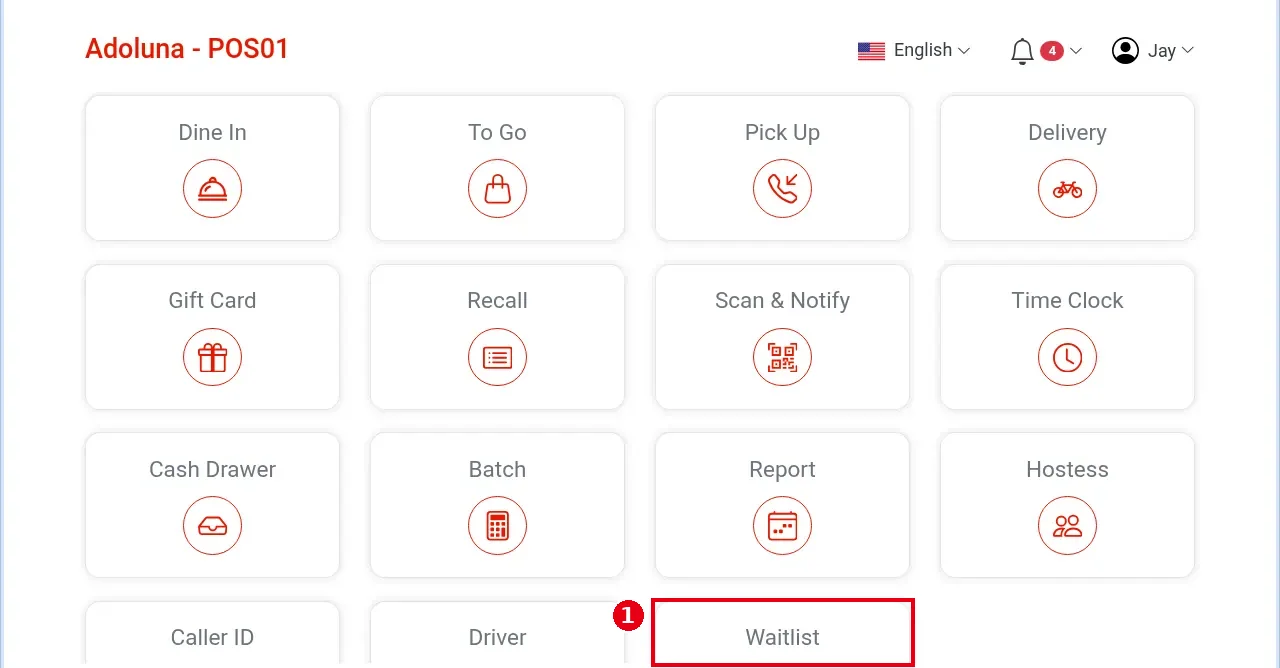
1. On the POS home screen, tap ① Waitlist.
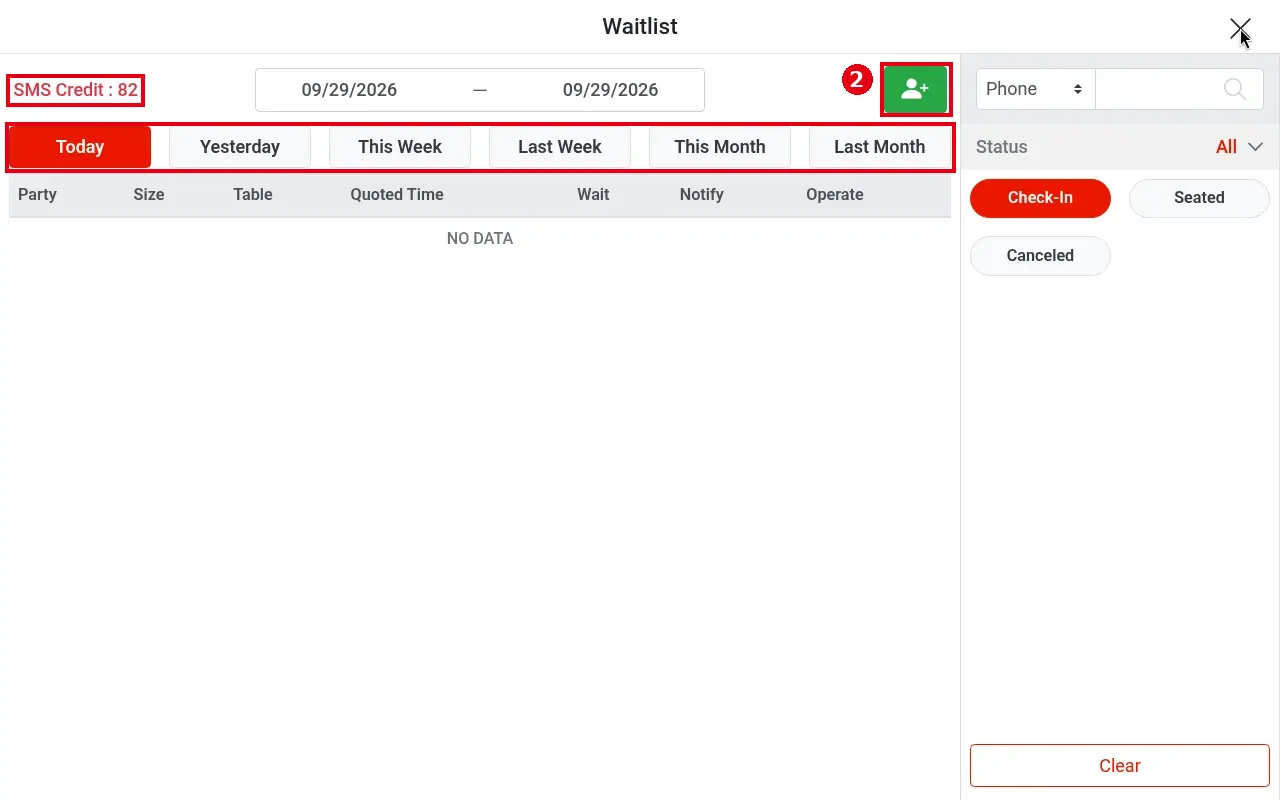
2. The Waitlist screen opens. SMS Credit at the top left is the remaining SMS credit (82 in the screenshot). In the middle you can pick a date range or a quick date such as Today, Yesterday or This Week. Tap the green ② add button at the top right.
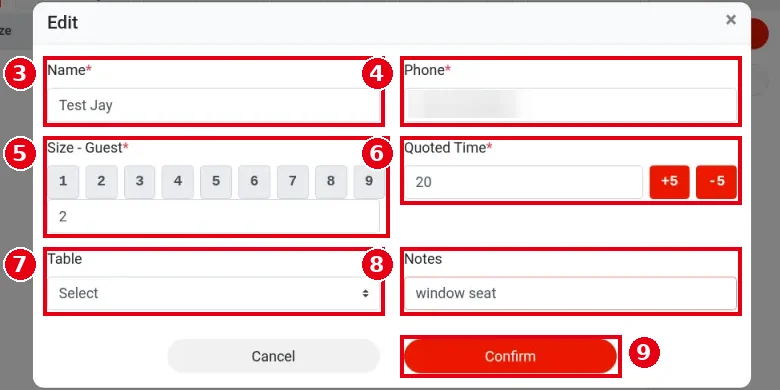
3. Fill in the party:
-
③ Name (required): the guest’s name.
-
④ Phone (required): the guest’s mobile number, used for text notifications.
-
⑤ Size – Guest (required): party size; tap 1–9, or +10 for 10 or more.
-
⑥ Quoted Time (required): the wait you quote the guest, in minutes; default 20, adjust with +5 / -5. The default is set in the Backoffice (see 3.5.3 How to set up a Waitlist self check-in kiosk).
-
⑦ Table: optionally pre-assign a table.
-
⑧ Notes: e.g. “high chair” or “window seat” (window seat in the screenshot).
Tap ⑨ Confirm.
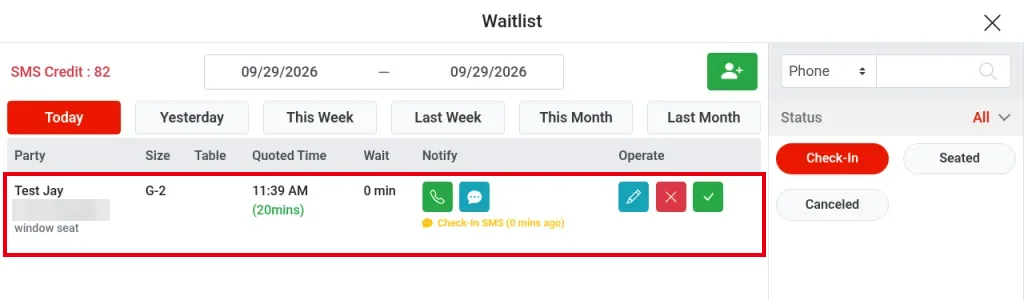
4. The party appears in the waitlist with the status Check-In (waiting):
-
Size shows “group code-size”, e.g. G-2 or G-5 (the demo store has one group, Guest, code G).
-
Quoted Time shows the expected seating time and the minutes left; Wait shows how long they’ve waited; the notes appear under the phone number.
-
“Check-In SMS” under the Notify icons means the confirmation text was sent.
For notifying and seating, see 1.7.3 How to notify a waiting party that their table is ready.
Editing an entry #
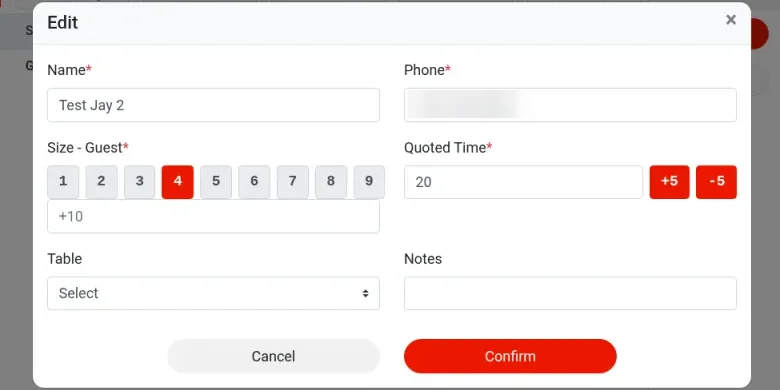
Tap the blue pencil icon in the Operate column to open the Edit screen (same fields as when adding), make the change and tap Confirm. The list updates right away; for example, after changing the size to 5, Size shows G-5.
Guests adding themselves at the self check-in page #
If there’s a waitlist self check-in device at the entrance (setup: 3.5.3 How to set up a Waitlist self check-in kiosk), guests can add themselves:
1. On the Adoluna Check-In page, enter Name and Telephone, pick the party size (1–20) in the Guest – Party size, – please include ages of kids 10 & under dropdown, and optionally fill in Special request (optional). The top of the page shows the estimated wait (e.g. Estimated Wait : 20 mins).
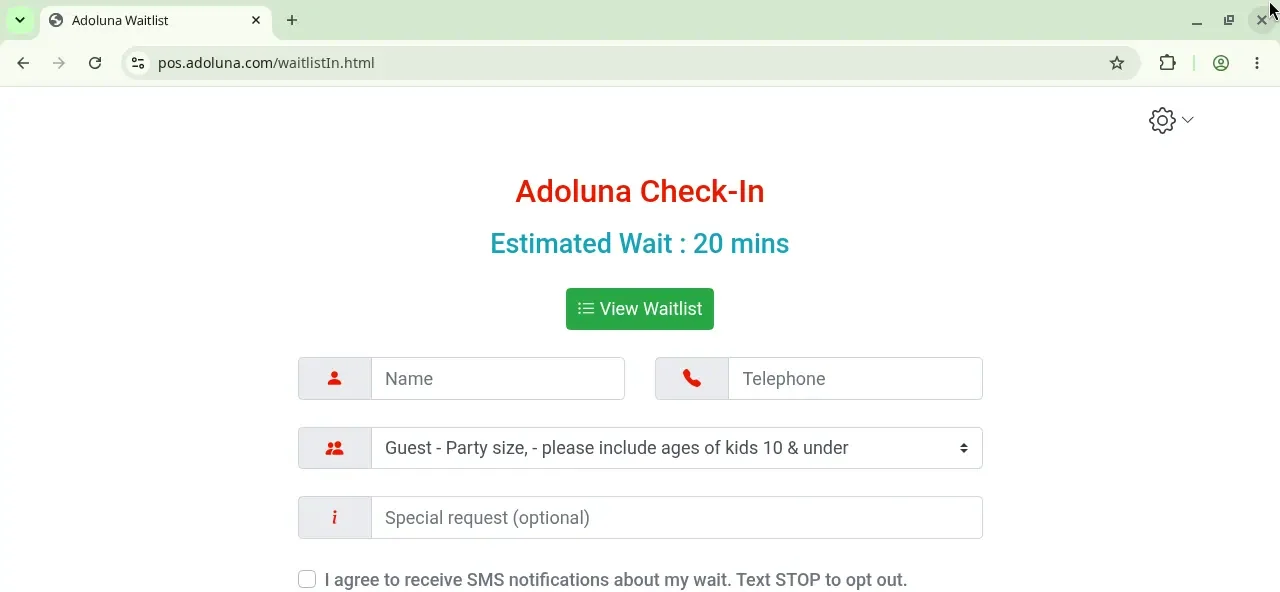
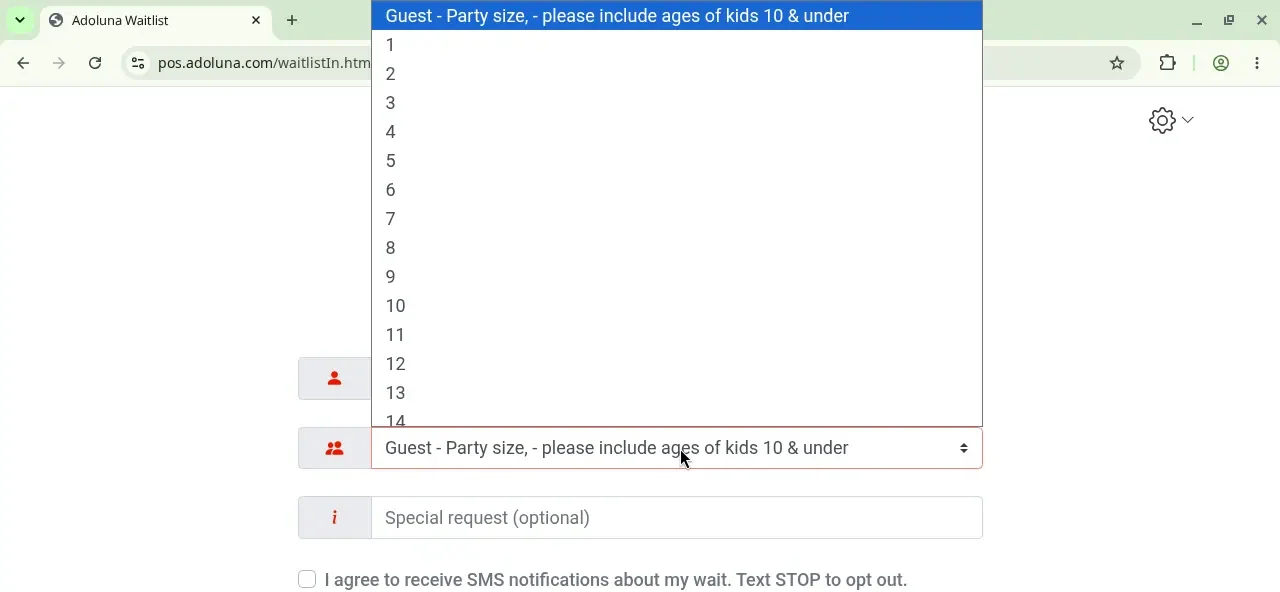
2. Tick the SMS consent box “I agree to receive SMS notifications about my wait. Text STOP to opt out.” The box is required: without it, Add won’t register the party.
3. Tap Add to finish (Clear empties the form). The party then appears in the POS waitlist, and staff notify them as in 1.7.3 How to notify a waiting party that their table is ready.
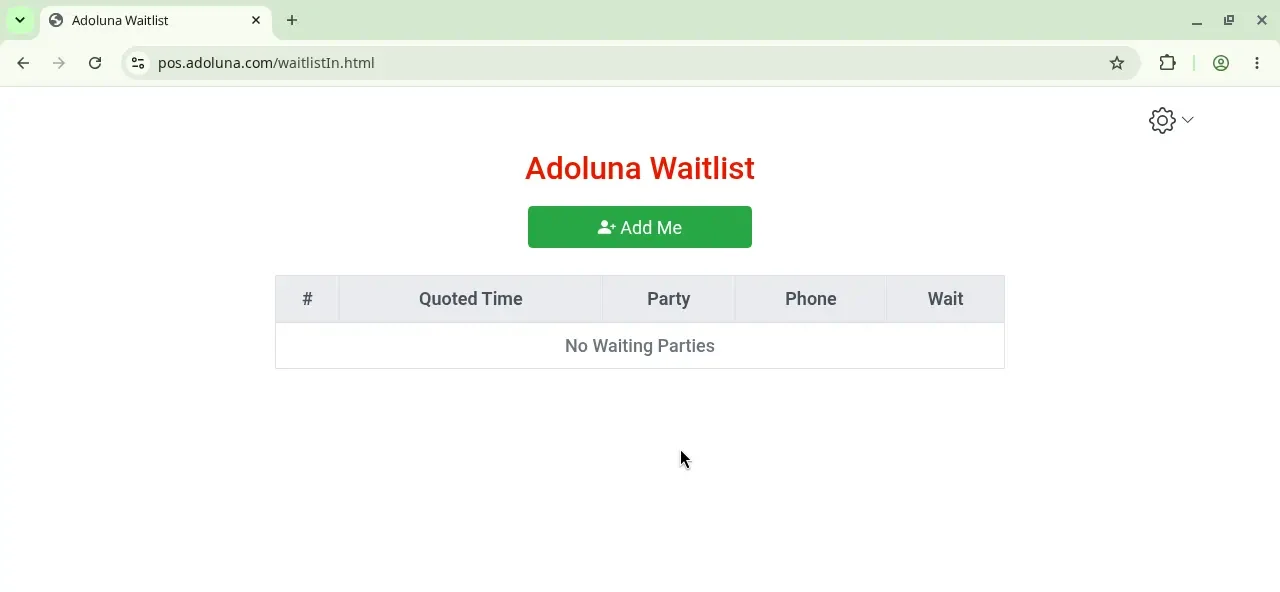
4. Tap View Waitlist to open the Adoluna Waitlist page with the line (#, Quoted Time, Party, Phone, Wait). With nobody waiting it shows “No Waiting Parties”. The Add Me button on that page is for adding yourself.
What the guest receives #
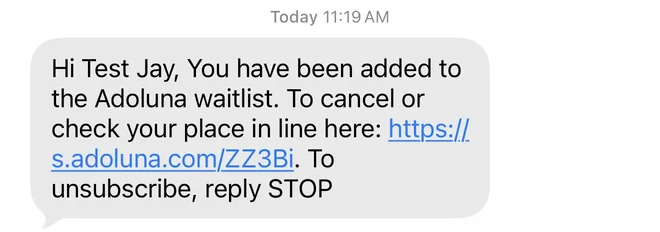
After being added, the guest gets a confirmation text: “Hi Test Jay, You have been added to the Adoluna waitlist. To cancel or check your place in line here: …”, with a short link starting with s.adoluna.com.
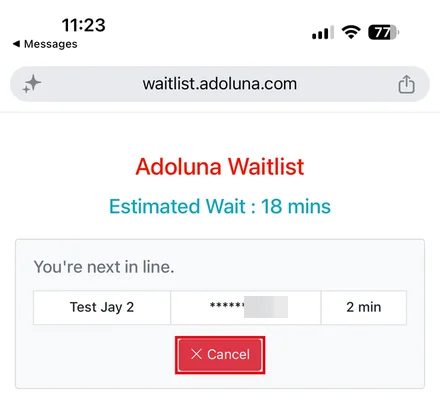
The link opens the waitlist page (waitlist.adoluna.com), which shows:
-
Estimated Wait: the estimated wait (e.g. 18 mins).
-
Their place in line, e.g. “You’re next in line.” or “You’re 2nd in line.”
-
The guest’s name, the phone number with only the last four digits shown (e.g. ******1234), and the minutes waited so far.
-
A red Cancel button, so guests can cancel themselves; the entry then moves automatically to the Canceled list on the POS waitlist screen (see 1.7.4 How to cancel a waitlist entry).
Notes / FAQ #
-
Each text uses 1 SMS credit. In testing, SMS Credit went down by 1 after a “Ready” text and again after a cancellation text (78 → 77 → 76). SMS credit is topped up through the Adoluna admin back end (contact Adoluna). With 0 credit you can still add parties, but no texts go out.
-
The Backoffice can cap the number of guests waiting (the total across all parties; 20 in the demo store). The cap only applies to guest self check-in (see 3.5.3 How to set up a Waitlist self check-in kiosk); staff adding a party on the POS get no warning when it’s exceeded.
-
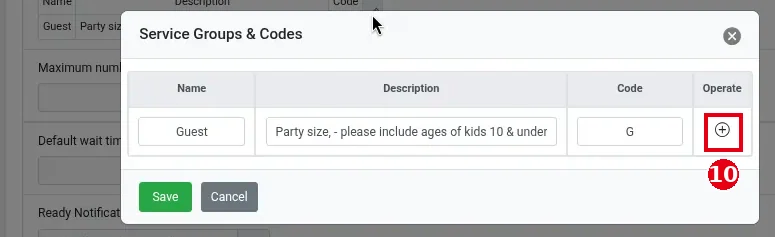
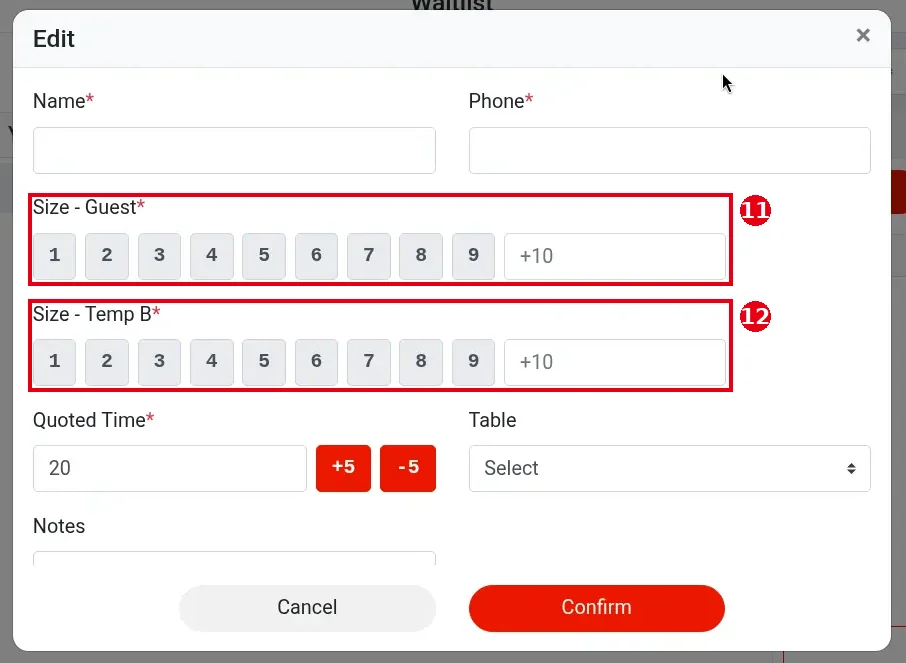
You can set up several party-size groups (e.g. adults and kids) under Service Groups & Codes in Service > Waitlist in the Backoffice: click the pencil to open the setup window, where each row is one group (Name, Description, Code); click ⑩ ⊕ to add a row and Save to save. With several groups, the add screen has one size field per group (e.g. ⑪ Size – Guest* and ⑫ the size field for a second group, Group B), and the list shows sizes as “A-2 K-2”. The demo store has only one group, Guest; Group B in the picture below was added temporarily for testing and deleted afterwards.
-
Use your own phone number when testing; don’t send test texts to real guests.