
Purpose: Once a server opens a table (in mode 2 on the POS; in mode 3 by entering an employee passcode and choosing the table on the Kiosk), the guests order on the tableside Kiosk themselves. For: servers, managers.
Before you start: this mode suits stores with a Kiosk (or tablet) at each table. Set the Kiosk’s Mode in the Backoffice to one of these two (see “The four Kiosk modes” in 3.5.2 How to configure a Kiosk):
-
Mode 2, Fixed Table: Assign to a fixed table, order after the server opens the table. The Kiosk belongs to one table, and the server opens the table on the POS.
-
Mode 3, Server-Assigned Table: No fixed table assignment, order after the server selects and opens a table. The Kiosk has no fixed table; the server enters an employee passcode on the Kiosk and then chooses the table number.
Mode 3 needs the server to enter an employee passcode on the Kiosk (as in the 2026-03-16 website release notes); mode 2 needs no passcode on the Kiosk.
Steps #
1. The server opens the table:
-
Mode 2: the server opens an order for the table on the POS (see 1.2.1 How to start a dine-in order), adds any item and saves (see 1.2.12 How to save, send and settle an order). After saving, the Kiosk assigned to that table activates and shows the menu.
-
Mode 3: the server enters their own employee passcode on the Kiosk, then chooses the table number, and the Kiosk opens the ordering screen for that table.
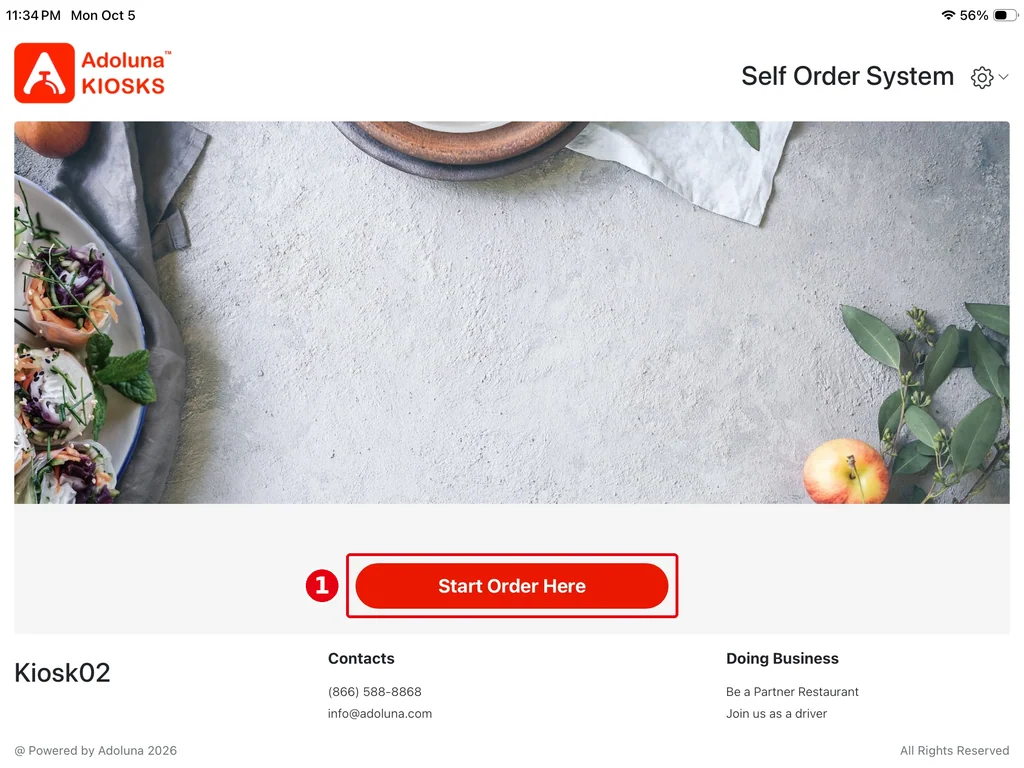
Mode 3 on the Kiosk (Kiosk screenshots taken 2026-10-05):
-
On the welcome page, tap ① Start Order Here.
-
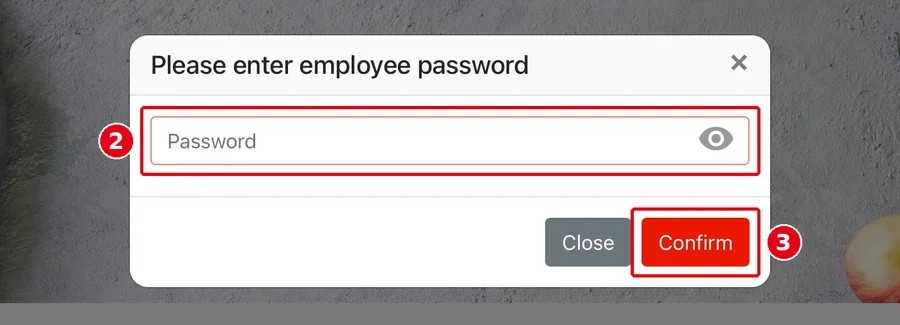
Please enter employee password opens. Enter the server’s own employee passcode in ② and tap ③ Confirm (Close cancels).
-
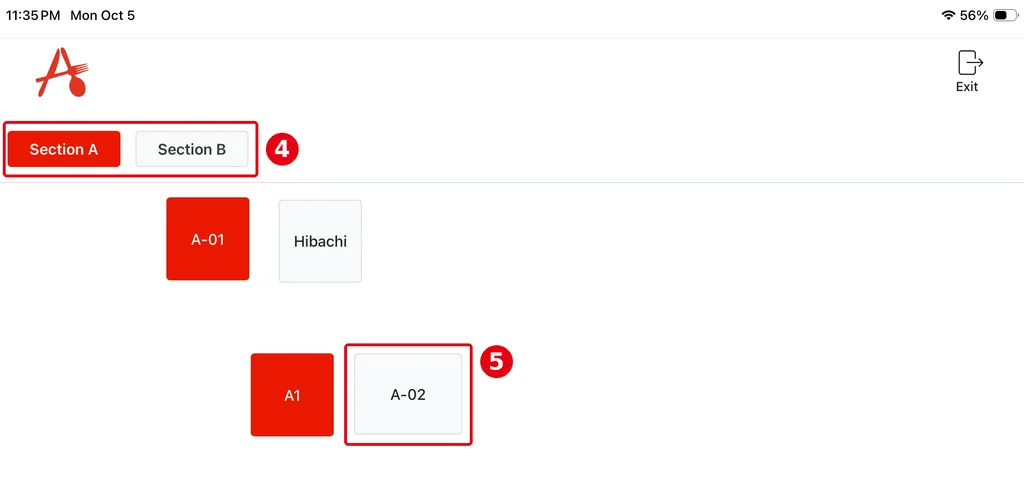
The table screen opens: ④ switch between areas (Section A and Section B in the screenshot) and tap ⑤ the table to open (A-02 in the screenshot). Red tables (e.g. A-01, A1) are already occupied. Exit at the top right leaves this screen.
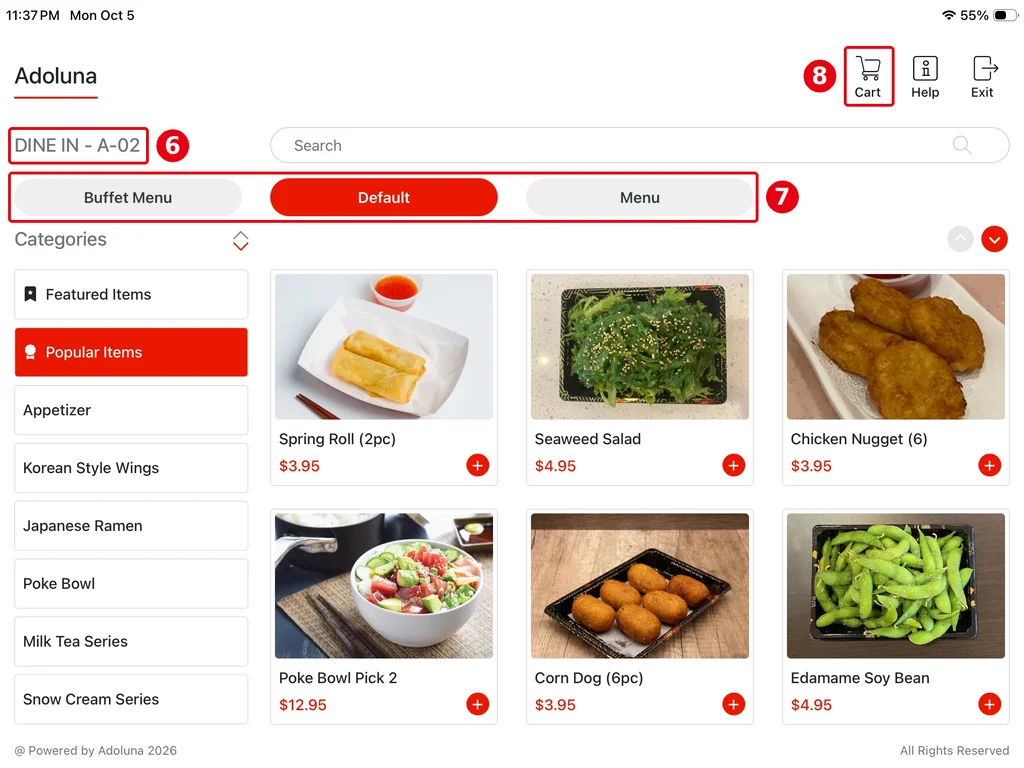
Once the table is open, the Kiosk shows the ordering screen for that table; it’s the same screen in mode 2 and mode 3 (below: mode 3 after choosing the table): ⑥ DINE IN – table number at the top left; ⑦ switch menus at the top (Buffet Menu, Default and Menu in the screenshot); tap + on an item to add it to the cart, and tap ⑧ Cart to open the cart.
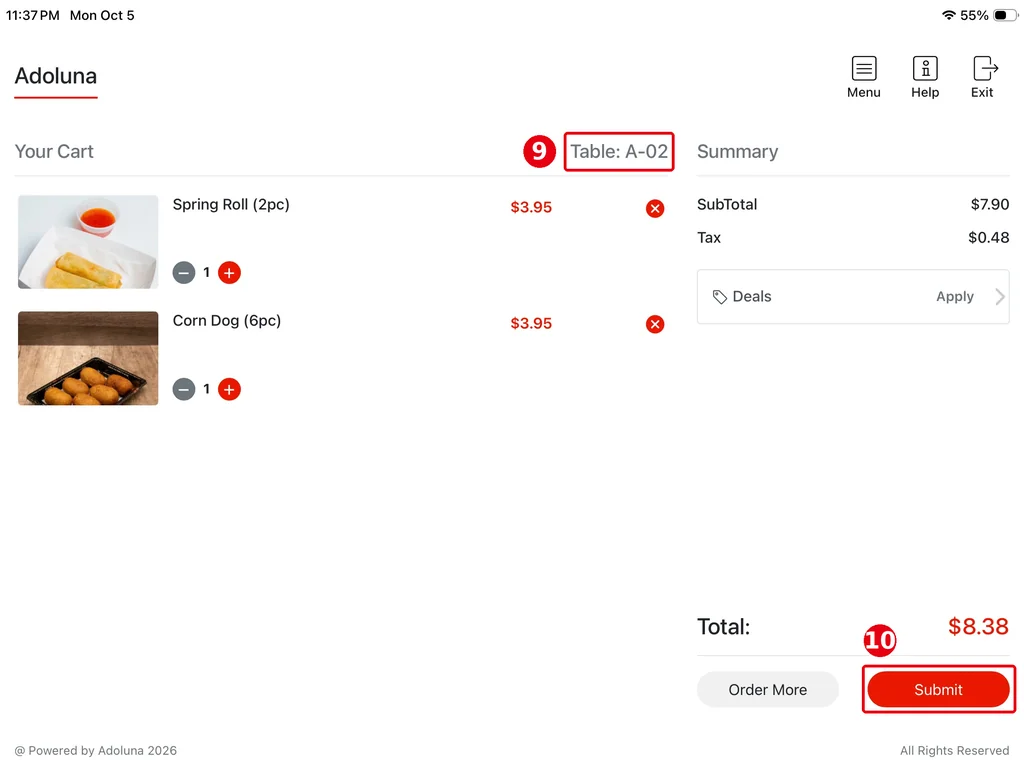
2. The guests order on the Kiosk, then check the items in the cart (Your Cart); ⑨ the table number shows at the top right. Tap ⑩ Submit to send the items to the kitchen, or Order More to go back to the menu and add more.
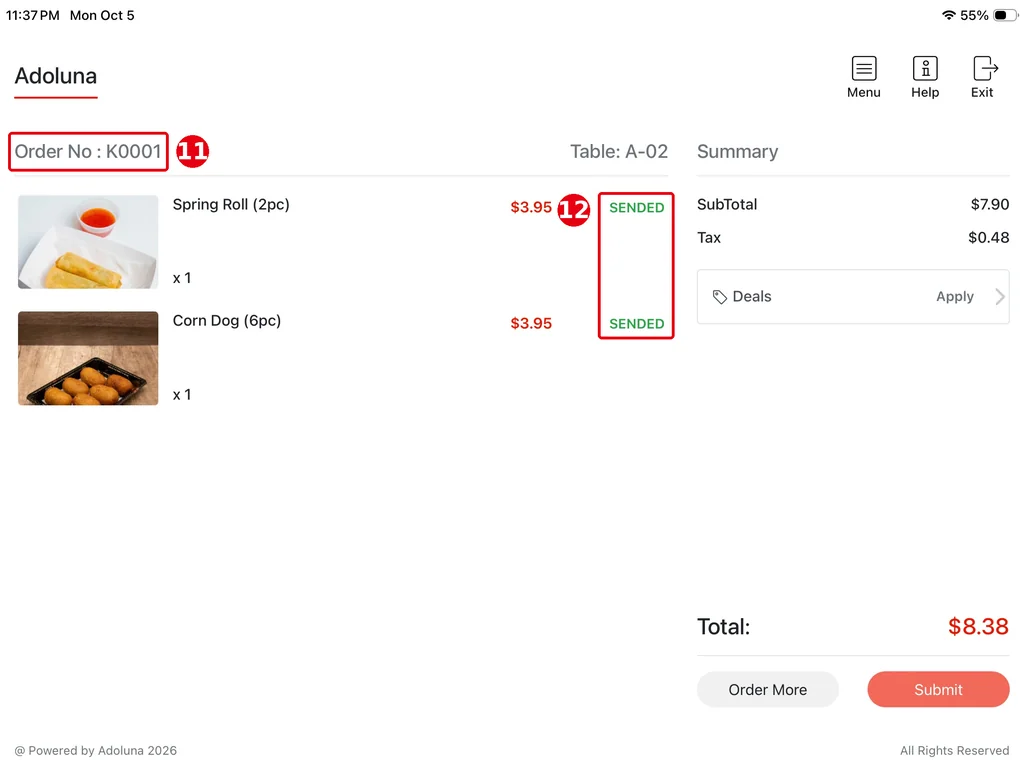
After sending, the cart title changes to ⑪ the order number (e.g. Order No : K0001) and each item shows ⑫ SENDED (sent to the kitchen). Submit turns light because there are no new items to submit.
3. Payment: in modes 2 and 3 the server settles the check for the table on the POS (see 1.3.1 How to take a cash payment, 1.3.2 How to take a credit card payment). If payment types are ticked under Payment Type for this Kiosk in the Backoffice, guests can also pay on the Kiosk (see 3.5.2 How to configure a Kiosk).
Notes / FAQ #
-
After the table is opened, it shows as occupied on the POS table screen (see 1.7.1 How to check table status and mark tables clean).
-
All You Can Eat (buffet) uses a similar way of opening tables; see 1.8.5 How to start an All You Can Eat (buffet) table.
-
In mode 3 the passcode is the server’s own employee passcode; the server enters it and shouldn’t share it with guests.


