
Purpose: Find a network printer’s current IP address and change it to a fixed, unique IP on the store network. For: Adoluna onboarding staff. Hardware: the network printer and a computer on the same network.
Steps #
1. Turn the printer off.
2. Hold down the printer’s Feed button and turn the power on. Release Feed after 3–5 seconds. The printer prints a config page (self-test page) that shows its current IP address.
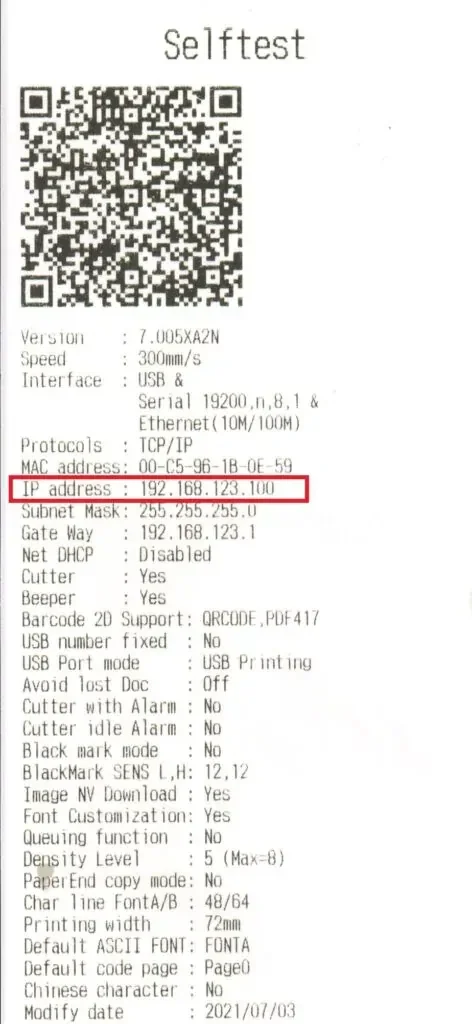
Image: printer config page (from the official website docs)
3. On a computer on the same network as the printer, open a browser and type the IP from the config page (e.g. 192.168.9.87) into the address bar to open the printer’s settings page. If the printer’s factory IP is on a different subnet from the store network (e.g. the printer is 192.168.1.x and the store is 192.168.9.x), first change the computer’s IP temporarily to an address on the printer’s subnet, or the page won’t open. After changing the printer’s IP, set the computer’s IP back.
4. Click Configuration on the left, choose Fixed IP Address, and enter the new IP in Device IP Address. The new IP must be on the same subnet as the store router and must not clash with any other device. Fill Subnet Mask and Gateway Address to match the store network (usually 255.255.255.0 and the router’s address).
5. Click Save, then click Restart on the left. The printer beeps once when it has restarted.
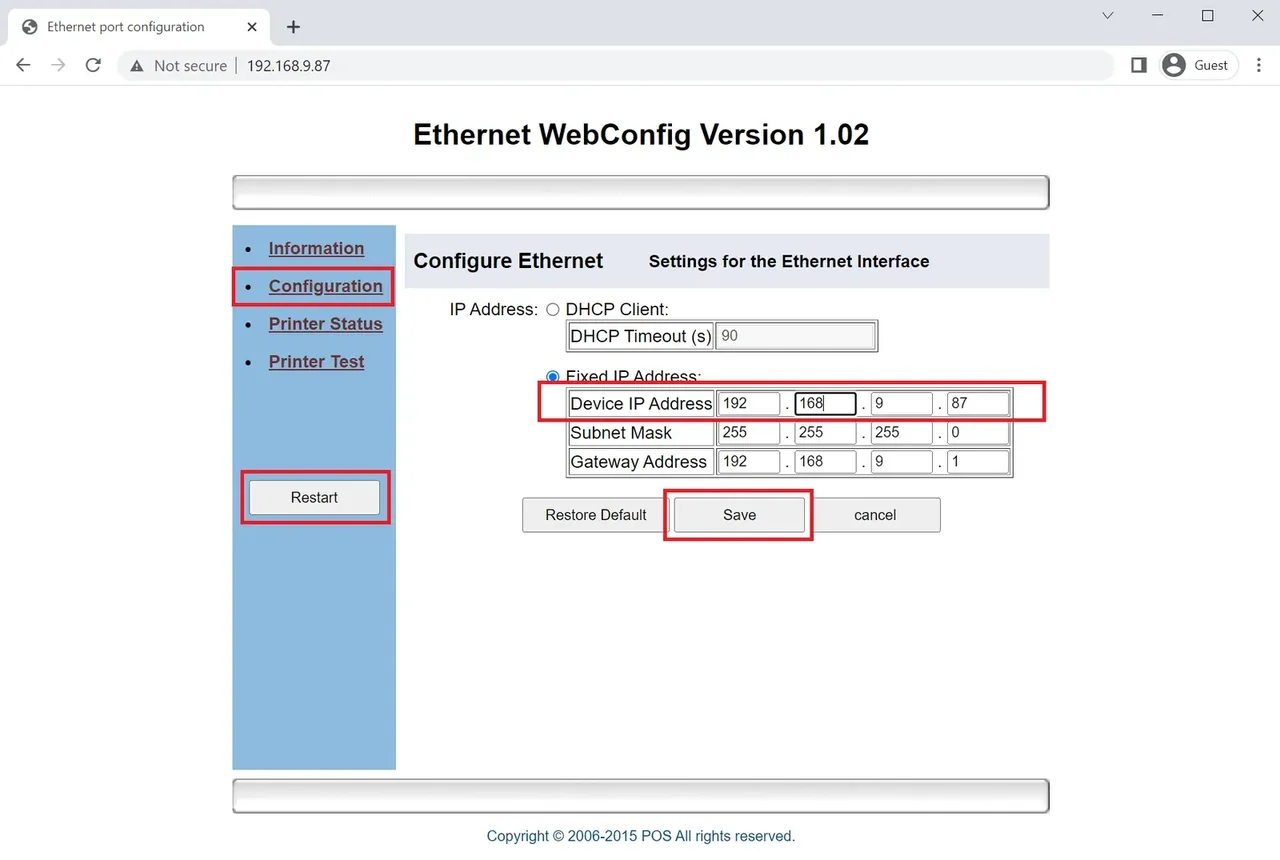
Image: printer settings page (from the official website docs)
6. Print the config page again (repeat steps 1–2) to check the new IP.
7. In the Backoffice, change this printer’s IP Address under Device > Printer to the new IP (see 3.3.1 How to add a printer).
Notes / FAQ #
-
The image shows the settings page of one common network printer. Other brands and models may have different pages and buttons. For Epson, Star and other brands, contact Adoluna tech support if you need to print the config page or change the IP.
-
Keep all printer and card terminal IPs in one list so none are duplicated (network planning: 3.1.2 How to set up the network and wire a POS station).
-
Printer Tools for Windows (from the website downloads page, see 3.6.4 How to install remote support tools) sets the printer’s language / code page. The system prints by sending codes to the printer, so a wrong language setting prints garbled text. If printouts are garbled, check the printer’s language setting with this tool first.


