
Purpose: Create an employee profile with their POS passcode, position, pay rate and clock-in requirement. For: owners, managers.
Before you start: Create positions first (see 2.8.1 How to create positions and set permissions); employees get their permissions from their position. The Passcode is 4–6 digits, numbers only, and is used to sign in to the POS (see 1.1.1 How to log in and out of the POS).
Steps #
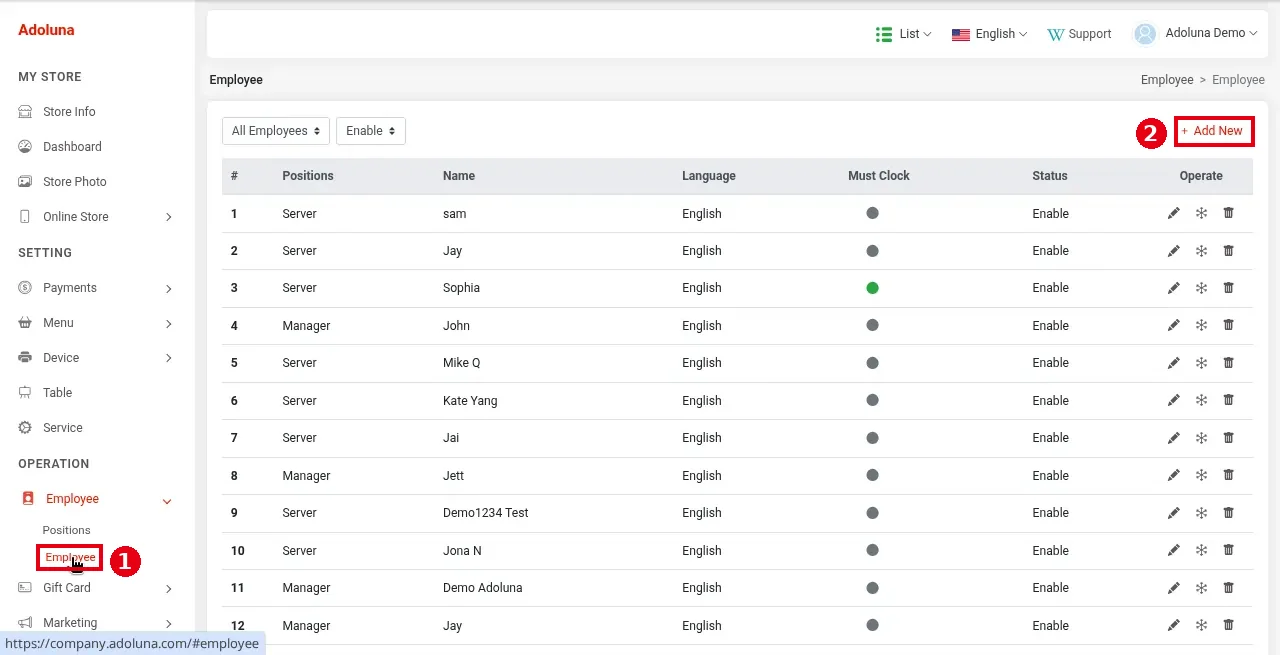
1. In the Backoffice left menu, click Employee > ① Employee. The list’s columns are Positions, Name, Language, Must Clock (a green dot means on), Status and Operate. Click ② + Add New.
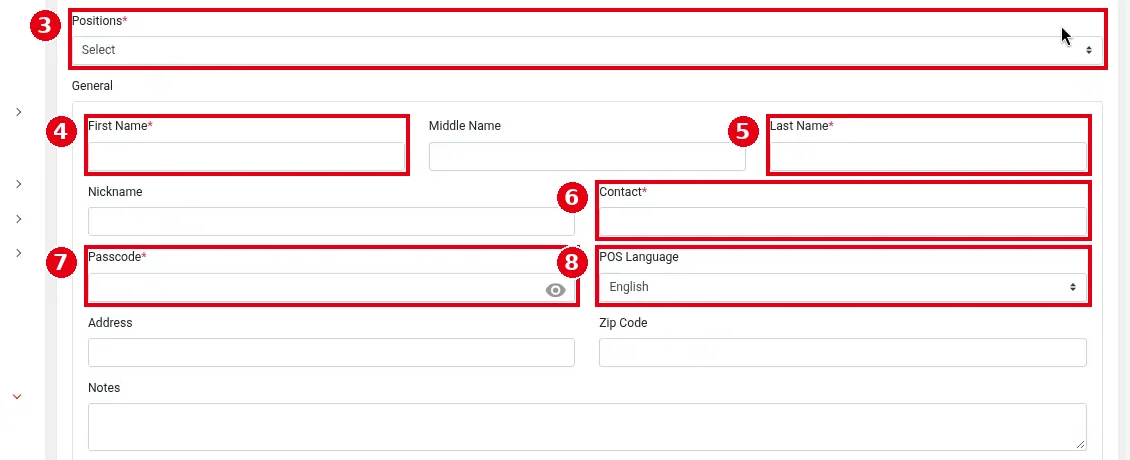
2. Fill in the basics:
-
③ Positions*: choose the position.
-
④ First Name*, ⑤ Last Name*; Middle Name and Nickname are optional.
-
⑥ Contact*: the employee’s phone number (required).
-
⑦ Passcode*: the POS sign-in passcode, 4–6 digits; it must be different from every other employee’s. The eye icon shows or hides it.
-
⑧ POS Language: the POS language for this employee (English by default).
-
Address, Zip Code and Notes are optional.
3. Scroll down:
-
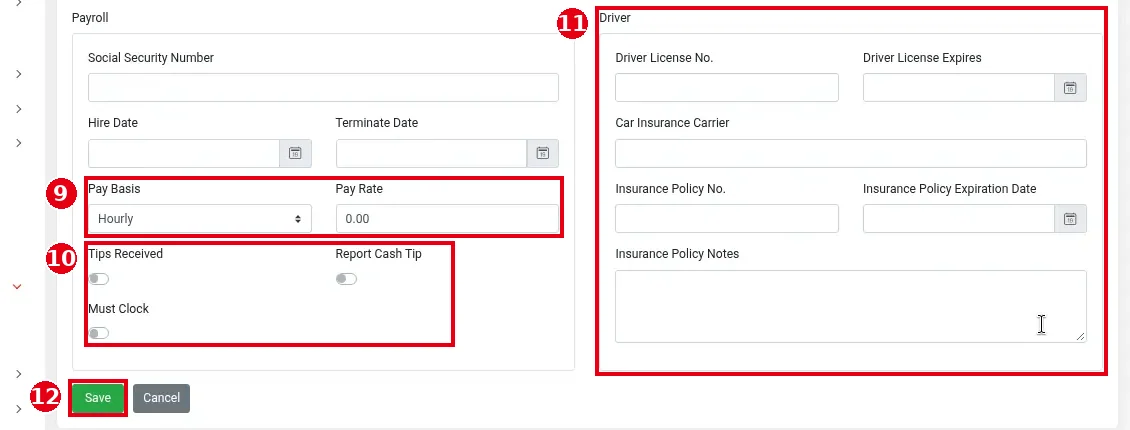
Payroll: Social Security Number, Hire Date, Terminate Date; ⑨ Pay Basis (Hourly in the screenshot) and Pay Rate, used for the pay figures in the Time Card report (see 2.8.5 How to edit or add time card records).
-
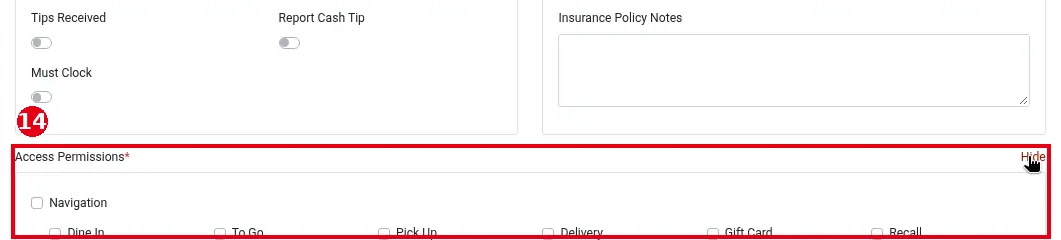
⑩ Tips Received: currently has no real effect; Report Cash Tip: when on, the employee enters their cash tips at clock-out (see 1.5.1 How to clock in, take a break and clock out); Must Clock: when on, an employee who hasn’t clocked in can’t use the system.
-
⑪ Driver (delivery driver details, optional): Driver License No., Driver License Expires, Car Insurance Carrier, Insurance Policy No., Insurance Policy Expiration Date, Insurance Policy Notes.
Click ⑫ Save (or Cancel).
4. Give the employee their passcode and have them try signing in on the POS (see 1.1.1 How to log in and out of the POS).
5. (Optional) To adjust one employee’s permissions: click the pencil for the employee in the list to open the edit page, scroll to the bottom, and click Show next to ⑬ Access Permissions*.
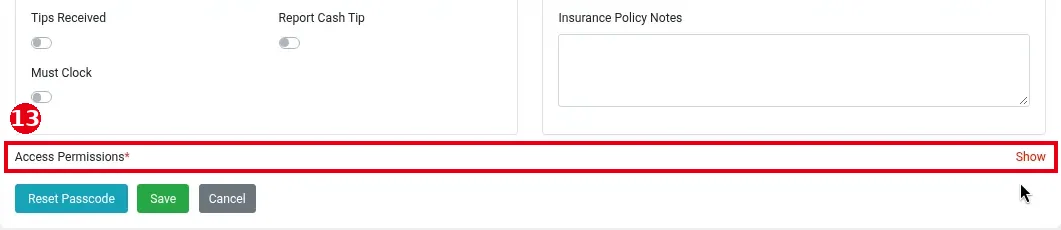
⑭ This expands the employee’s own permission list, grouped the same way as position permissions (see 2.8.1 How to create positions and set permissions). Tick or untick as needed and click Save; click Hide to collapse it.
Notes / FAQ #
-
The new-employee form has no permission settings. After saving, you can view and adjust this employee’s own permissions on the employee edit page (see step 5 and 4.5.2 Why can’t an employee see a feature or report?).
-
Changing a position’s permissions doesn’t update employees who already have it (each keeps their own copy); to change an existing employee, use step 5 (see 2.8.1 How to create positions and set permissions).
-
To change a passcode, use Reset Passcode on the employee edit page (see 2.8.3 How to reset an employee’s passcode).
-
Every employee’s passcode must be unique.


