
Purpose: Set the store name, logo, phone number, supported languages, time zone and the start time of the business day. For: owners, managers, Adoluna onboarding staff.
Before you start: Each item on the Store Info page has its own Edit button; change them one at a time. Auto Batch, Tax Calculation and Cash Payment Discount on the same page are covered in 2.2.3 How to set up Auto Batch, 2.2.2 How to choose the tax calculation method and 2.2.4 How to turn on the cash payment discount.
Steps #
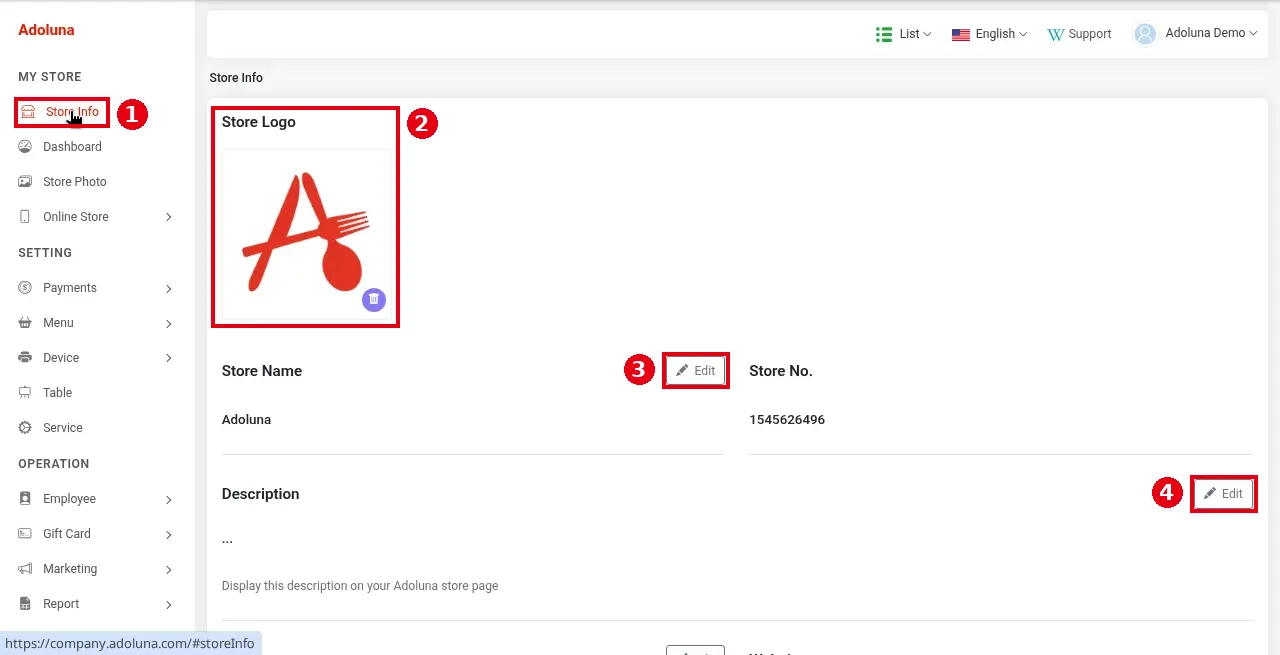
1. In the Backoffice left menu, click ① Store Info.
2. At the top of the page:
-
② Store Logo: the store logo. The bin icon at its lower right deletes the current logo.
-
③ Store Name: click Edit next to it to change the name. Store No. on the right is the store number; it has no Edit and can’t be changed.
-
④ Description: click Edit to change the store description. The page says: Display this description on your Adoluna store page.
3. Scroll down:
-
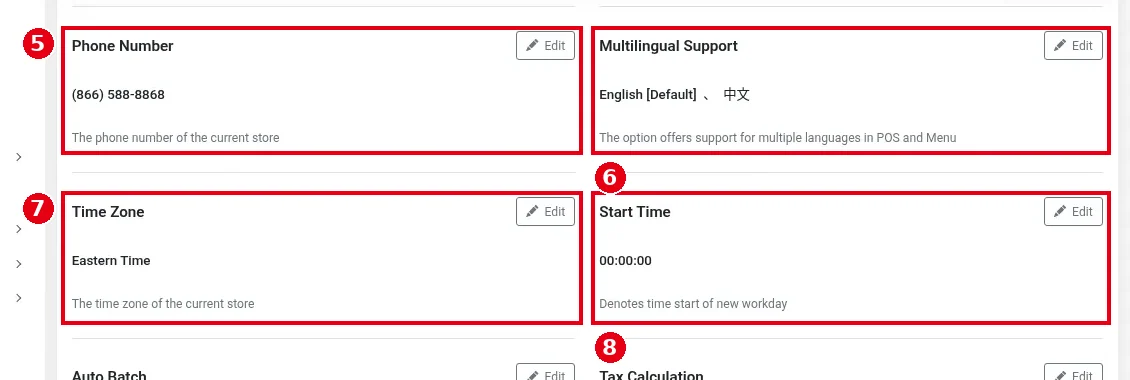
⑤ Phone Number: the store phone number (The phone number of the current store).
-
⑥ Multilingual Support: the languages supported on the POS and menus, English [Default] and 中文 in the screenshot (The option offers support for multiple languages in POS and Menu). For staff switching languages on the POS, see 1.1.3 How to change the POS display language.
-
⑦ Time Zone: the store’s time zone, Eastern Time in the screenshot.
-
⑧ Start Time: when each business day starts (Denotes time start of new workday), 00:00:00 in the screenshot.
Click the Edit button at the top right of each item to change it.
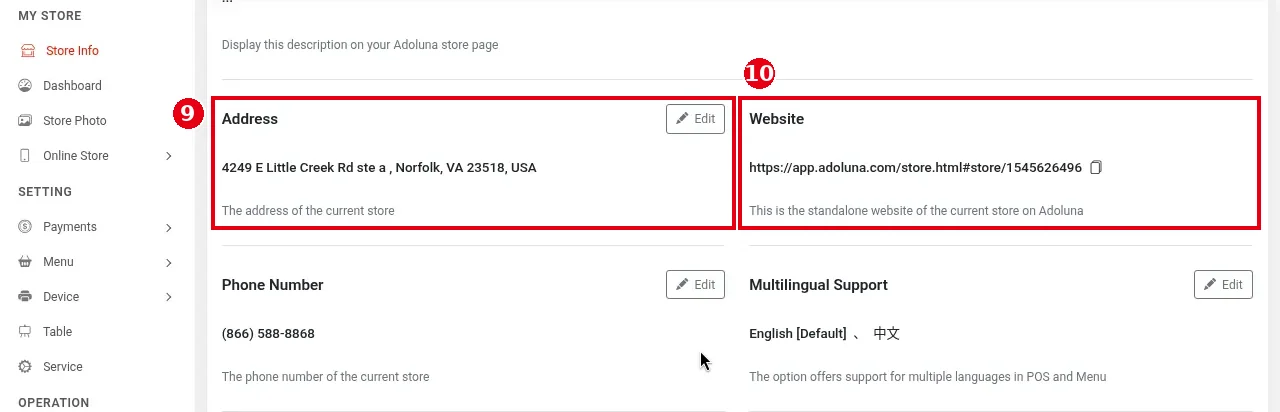
4. There’s one more row between Description (④) and Phone Number (⑤):
– ⑨ Address: the store address (The address of the current store). Click Edit to change it.
– ⑩ Website: the store’s own website on Adoluna (This is the standalone website of the current store on Adoluna), a link like https://app.adoluna.com/store.html#store/…. The icon on the right copies the link; this item has no Edit.
5. To change an item, click its Edit: the value turns into an edit box, and Save and Cancel appear at the top right. The two pictures below show the edit boxes for Time Zone (choose the time zone in dropdown ⑪) and Start Time (choose the time in dropdown ⑬). Click ⑫ Save to save, or Cancel to discard the change.


Notes / FAQ #
-
A wrong time zone makes order times, report dates and the auto batch time wrong; check it first when setting up a new store.
-
The logo and other images are uploaded on the Store Photo page (see 2.2.5 How to manage store photos). The address and the other details are edited on Store Info with their Edit buttons.
-
Start Time is 00:00:00 by default and can be changed with Edit. Orders placed before Start Time count toward the previous business day, so a store open past midnight can move Start Time to after closing. Start Time only sets when the business day starts; the POS has no in-store business-hours setting, and doesn’t need one (online store hours: see 2.9.1 How to set online store availability and hours).


