
Purpose: Create Backoffice accounts for managers or partners, and edit or delete them. For: owners, administrators.
Before you start: Backoffice accounts (Team > Administrator) are for signing in to the Backoffice website. They’re separate from POS employees (Employee, see 2.8.2 How to add an employee and set their passcode): employees sign in to the POS with a 4–6 digit passcode, while Backoffice accounts sign in with an email or mobile number and a password (see 2.1.1 How to sign in to the Backoffice). Team has three submenus: Positions, Department and Administrator.
Steps #
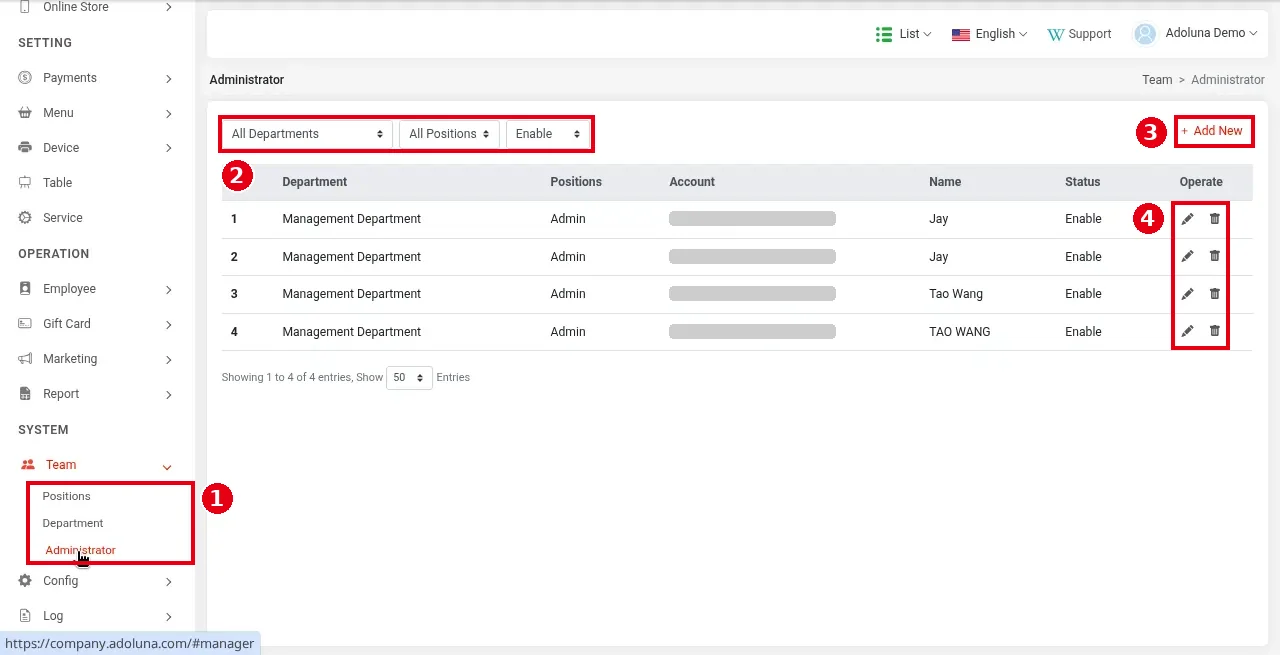
1. Scroll the left menu down to SYSTEM, click Team to expand ① its submenu, and click Administrator.
2. The account list’s columns are #, Department, Positions, Account (the sign-in account, masked in the screenshot), Name, Status and Operate. All demo accounts are Management Department / Admin.
-
② Three filters at the top: department (All Departments), position (All Positions) and status (Enable).
-
④ Operate: the pencil edits, the bin deletes.
-
Click ③ + Add New to add an account.
3. Fill in the form:
-
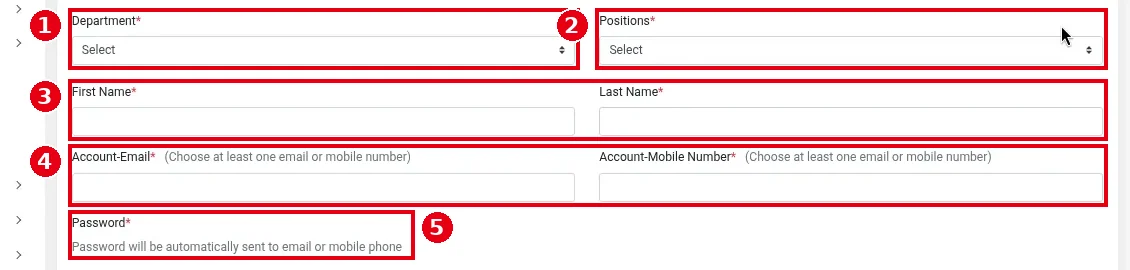
① Department*, ② Positions*: choose from the dropdowns. The options come from Team > Department and Team > Positions.
-
③ First Name*, Last Name*.
-
④ Account-Email*, Account-Mobile Number*: fill in at least one (Choose at least one email or mobile number); it’s used to sign in.
-
⑤ Password*: there’s no input box. The page says “Password will be automatically sent to email or mobile phone”: after you save, the system sends the password to that email or mobile number.
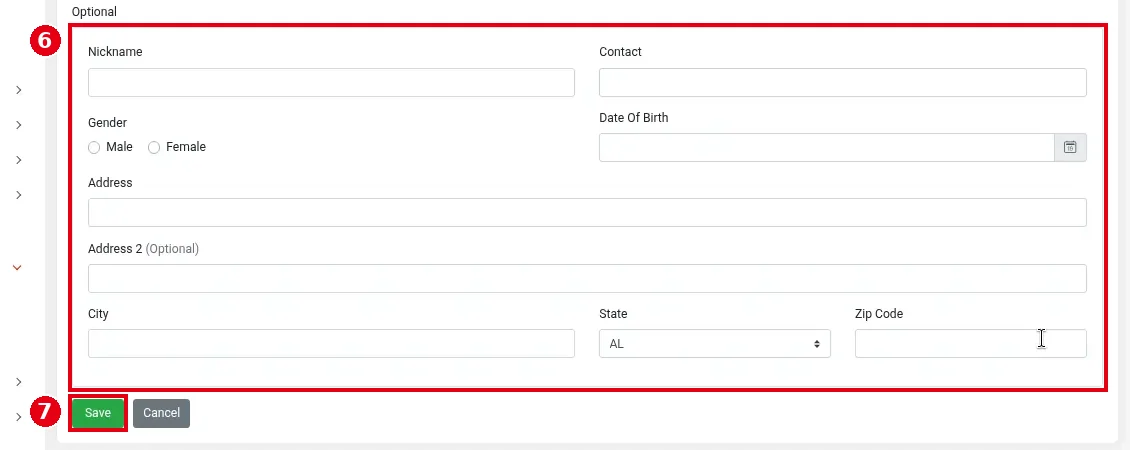
4. ⑥ Optional holds optional details: Nickname, Contact, Gender, Date Of Birth, Address, Address 2, City, State, Zip Code. Click ⑦ Save (or Cancel).
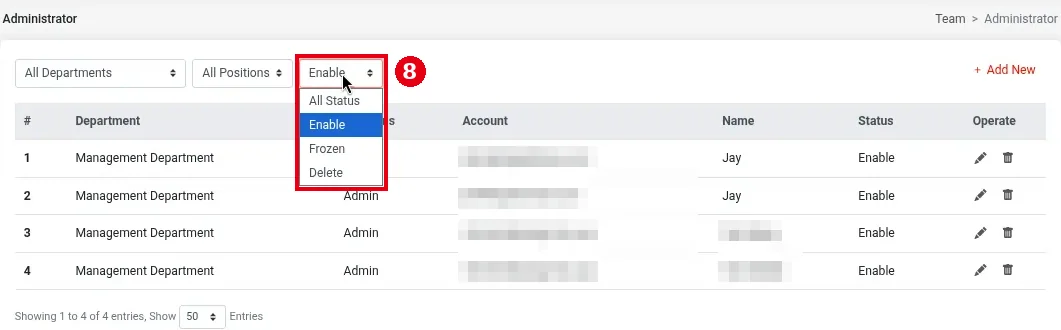
5. To edit or stop an account: the ⑧ status filter above the account list has All Status, Enable (active), Frozen and Delete; Enable is shown by default.
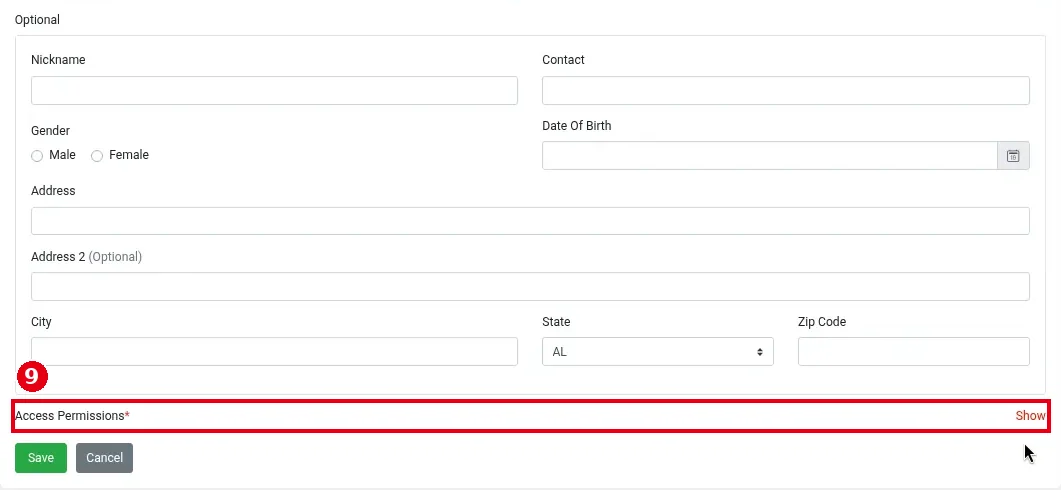
Click an account’s pencil to open the edit page. It’s the same as the new-account form (without Password), plus ⑨ Access Permissions* at the bottom: click Show to expand this account’s own permissions and adjust them. The edit page has no status option, and the account list’s Operate column only has the pencil (edit) and the bin (delete), with no freeze icon (tested 2026-10-05). Delete Backoffice accounts that are no longer used.
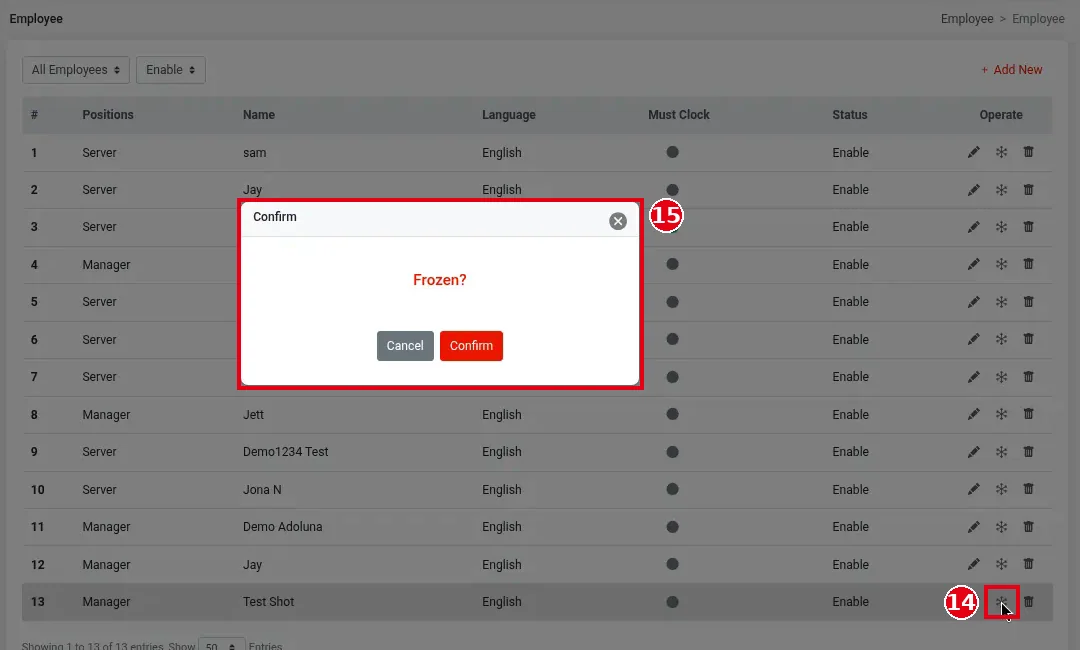
Where the freeze icon is: Freezing (the snowflake icon ❄) is under OPERATION > Employee > Employee and applies to POS employees, not to Team > Administrator. In the employee’s row click ⑭ ❄; in the ⑮ Frozen? dialog click Confirm, and the employee drops out of the default Enable list. Set the status filter to Frozen to see them; the Operate column has View and Regain. Click Regain, then Confirm in the Available? dialog, and the employee is back to Enable. See 2.8.4 How to freeze, delete or restore an employee for details.
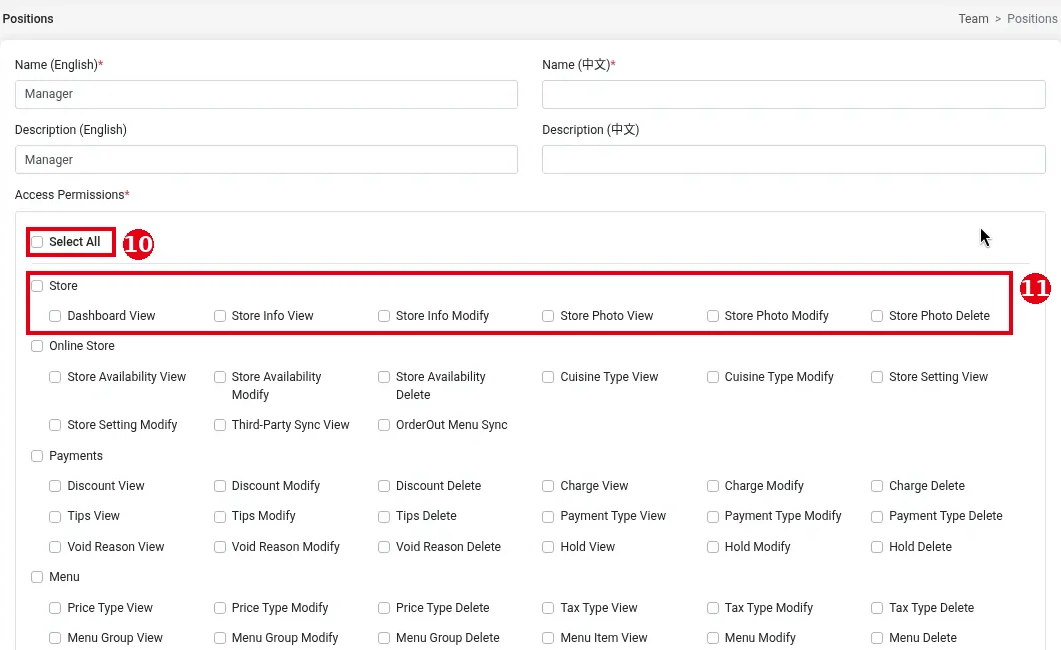
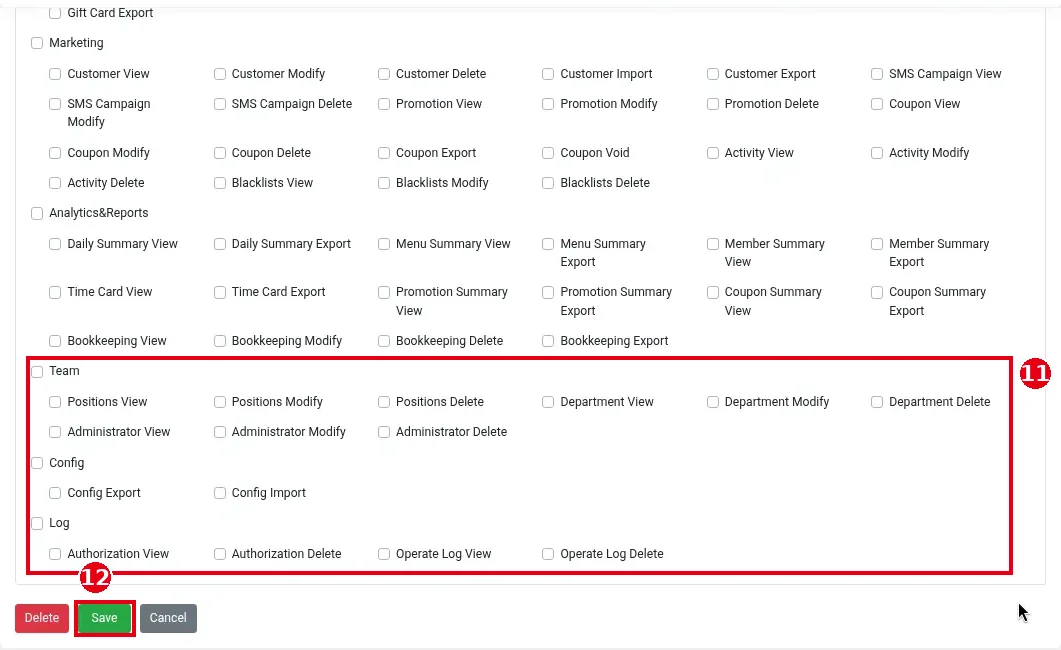
6. To limit which menus a Backoffice account sees: Backoffice permissions are set per position. Click Team > Positions. The list has positions such as Admin, Owner and Manager; click a position’s pencil to open its edit page (+ Add New adds a position). Access Permissions* is a permission tree: ⑩ Select All, then module groups Store, Online Store, Payments, Menu, Device, Table, Service, Employee, Gift Card, Marketing, Analytics&Reports, Team, Config and Log. ⑪ Each group lists View, Modify, Delete, Export and similar permissions for each page. Untick a page’s View and accounts with this position no longer see that menu.
Click ⑫ Save when done (Cancel to close, Delete to delete the position).
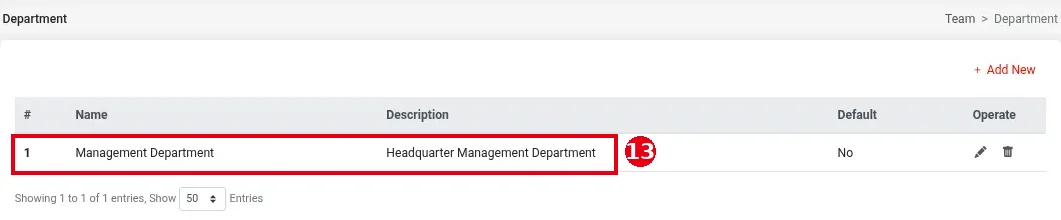
Department: ⑬ Team > Department is the department list (the demo store has only Management Department). You can add, edit or delete departments; the Department* field of a Backoffice account is chosen from here.
Notes / FAQ #
-
Give everyone their own account; don’t share one account.
-
When someone leaves, delete their Backoffice account; if they’re also a POS employee, freeze or delete the employee too (see 2.8.4 How to freeze, delete or restore an employee).
-
Team > Positions are job titles; Backoffice permissions are set per position (see step 6). Department is the department name (see “Department” above).


