
Purpose: Create dining areas (e.g. Section A, Section B) and tables, and arrange where tables sit. The POS shows this layout when staff pick a table or check table status. For: owners, managers, Adoluna onboarding staff.
Steps #
1. In the Backoffice left menu, click ① Table.
2. On the page:
-
③ Dining area tabs (Section A, Section B in the screenshot): click a tab to switch areas; that area’s tables show below. The selected tab has ≡ and pencil icons: drag ≡ to reorder areas, and click the pencil to rename the area.
-
⑤ Table cards: show the table name and seat count, e.g. A-01 / 4P (a 4-seat table).
-
⑥ Three icons under each card: a QR code (downloads that table’s QR code), ≡ (press and drag to move the table on the layout) and a pencil (edit the table).
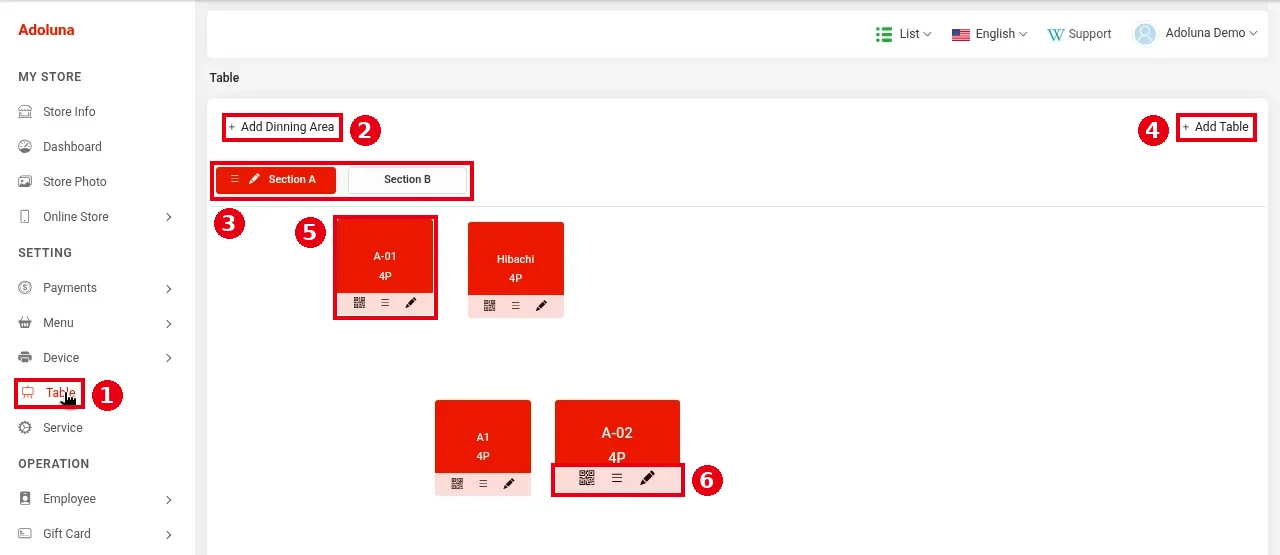
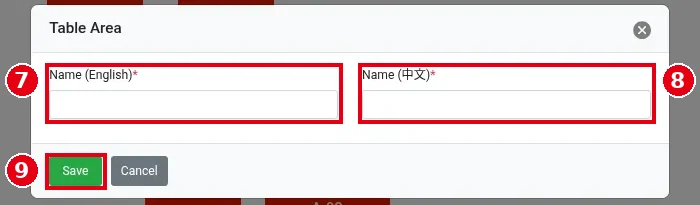
3. To add a dining area, click ② + Add Dinning Area (spelled this way on the page). In the Table Area dialog, enter ⑦ Name (English)* and ⑧ Name (中文)* and click ⑨ Save (or Cancel).
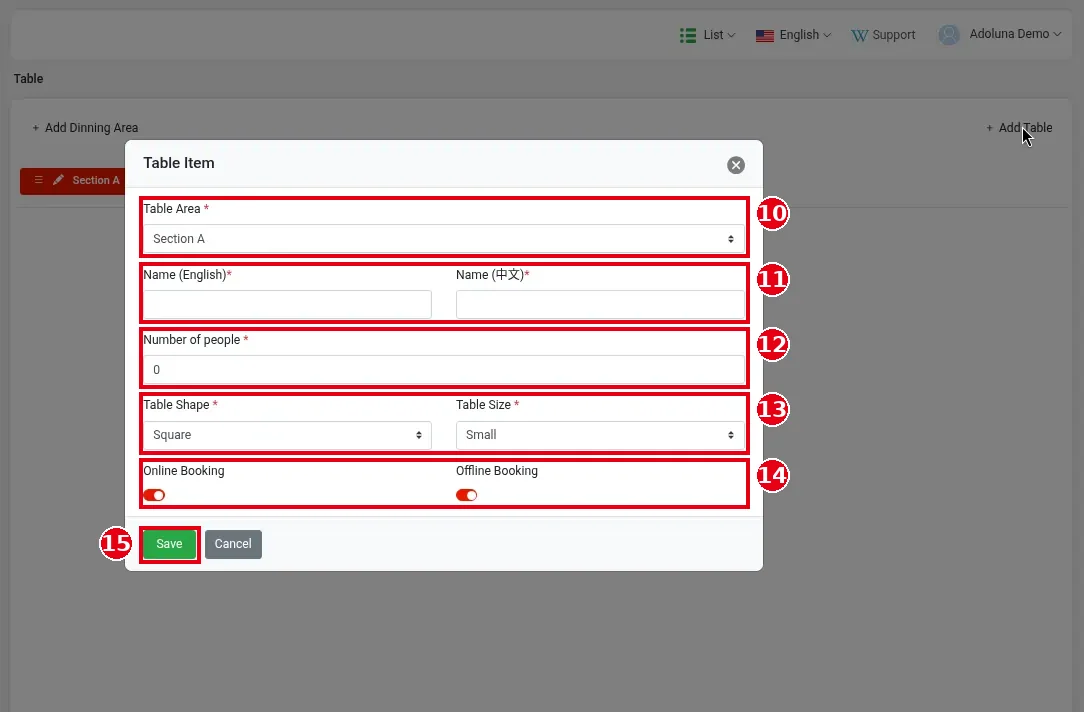
4. To add a table, click the area’s tab first, then click ④ + Add Table. The Table Item window opens:
-
⑩ Table Area*: the dining area the table belongs to (Section A in the screenshot).
-
⑪ Name (English)*, Name (中文)*: the table name.
-
⑫ Number of people*: the seat count, shown on the table card as e.g. 4P.
-
⑬ Table Shape*: e.g. Square or Rectangle; Table Size*: e.g. Small or Large.
-
⑭ Online Booking, Offline Booking: two switches, on by default for a new table.
Click ⑮ Save (or Cancel).
5. Drag the ≡ icon under each table card to place tables roughly where they are in the restaurant, so staff can find them on the POS.
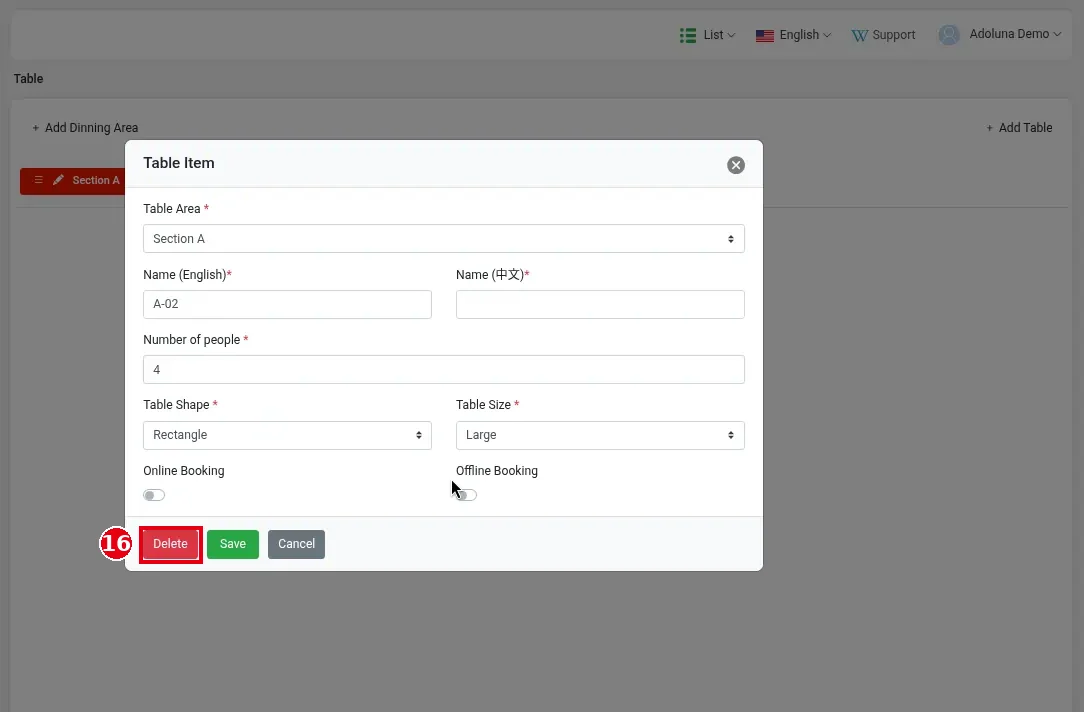
To delete a table, click the pencil under its card. The same Table Item window opens: change the details and click Save, or click ⑯ Delete to delete the table. For a dining area, click the pencil on its tab to edit or delete it.
Notes / FAQ #
-
For picking a table for a Dine In order on the POS, see 1.2.1 How to start a dine-in order; for table status and cleaning, see 1.7.1 How to check table status and mark tables clean.
-
For Scan to Order table codes, see 2.6.2 How to set up Scan to Order.
-
Stores that don’t use tables can turn on Skip Table Selection under Service > Dine In (see 2.5.1 How to configure Dine In service settings).


