
Purpose: When the customer display doesn’t show the order or won’t connect, check binding, the Backoffice switch, the network and the local service, in that order. For: managers, Adoluna onboarding staff.
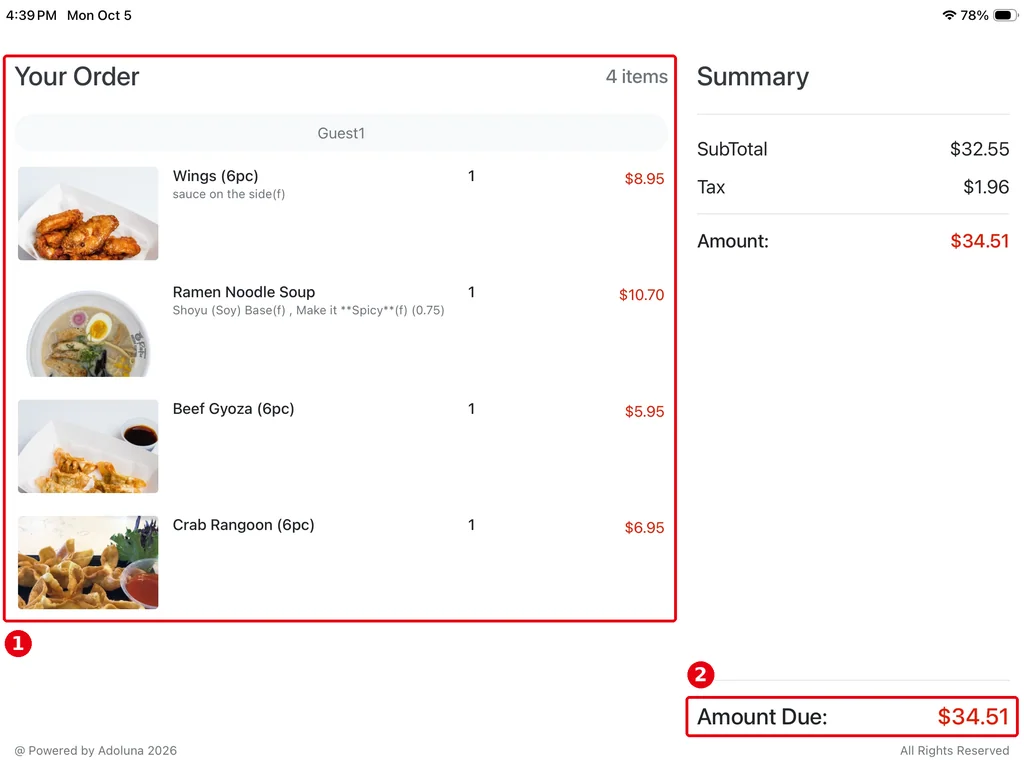
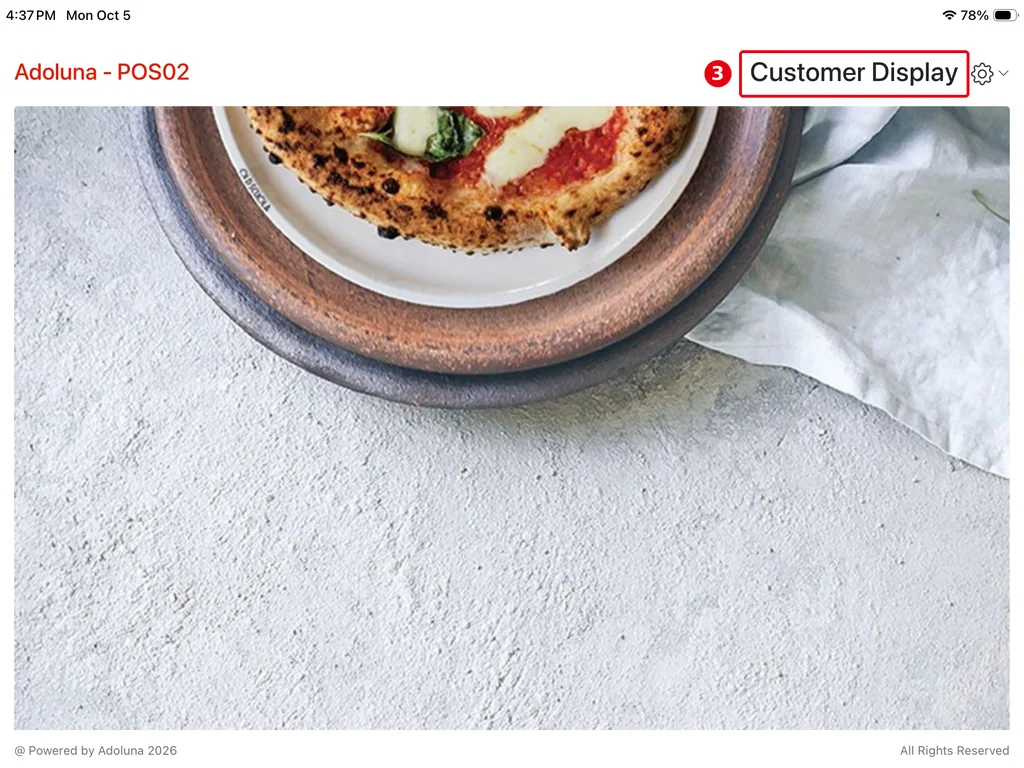
When connected normally, the customer display shows the order (① Your Order, ② Amount Due) while there is one, and the uploaded background (③ Customer Display) when idle:
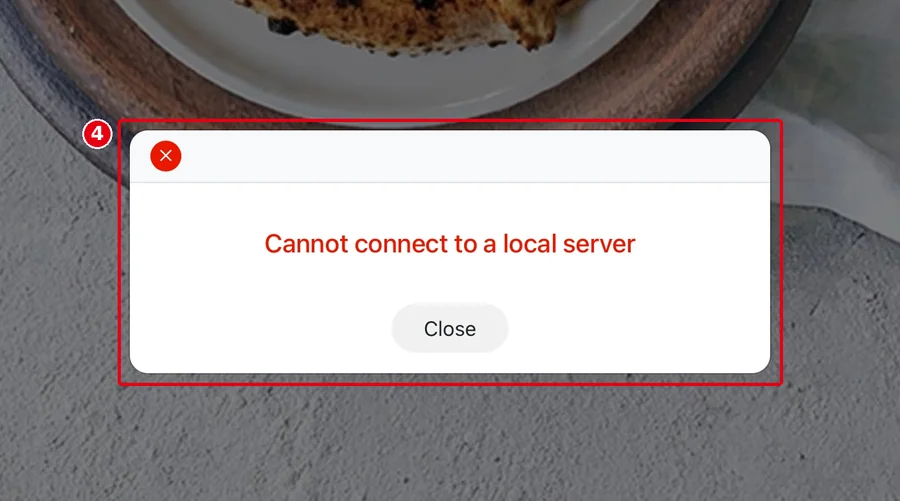
When it can’t connect, a prompt appears (④, e.g. Cannot connect to a local server); tap Close to dismiss it. With Enable Cloud Connection on and the device online, the display usually stays connected; until the connection actually fails, the idle screen can look the same as a normal idle — use the “can’t connect” screenshot below as the reference:
Steps #
1. Make sure the customer display device is bound as Customer Display (not POS). If it isn’t bound or was bound wrong, bind it again as in 3.2.3 How to bind a device. On Sunmi dual-screen devices the second screen shows it without separate binding.
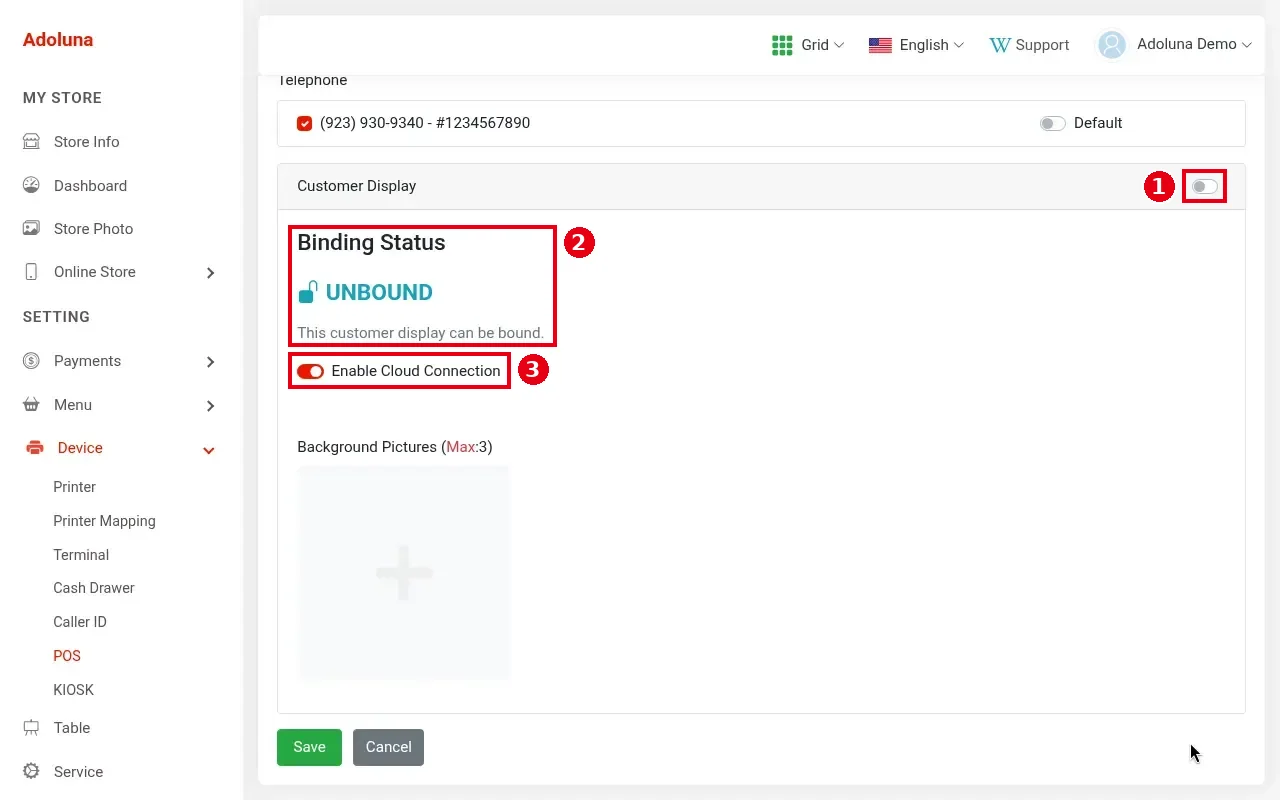
2. In the Backoffice, open that POS under Device > POS and scroll down to Customer Display (see 3.2.2 How to create POS and Kiosk devices in the Backoffice):
-
① The switch on the right must be on.
-
② Binding Status: BOUND when a display is bound. UNBOUND (“This customer display can be bound”) means no display is bound to this POS yet; bind one as in 3.2.3 How to bind a device.
-
③ Enable Cloud Connection: the cloud connection switch. With it on, the customer display connects through the cloud: it doesn’t need to be on the same network as the POS and Local Server, and doesn’t depend on the Local Server. With it off, it goes through the Local Server.
Click Save after any change.
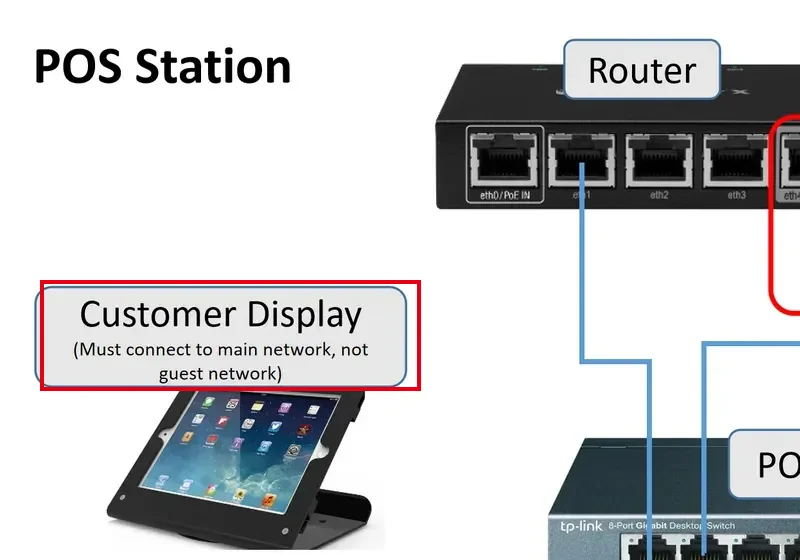
3. Check the network: the customer display must be online. With Enable Cloud Connection off, the display goes through the Local Server, so as the website diagram says it must be on the main network (not the guest network) and on the same network as the POS and Local Server.
4. With Enable Cloud Connection off, check whether the POS home screen shows a red Local Service Offline; if it does, fix that first (4.4.1 What to do when the Local Server is offline). With cloud connection on, the display doesn’t depend on the Local Server, so you can skip this step.
5. Refresh both the POS and the customer display: tap Refresh on each (see 4.4.3 How to refresh or restart the POS).
6. Still not working: on that POS’s Backoffice edit page, click the customer display’s Unbound (see 3.2.4 How to unbind or replace a device), then bind the customer display device again (see 3.2.3 How to bind a device).
7. If it still won’t connect, contact the technical team: +1 (866) 588-8868, support@adoluna.com.
Notes #
-
With VP3350 / VP3300 readers, tip and signature show on the customer display, so a disconnected display affects tipping and signing (see 1.3.10 How guests add a tip and sign on the customer display).
-
If a Sunmi dual-screen device’s second screen shows nothing, use another device as the customer display instead: unbind it (see 3.2.4 How to unbind or replace a device), then bind the new device as Customer Display (see 3.2.3 How to bind a device).


