
Purpose: Upload and organize store images (food photos, banners, wallpapers and so on) in folders. For: owners, managers, Adoluna onboarding staff.
Steps #
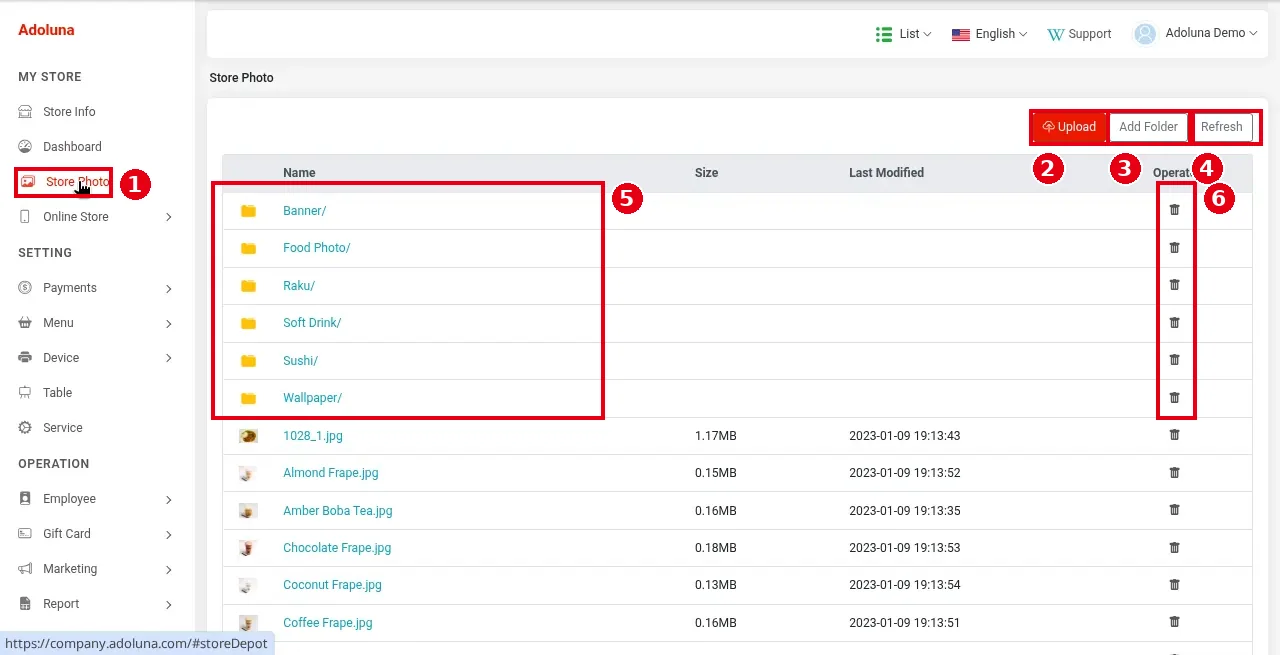
1. In the Backoffice left menu, click ① Store Photo.
2. At the top right:
-
② Upload: upload images from your computer into the current folder.
-
③ Add Folder: create a folder.
-
④ Refresh: reload the list.
3. The list’s columns are Name, Size, Last Modified and Operate. ⑤ The demo store has folders such as Banner/, Food Photo/, Raku/, Soft Drink/, Sushi/ and Wallpaper/; click a folder name to open it. Image files are listed below the folders (e.g. Almond Frape.jpg, 0.15MB). ⑥ The bin in the Operate column deletes an image or folder.
Notes / FAQ #
-
Before deleting, make sure the image isn’t used by an item, the online store or a Kiosk.
-
In the screenshot, the Banner/ folder has no delete icon.
-
Folders are image categories the merchant creates; they have no fixed purpose. The store logo is uploaded here too (see 2.2.1 How to set up store info). Supported formats are PNG, JPG and JPEG, up to 5MB per image.


