
Purpose: Explain the three order-screen buttons Save, Send and Settle. For: servers, cashiers.
Steps #
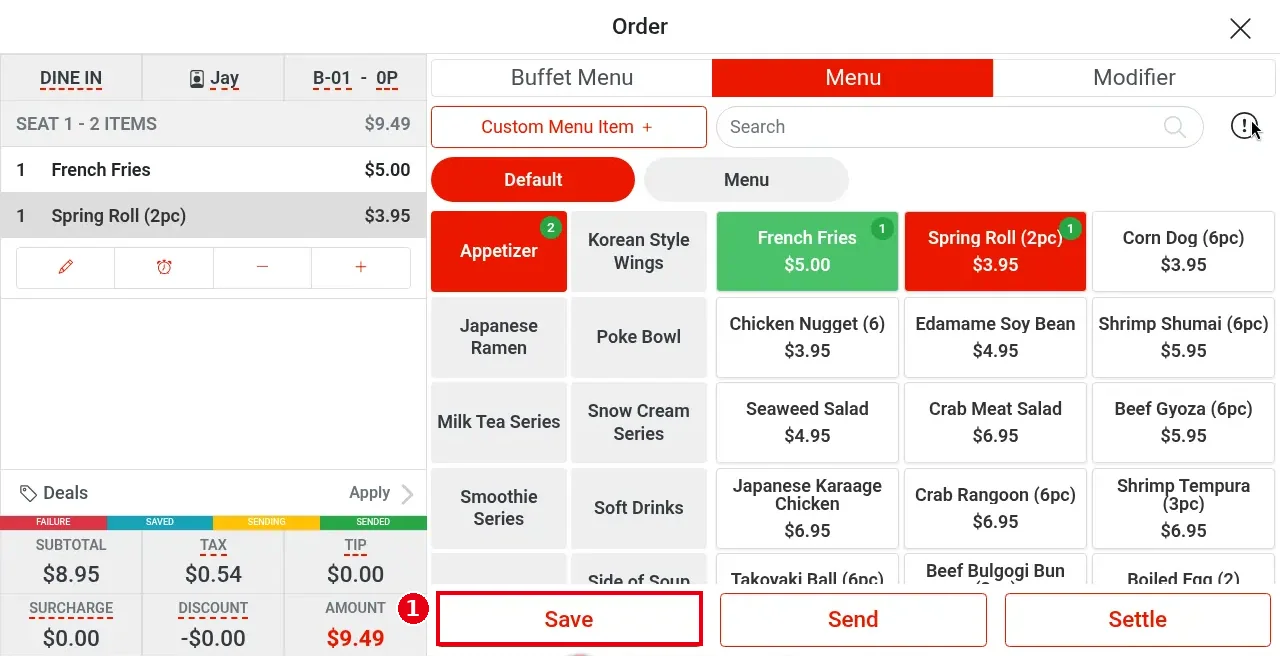
1. Save: saves the order without sending it to the kitchen. An order number is created (e.g. P0001) and you leave the order screen (dine-in returns to the table map, where the table turns green).
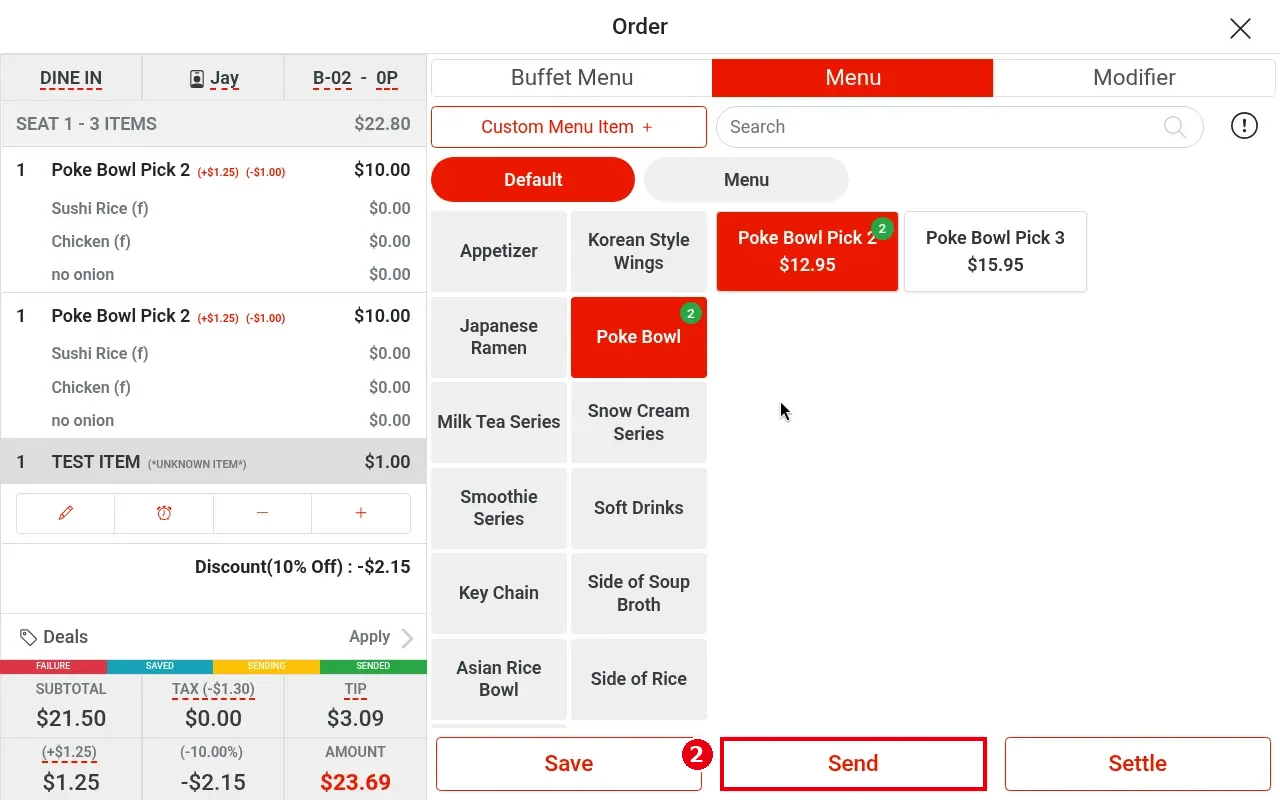
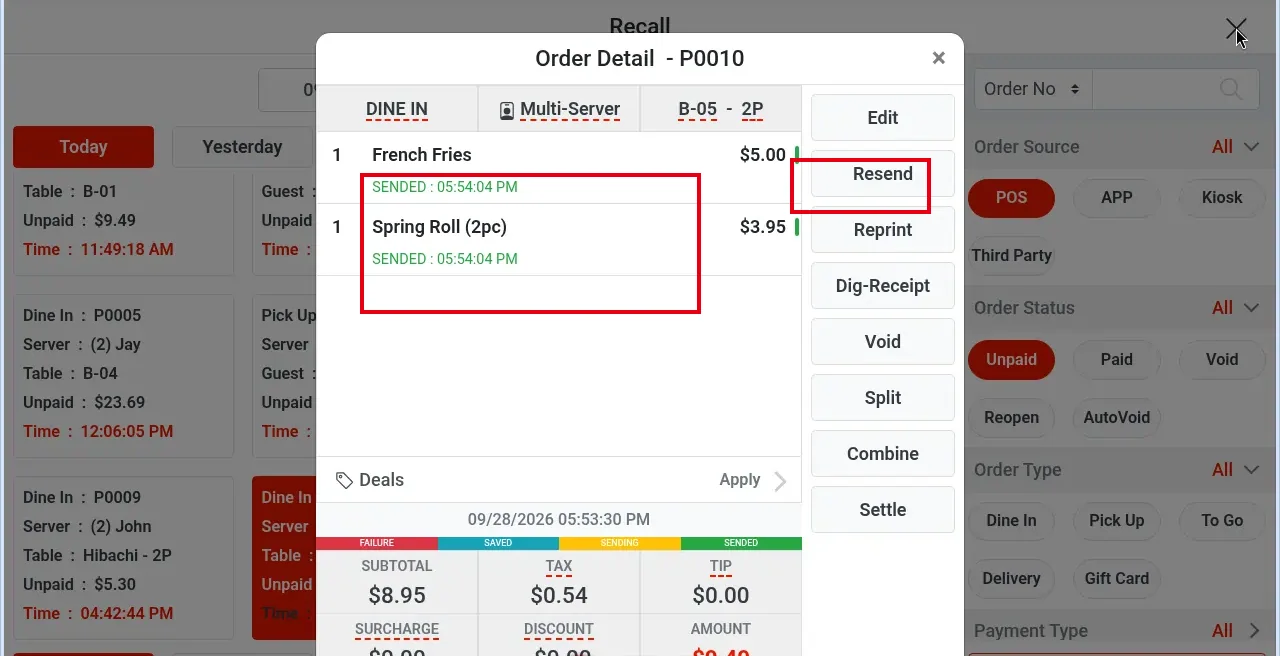
2. Send: saves the order and sends the items to the kitchen (prints kitchen tickets). Send asks Send to kitchen printer?; confirm to send. After sending, the Send button in Order Detail becomes Resend. Kitchen tickets can show the order round (Order Round: #); this is turned on or off in the back office under Service > Other.
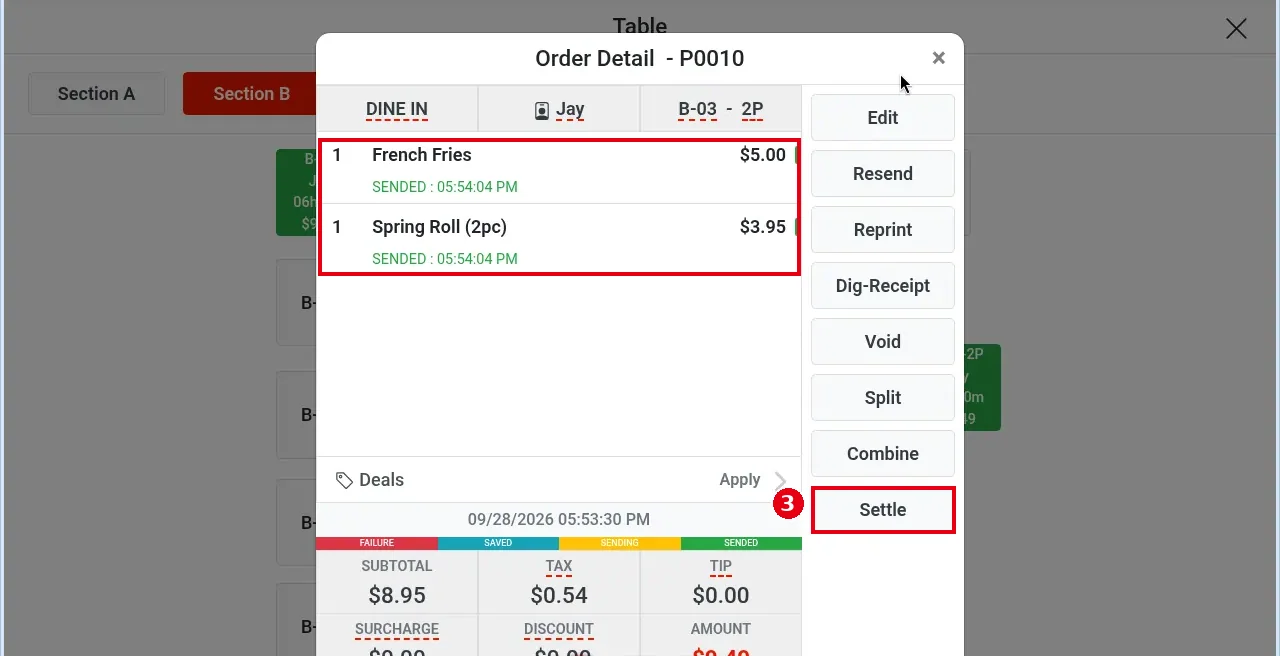
3. To take payment, tap the table on the table map (or find the order in Recall) to open Order Detail, then tap Settle. The order screen also has a Settle button. In Order Detail, sent items show their sent-to-kitchen time in green (e.g. SENDED : 05:54:04 PM).
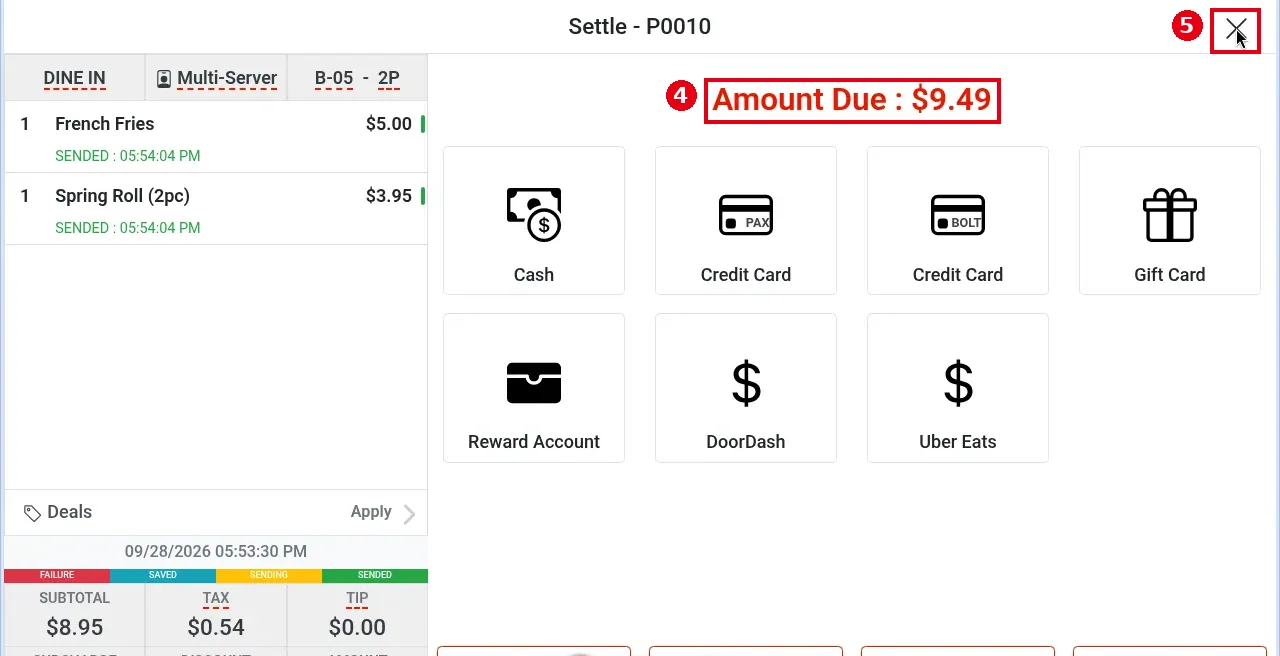
4. The Settle – P0010 screen opens: the red Amount Due is the balance (e.g. $9.49); below are the payment types Cash, Credit Card (PAX / BOLT), Gift Card, Reward Account, DoorDash, Uber Eats; at the bottom are Reprint, Split Even, Split, Combine. For payment steps see 1.3.1 How to take a cash payment, 1.3.2 How to take a credit card payment and 1.3.5 How to take a partial or split-tender payment.
5. To leave without paying, tap × at top right.
Notes / FAQ #
-
The coloured bar at the right of each item shows its status; the legend is at the bottom of the ticket: FAILURE (red), SAVED (teal), SENDING (yellow), SENDED (green).
-
After Send, each item’s sent-to-kitchen time (SENDED : time) is shown in Order Detail, whether you open it from the table map or from Recall (below: Order Detail opened from Recall); the order list on the left of the Settle screen shows it too. The ordering screen shows no times – only the coloured status bar at the right of each item and the colour legend at the bottom. Items with no print department (kitchen printer group) set up have no sent status or time.
-
The sent time is recorded only when the kitchen ticket actually prints through the local service (Local Server). When the local service is offline (Local Service Offline), the bars stay teal (SAVED) after Send and no sent time appears.
-
If items stay SAVED (teal) after Send with no error, first check that they have a kitchen print department. Only items with a kitchen print department set in the back office are sent to the kitchen; for a custom item, tick Kitchen Printer when adding it (see 1.2.8 How to add a custom menu item). Example: in demo order P0005, Poke Bowl Pick 2 had no kitchen print department in the back office, and the custom item TEST ITEM was added without choosing a kitchen department, so after Send none of the items were sent; they stayed SAVED and no error appeared.
-
One line or several for the same item: an item with modifiers (forced or regular) always shows each portion as a separate line. An item without modifiers merges into the existing line before the order is saved, and shows as a separate new line after the order has been saved and sent (each sent item’s sent-to-kitchen time is shown in Order Detail, see 1.2.12).
-
If a cash discount is turned on in the back office, the Cash button on the Settle screen shows the discounted amount, lower than Amount Due (e.g. with a 3% cash discount, an order with Amount Due $23.69 showed $23.07 on Cash). It is off in this example, so the Cash button shows just Cash. This is the restaurant’s cash payment discount set in the back office, not an order discount; the tip portion is not included when the cash payment discount is calculated.
-
Rule: after changing an order you must tap Save. Tapping × on the order screen asks Exit?; if you confirm, unsaved changes (e.g. table or server changes) are lost.
-
When an order has a pickup time, the kitchen ticket shows it (updated 2026-10-05).
-
Order Detail buttons: Edit, Send (becomes Resend after sending), Reprint, Dig-Receipt, Void, Split, Combine, Settle (payment, splitting, voids: see sections 1.3 and 1.4).


