
Purpose: Keep one category at the top (sticky top), or use a virtual category to show items from other categories together (e.g. “New Items”). For: owners, managers.
Before you start: there’s no separate pin button in the Backoffice, only the Sticky Top for Category switch on the category edit page. Only one category can be sticky, and it can be combined with a virtual category: for example, create a virtual category New Item and add new items from other categories to it to promote them together. For the other category settings, see 2.3.4 How to create and sort menu categories.
Steps #
1. Sticky top: in Menu > Menu, click the pencil icon on the category card, turn on ① Sticky Top for Category in the bottom part of the form, and click Save. Turn the switch off to undo it.

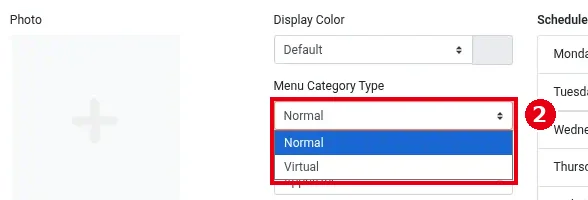
2. To create a virtual category, click + Add Menu Category, choose Virtual under ② Menu Category Type, and fill in the name and other fields. The type can only be chosen when creating the category; it can’t be changed later.
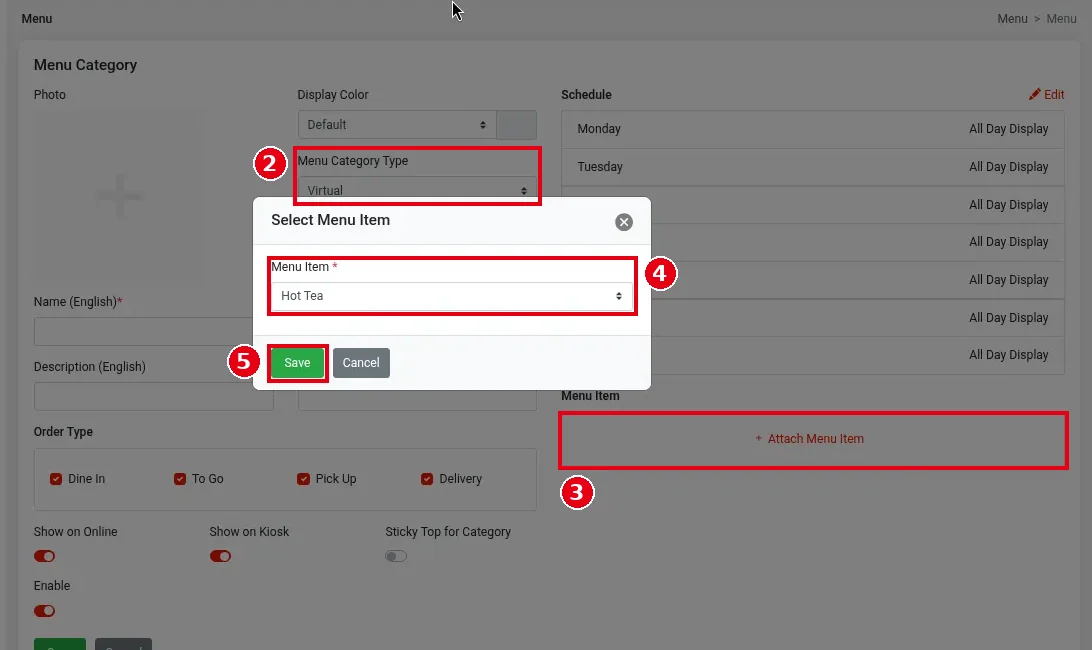
3. Adding items to the virtual category: as soon as you choose Virtual, a ③ + Attach Menu Item button appears under Menu Item in the right column of the form. Click it to open the Select Menu Item window, choose an item from another category in dropdown ④ Menu Item*, and click ⑤ Save (or Cancel); the dropdown takes one item at a time. When everything is filled in, click Save at the bottom of the form to save the category.
Notes / FAQ #
-
Sticky top works on the POS, the Kiosk, online ordering and Scan to Order. Turning it on for a second category replaces the first one.
-
To reorder categories by hand, drag ≡; to sort alphabetically, use ⇅ Sort (see 2.3.4 How to create and sort menu categories).


