
Purpose: When a guest calls to order, use Caller ID to see the caller’s number and customer details, then place a pick-up or delivery order for them. For: staff who answer the phone, managers. Hardware needed: a caller ID device.
Before you start: The caller ID device must be connected and set up in the Backoffice first (see 3.5.4 How to set up Caller ID). Without the device, the Caller ID screen has no call records. The callers’ numbers and names are blurred in the screenshots.
Steps #
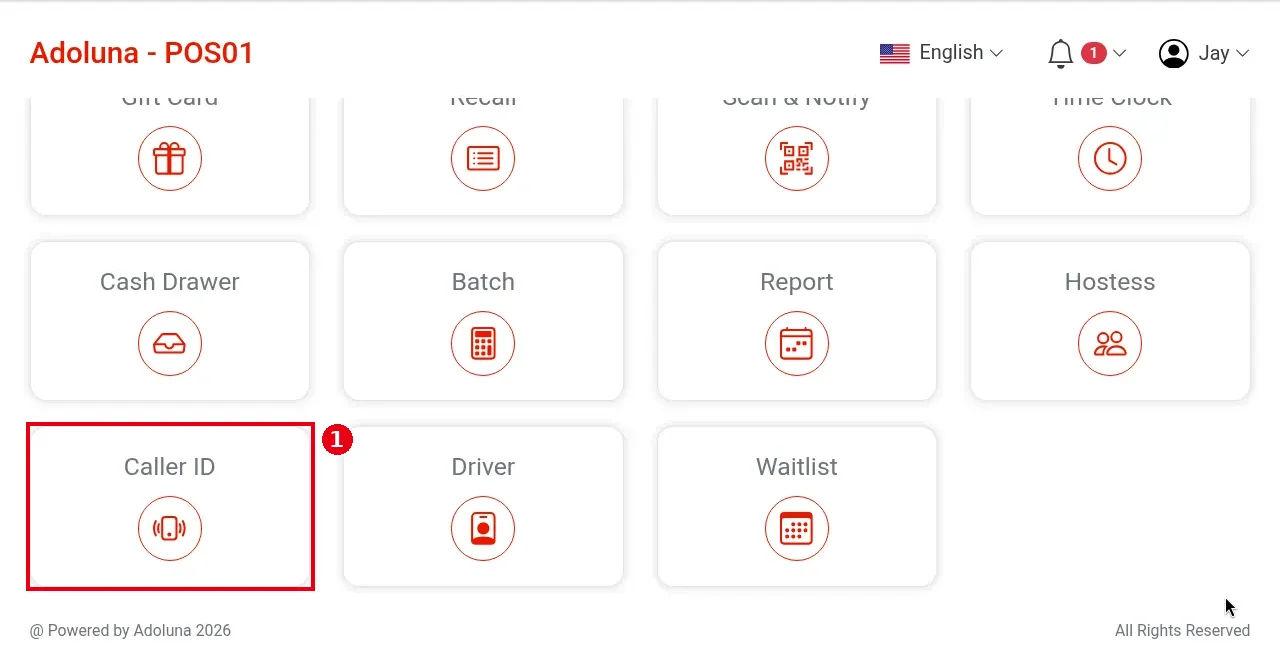
1. On the POS home screen tap ① Caller ID (on a small screen it’s in the last row; scroll down).
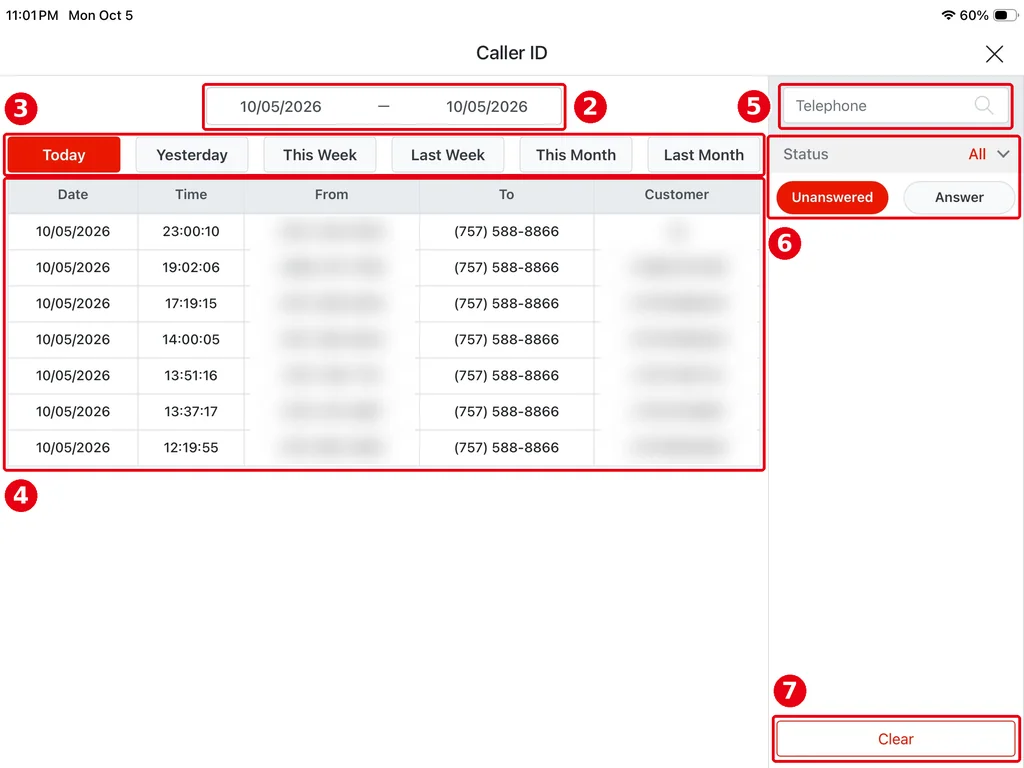
2. The Caller ID screen (the Caller ID Center, opened from the Caller ID module on the POS home screen) opens:
-
② the date range; ③ quick picks Today, Yesterday, This Week, Last Week, This Month, Last Month.
-
④ the call list: Date, Time, From (caller’s number), To (store number), Customer. For a caller with no customer record, Customer shows the caller’s number (starting with +1).
-
⑤ Telephone: find calls by phone number.
-
⑥ the Status filter buttons: All (default), Unanswered and Answer. The button you tap is highlighted and the list is filtered by that status.
-
⑦ Clear: reset the search.
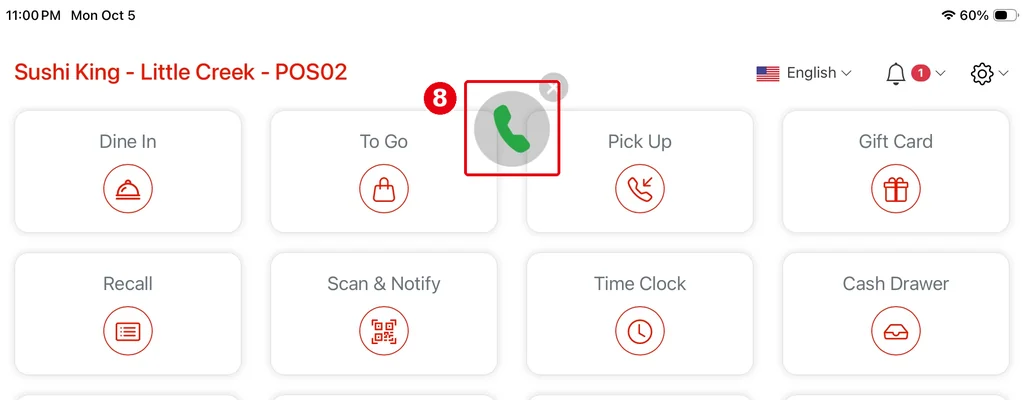
3. When a guest calls, the POS shows a call alert automatically:
-
A green phone icon ⑧ appears at the top of the POS home screen (if you don’t close it, it disappears automatically after 30 seconds; you can also close it with the × at its top right). Tap ⑧ to open the Caller ID window.
-
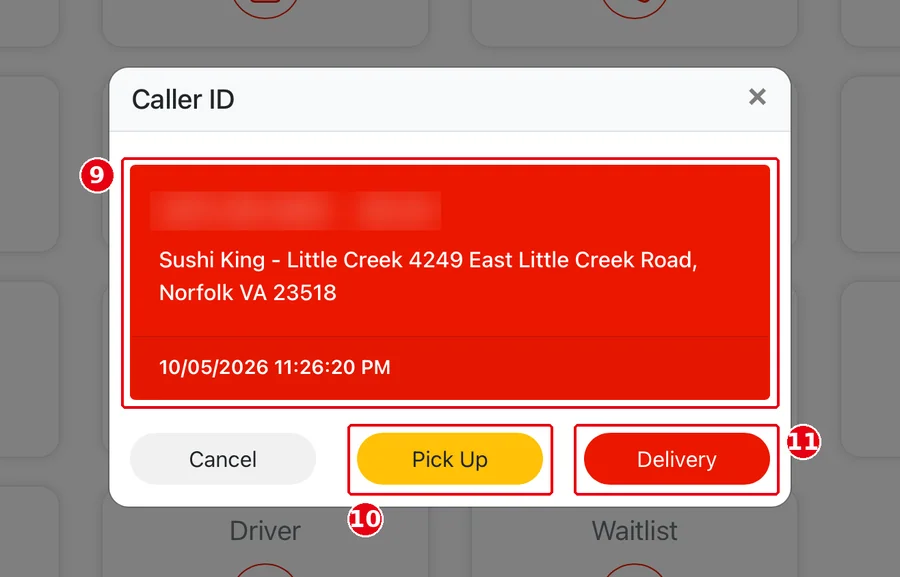
The Caller ID window: ⑨ shows the caller’s number, customer name, address and call time (the number and name are blurred in the screenshot). At the bottom are three buttons: Cancel, ⑩ Pick Up and ⑪ Delivery; the Delivery button only shows when the store has the Delivery service turned on. Tap Cancel if you don’t need an order.
-
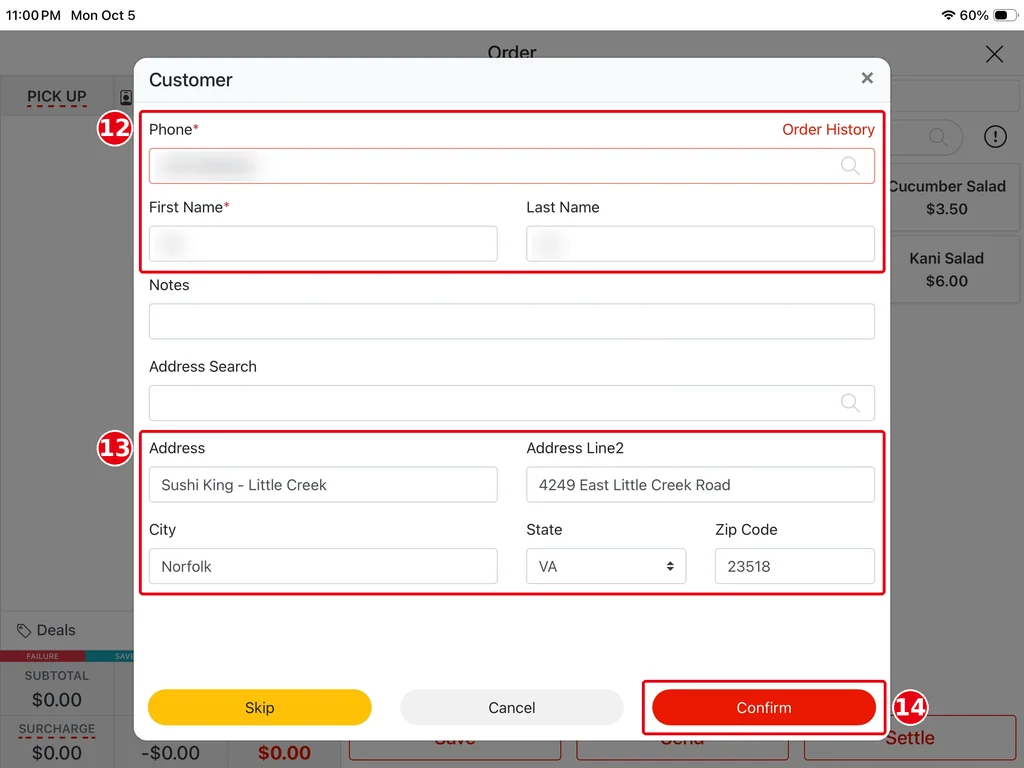
Tap ⑩ Pick Up and the order screen opens with the Customer window, and the customer details are filled in: ⑫ Phone (the caller’s number), First Name, Last Name; ⑬ the address. Check them and tap ⑭ Confirm. Order History at the top right shows this guest’s past orders.
-
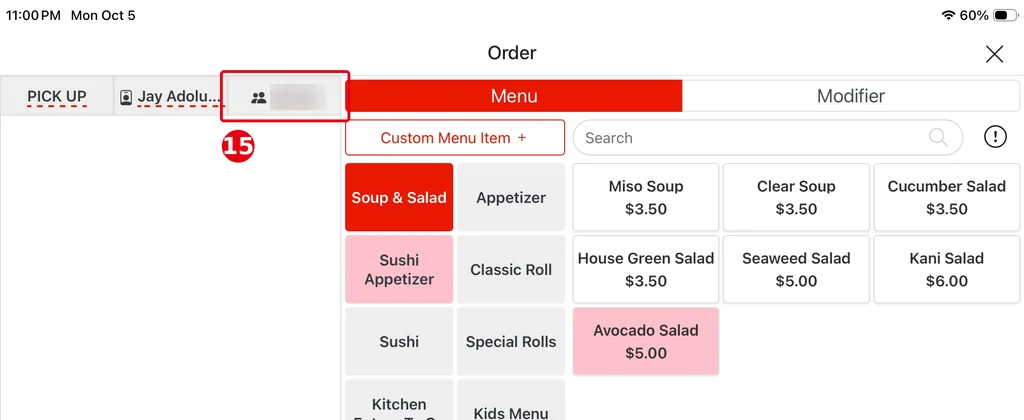
Back on the order screen, the order type is PICK UP and ⑮ the customer name shows at the top. Take the order as usual (see 1.2.3 How to take a phone pick-up order).
-
Tap ⑪ Delivery instead to open a delivery order for this guest with the customer details filled in; check the delivery address, then take the order (see 1.2.4 How to take a delivery order).
-
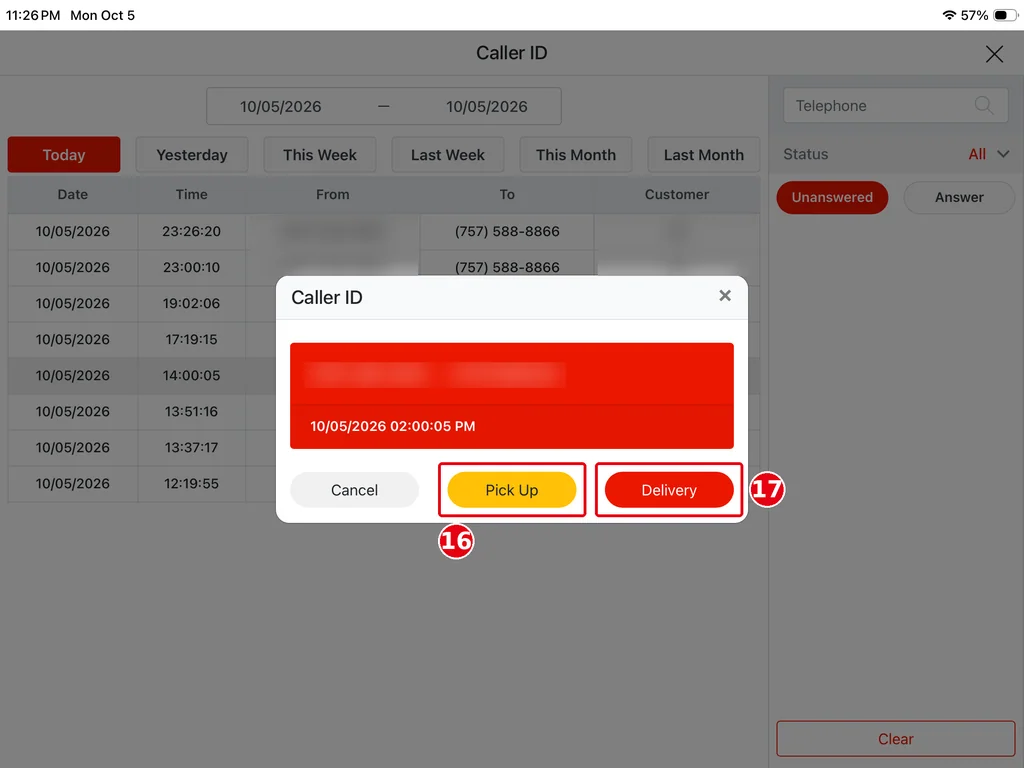
You can also start an order from the Caller ID screen: tap a call in the list (the row turns grey), and the same Caller ID window opens; tap ⑯ Pick Up for a pick-up order or ⑰ Delivery for a delivery order. For a caller with no customer record, the window shows only the number.
-
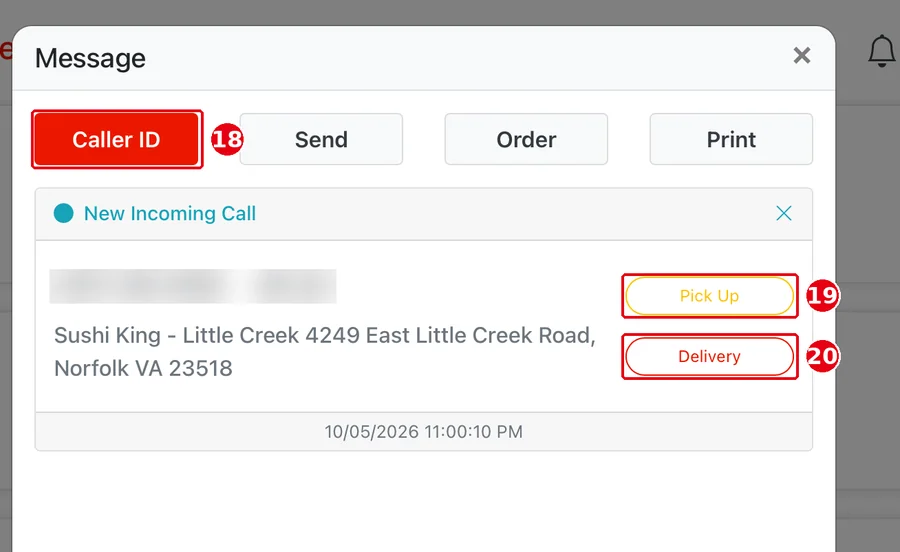
Calls are also logged in the Notification Center (the bell at the top right of the home screen) under ⑱ the Caller ID tab as New Incoming Call; you can tap ⑲ Pick Up or ⑳ Delivery there too (see 1.1.4 How to check the Notification Center).
4. Without the call alert, you can also place the order by hand:
-
Pick-up order: tap Pick Up on the home screen, enter the caller’s number in the Customer window, choose or create the customer and take the order (see 1.2.3 How to take a phone pick-up order).
-
Delivery order: tap Delivery on the home screen, enter the caller’s number and address, and take the order (see 1.2.4 How to take a delivery order).
Notes / FAQ #
-
One phone line can show on several POS stations; tick the lines for each POS under Device > POS in the Backoffice (see 3.5.4 How to set up Caller ID).
-
The Customer in the call list comes from customer records: guests registered on the POS before, or customers under Marketing > Customer in the Backoffice (see 2.12.1 How to manage customer records).
-
If no calls show up, test by calling the store from a mobile phone. If there’s still no record, check the device connection as in 3.5.4 How to set up Caller ID, or contact the technical team: +1 (866) 588-8868, support@adoluna.com (see 4.2.1 What to do when a printer isn’t printing).


