
Purpose: Choose the home screen layout (default or custom) for each POS. For: owners, managers, Adoluna onboarding staff.
Before you start: The home screen layout is set per POS, on that POS’s device edit page. For the default home screen buttons, see 1.1.2 How to find your way around the POS home screen.
Steps #
1. In the Backoffice left menu, click Device > ① POS, then click the pencil for the POS you want in the POS list to open its edit page (for the POS list, see 3.2.2 How to create POS and Kiosk devices in the Backoffice).
2. Find ② Home Page Layout, Default in the screenshot.
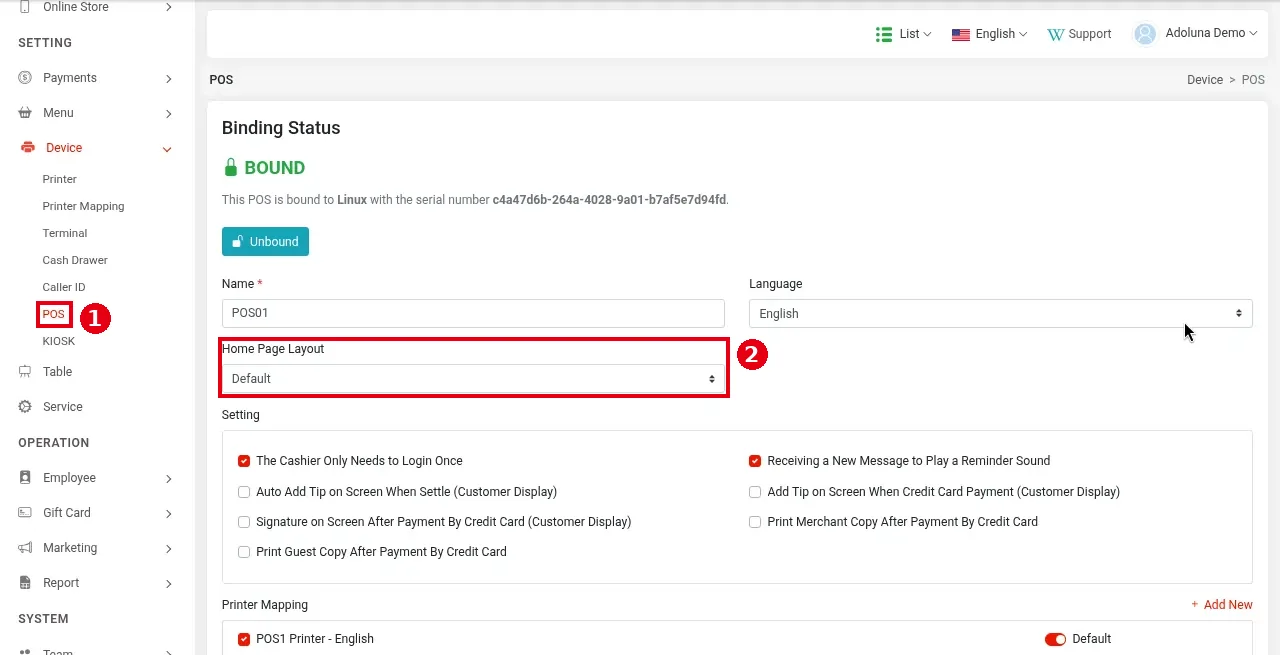
3. Open the dropdown and ③ choose Default or Custom. Click Save at the bottom of the page.
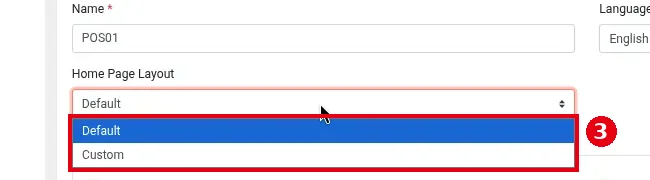
4. When Custom is selected, its settings appear below:
-
④ Margin Setting: the margins around the home screen, entered as Top, Right, Bottom and Left in pixels (px).
-
⑤ Buttons Per Row: how many buttons per row, Auto or a number.
-
⑥ The home screen buttons: Dine In, To Go, Pick Up, Delivery, Gift Card, Recall, Driver, Time Clock, Cash Drawer, Batch, Report, Hostess, Caller, Scan & Notify and Waitlist. Under each button, drag ⑦ ≡ on the left to change the order, and use ⑧ the switch on the right to show or hide the button on the home screen.
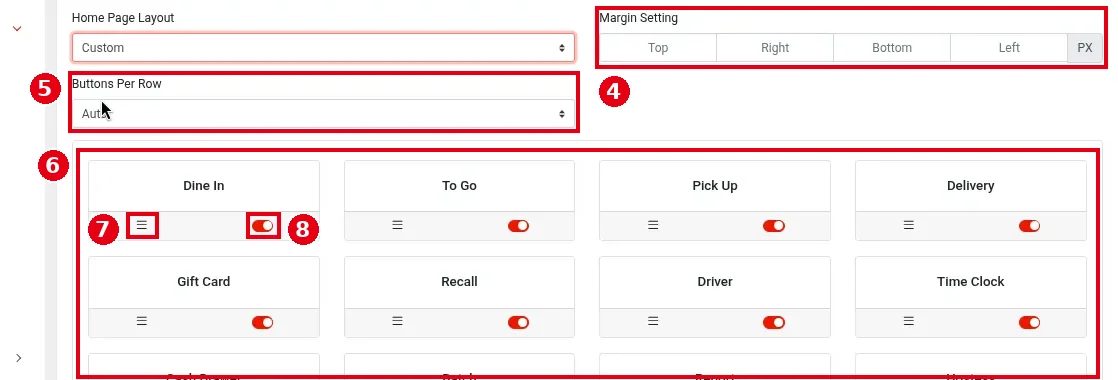
Scroll down for the remaining buttons (Caller, Scan & Notify, Waitlist). Click Save at the bottom of the page when done.

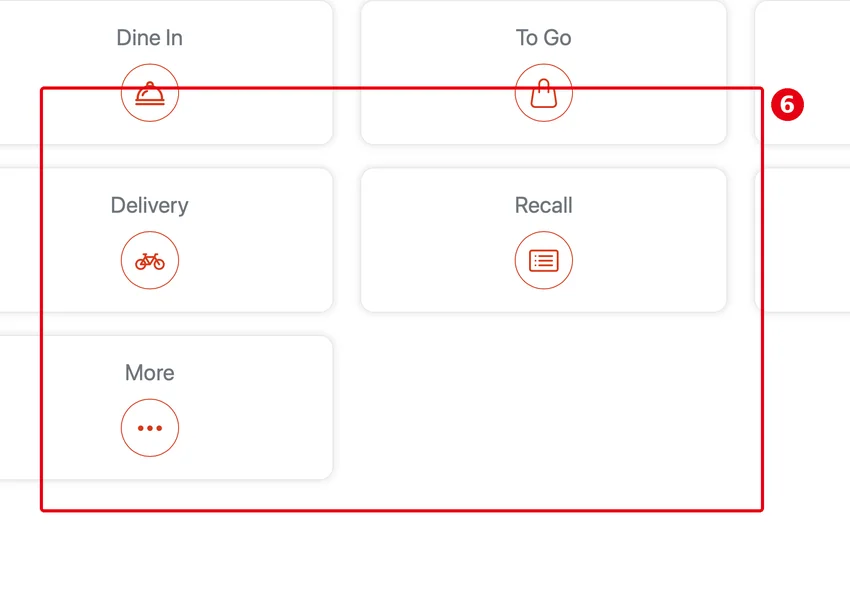
Custom settings example (④ Buttons Per Row, ⑤ button toggles):

After saving, that POS home screen follows the custom layout (⑥ e.g. 3 buttons per row, only enabled functions, and possibly More).
Notes / FAQ #
-
Other settings on the same page: Language (this POS’s default language, see 1.1.3 How to change the POS display language), the Setting options (such as The Cashier Only Needs to Login Once, and tip and signature on the customer display, see 1.3.10 How guests add a tip and sign on the customer display, 3.5.1 How to set up the customer display), Printer Mapping (see 3.3.3 How to set up printer mapping and route items to kitchen printers) and Terminal (see 3.4.1 How to add a PAX terminal).
-
To hide a button from some employees only, change Navigation in their position’s permissions instead, see 2.8.1 How to create positions and set permissions, 4.5.2 Why can’t an employee see a feature or report?.
-
After changing it, refresh that POS to check (see 4.4.3 How to refresh or restart the POS).


