
Purpose: Seat a dine-in party at a table and take their order. For: servers.
Steps #
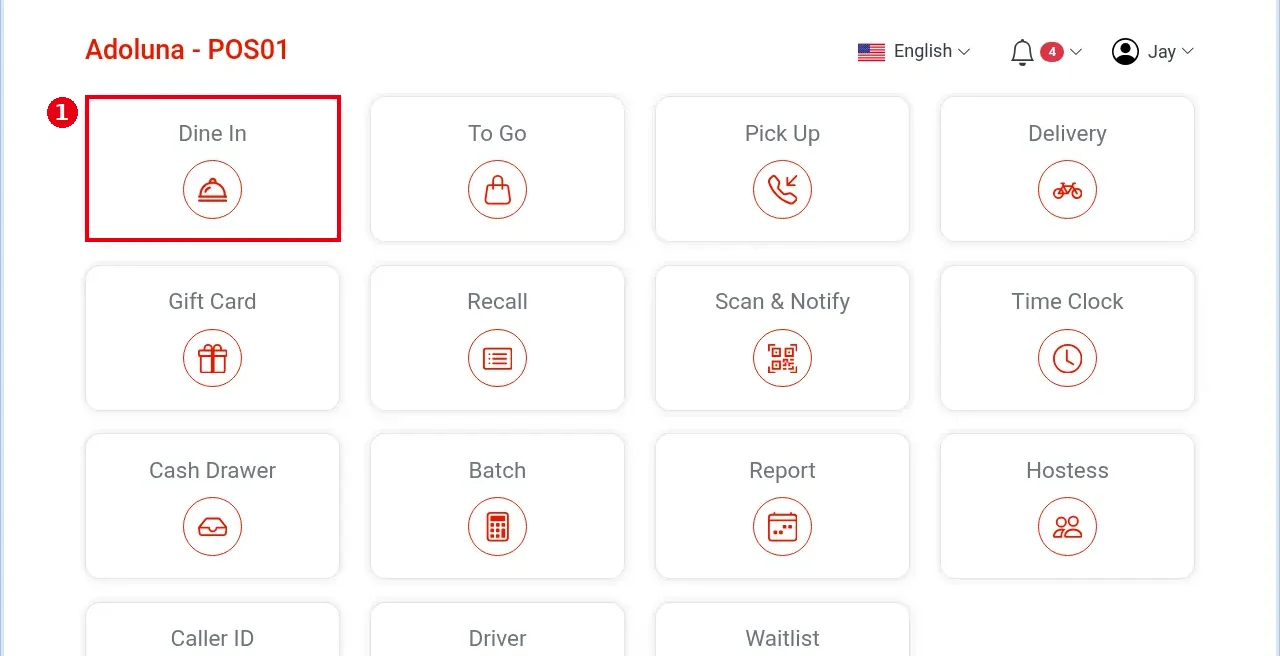
1. On the home screen tap Dine In (log in first if asked, see 1.1.1).
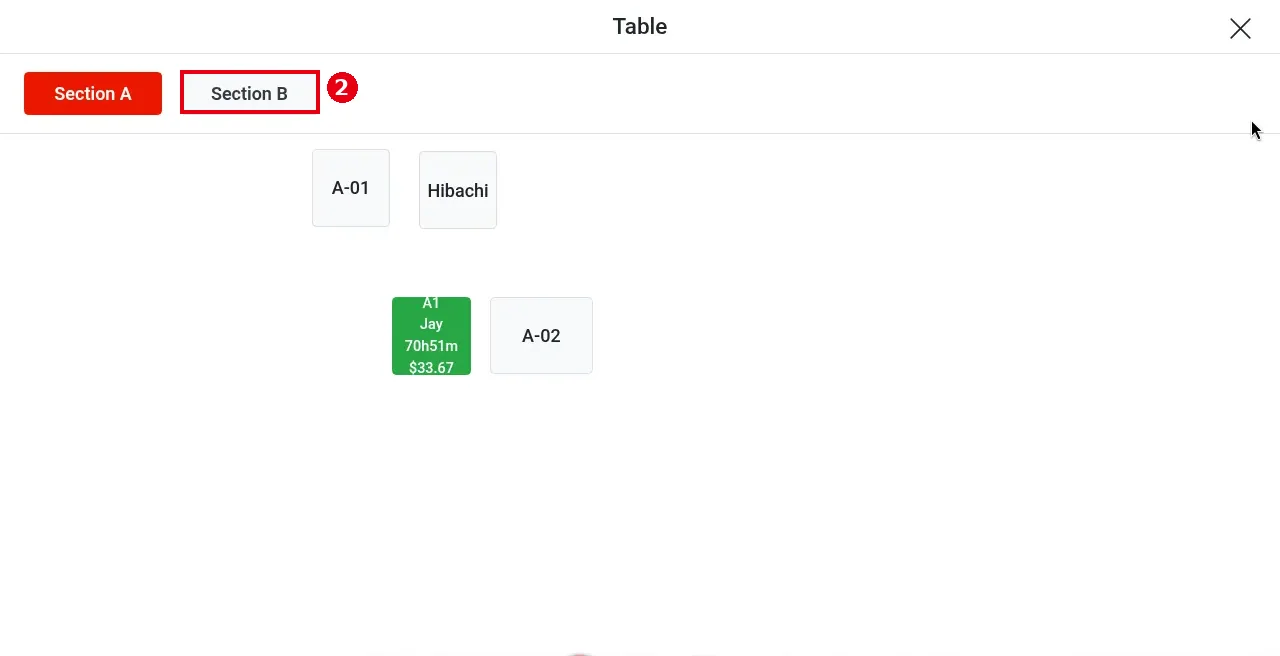
2. On the Table screen tap a section tab (e.g. Section B). The current section tab is red.
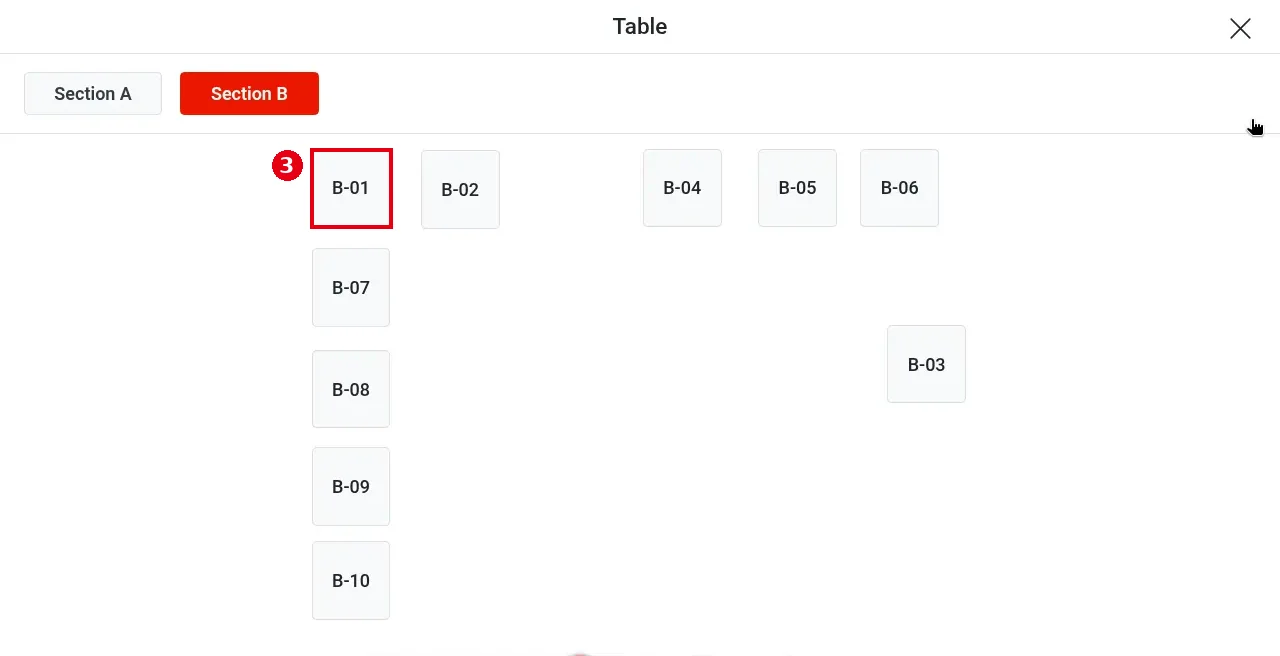
3. Tap a free table (white/gray, e.g. B-01) to open the order screen.
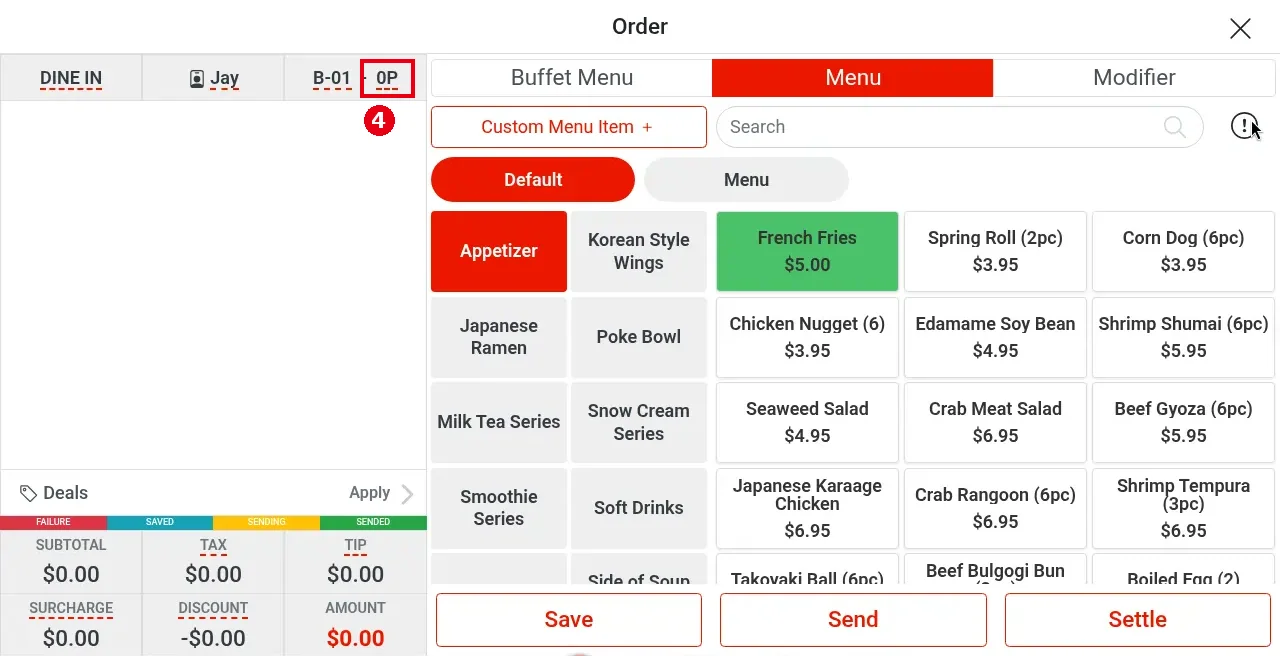
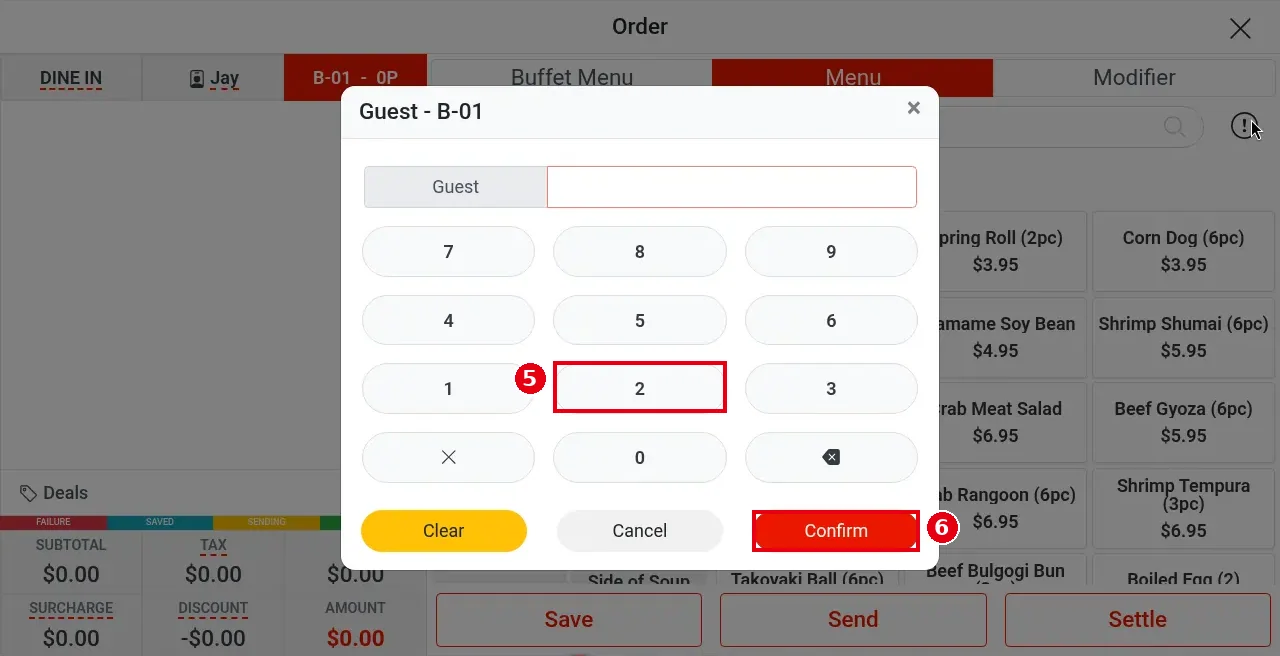
4. (Optional) Tap the guest count after the table name in the header (e.g. 0P in B-01 – 0P) to open the Guest window and enter the number of guests.
5. Type the number of guests (e.g. 2).
6. Tap Confirm. The header shows the table and the guest count you set (below, e.g. B-03 – 2P).
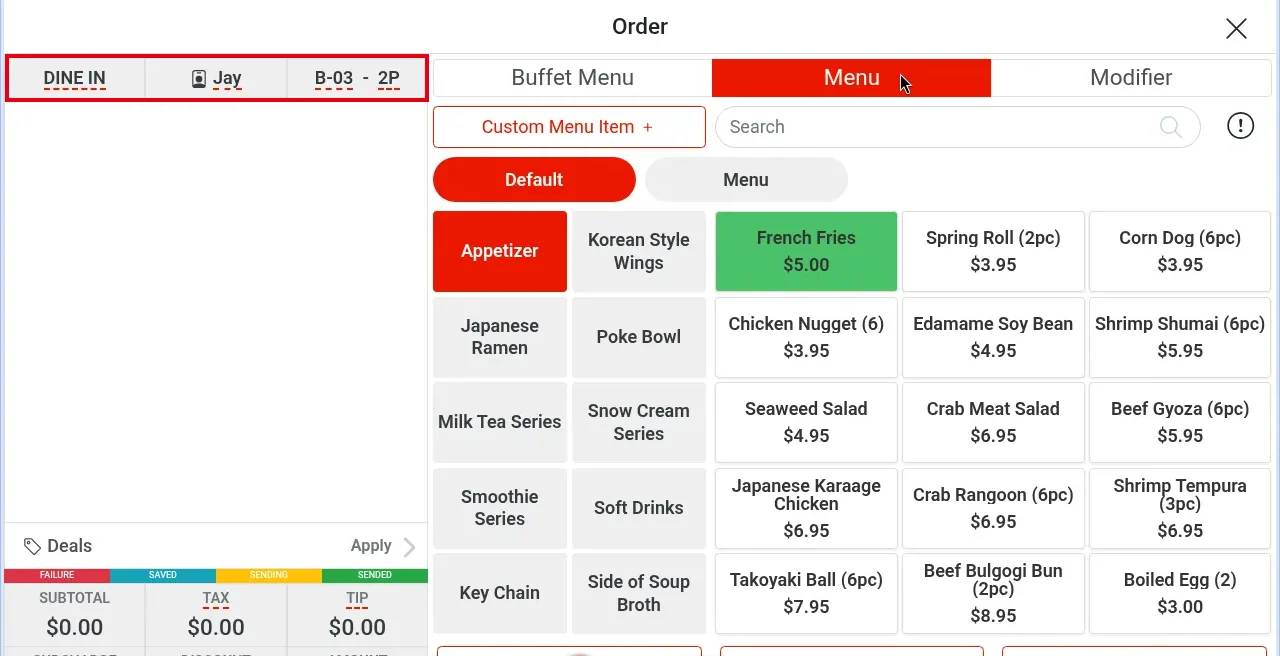
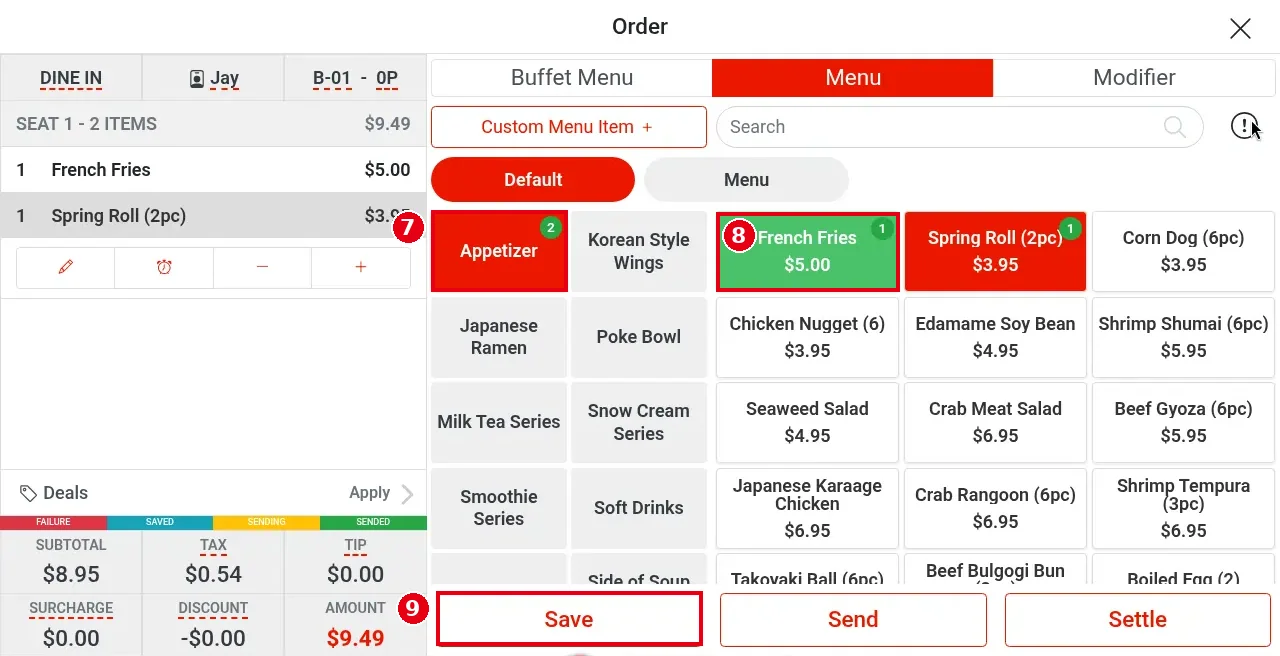
7. On the Menu tab, pick a category on the left (e.g. Appetizer).
8. Tap items to add them (e.g. French Fries, Spring Roll (2pc)). Ordered items and their category show a green count badge; the ticket appears on the left.
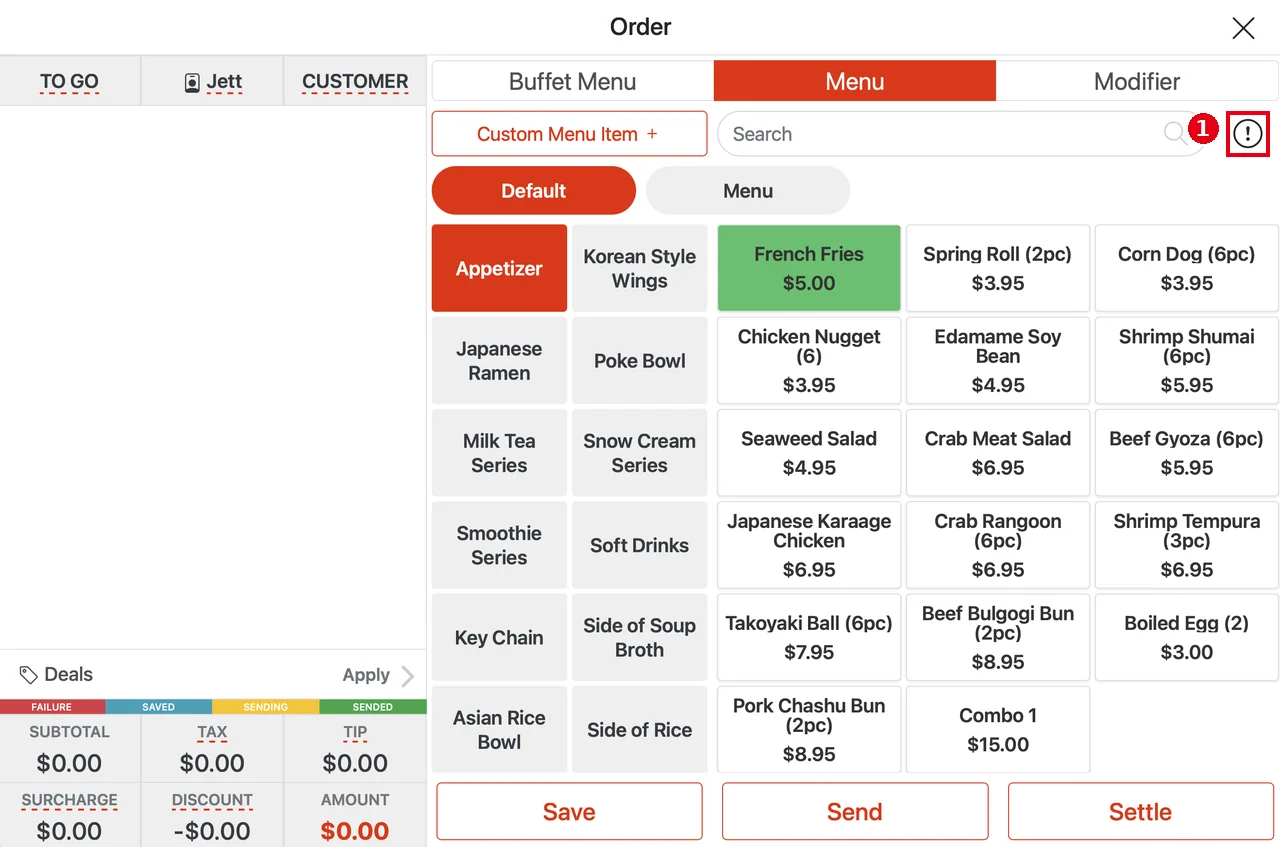
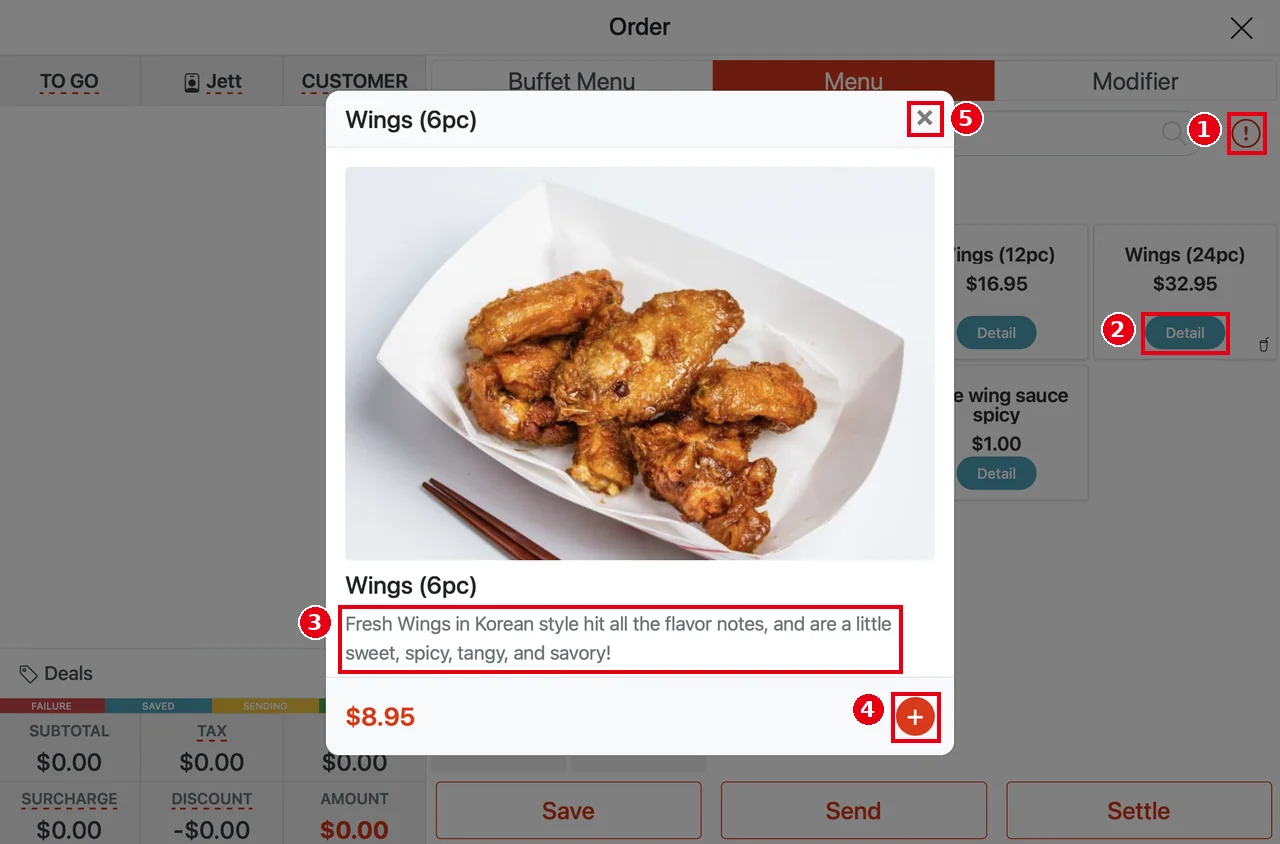
View dish photos and details (updated 2026-10-05): Tapping a dish tile still adds it to the order, as before. To see a dish’s photo and description first, tap the ① i icon to the right of the Search bar (it turns red when on); a ② Detail button appears on each dish tile. Tap Detail to open the dish window with a large photo, the name, ③ the dish description (shown only when one has been entered for the item in the Backoffice) and the price. Tap the red ④ + to add the dish to the order, or ⑤ × to close the window.
9. Tap Save to save the order (to also fire it to the kitchen, tap Send, see 1.2.12).
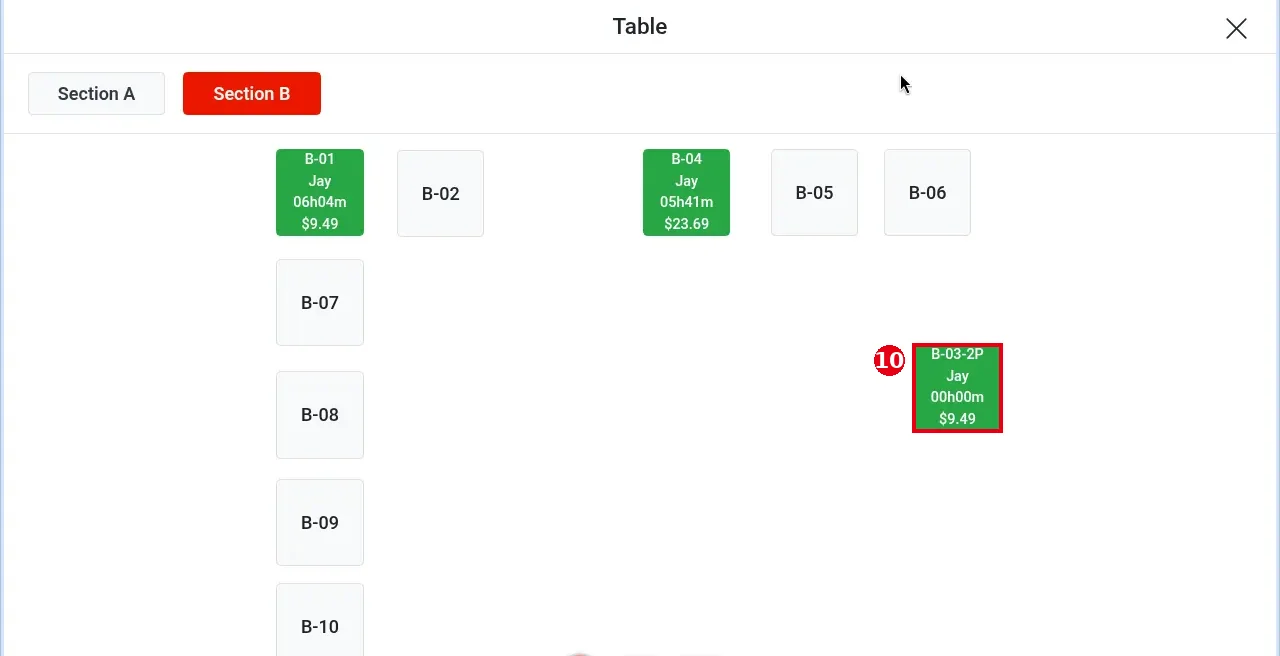
10. You return to the Table screen. The table turns green and shows the table and guest count, server, elapsed time and amount (e.g. B-03-2P / Jay / 00h00m / $9.49).
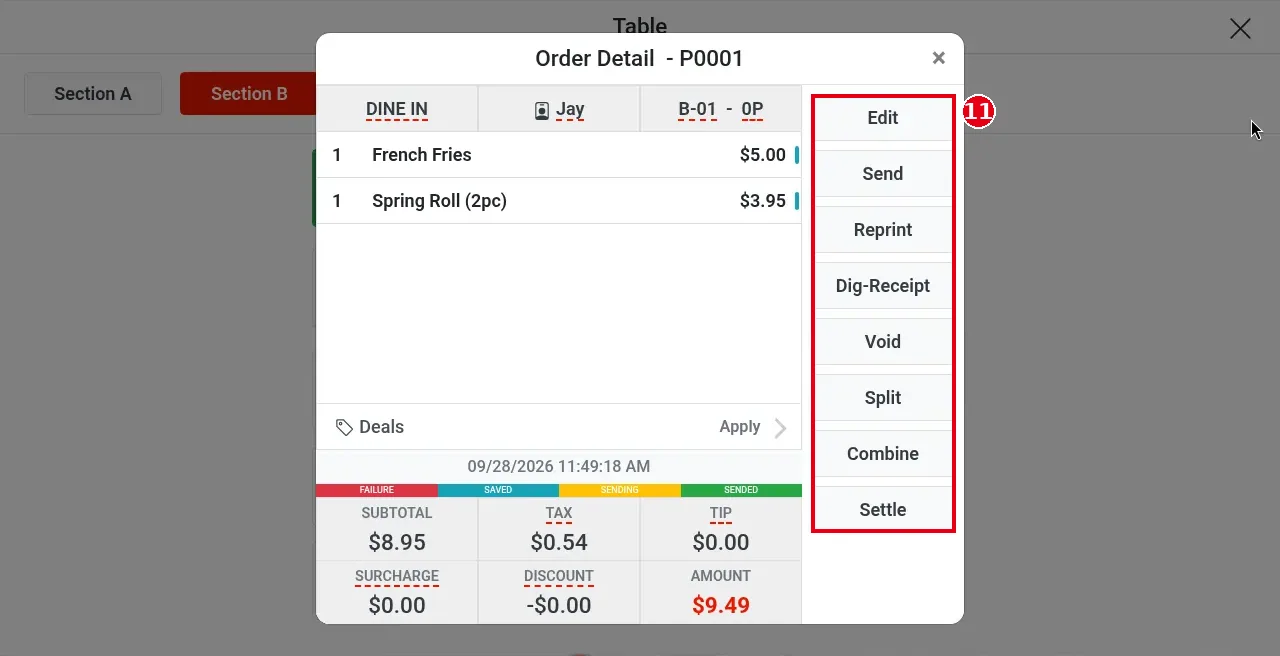
11. Tap the green table to open Order Detail (order number e.g. P0001). The right side has Edit, Send, Reprint, Dig-Receipt, Void, Split, Combine, Settle. The letter at the start of the order number shows where the order came from: P = POS orders entered by staff, K = Kiosk, A = Adoluna Online Order, T = third-party platforms. Numbers restart from 1 every day.
Notes / FAQ #
-
Table colours: free tables were white/gray, and the table we opened ourselves was green (server, time, amount); the current section tab is red. There is no colour legend on screen. The colour rules are the same as on the Hostess screen (see 1.7.1 How to check table status and mark tables clean): white = free; yellow = needs cleaning; red = guests seated at another server’s table; green = guests seated at your own table (the logged-in server’s).
-
Tapping a table does not ask for the guest count; tap the guest count in the header (e.g. 0P) to open the Guest window.
-
One line or several for the same item: an item with modifiers (forced or regular) always shows each portion as a separate line. An item without modifiers merges into the existing line before the order is saved, and shows as a separate new line after the order has been saved and sent (each sent item’s sent-to-kitchen time is shown in Order Detail, see 1.2.12).
-
The three header cells are order type (DINE IN), server (Jay), and table/guests; tap them to change (see 1.2.13). In the third cell, tapping the guest count (e.g. 2P) opens the Guest window; tapping the table name opens the window titled Table.
-
On the order screen, footer items with a red dashed underline (TAX, TIP, SURCHARGE, DISCOUNT) can be tapped to open that function; items without the underline (SUBTOTAL, AMOUNT) only show amounts. See 1.2.10 and 1.2.11.
-
The order screen has three tabs: Buffet Menu, Menu, Modifier; under Menu there are two buttons, Default and Menu. These are menu names: the system can have several menus with different names, so the buttons vary by store.


