
Purpose: Turn on the waitlist and set up the notification texts so guests can add themselves at a self check-in kiosk by the door. For: Adoluna onboarding staff, store managers. Hardware: a tablet or Kiosk at the entrance.
Steps #
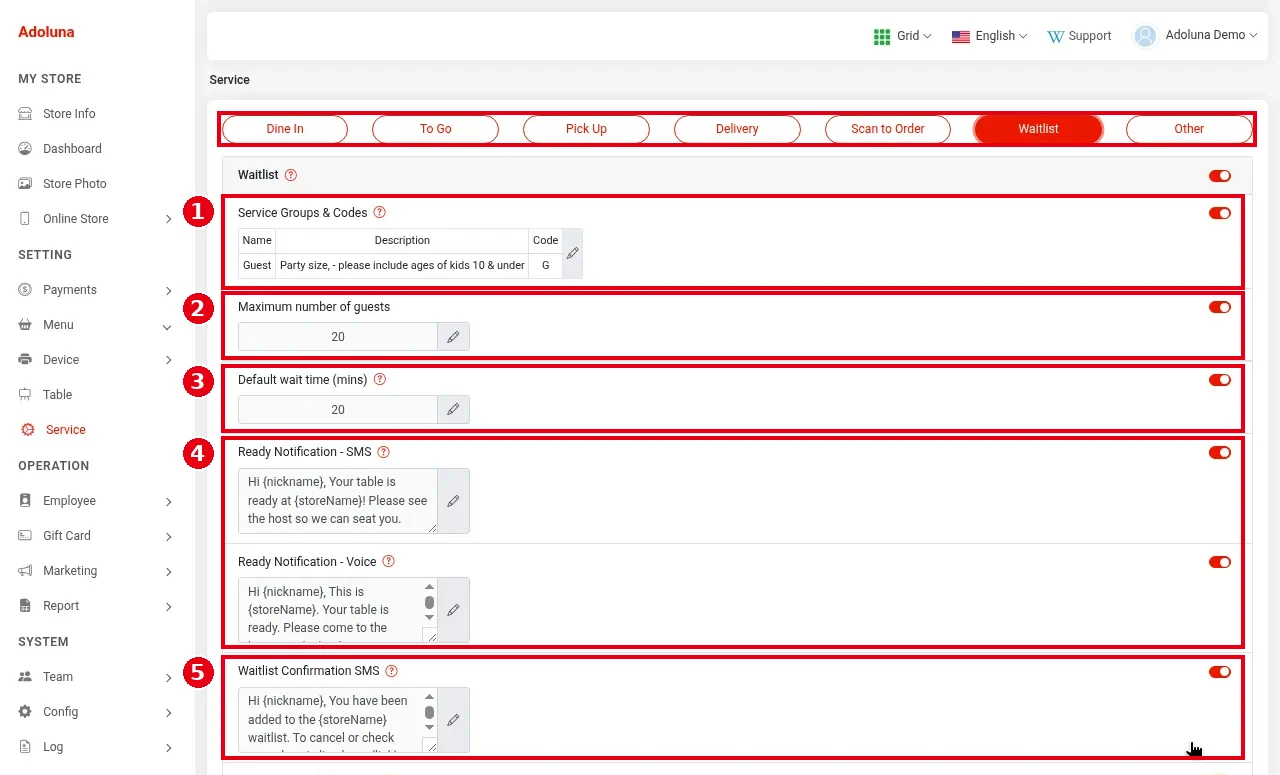
1. In the Backoffice left menu, click Service, choose the Waitlist tab at the top, turn on the Waitlist switch, then set:
-
① Service Groups & Codes: party size groups. The demo store has one group: name Guest, description “Party size, – please include ages of kids 10 & under”, code G. You can split by adults, kids, etc.; the list then shows sizes like “A-2 K-2”.
-
② Maximum number of guests: the most guests allowed on the waitlist (the total across all parties); 20 in the screenshot. The cap only applies to guest self check-in; staff adding parties on the POS aren’t limited and get no warning (see 1.7.2 How to add a party to the waitlist).
-
③ Default wait time (mins): the default quoted wait; 20 minutes in the screenshot.
-
④ Ready Notification – SMS, Ready Notification – Voice: the text and voice templates for when the table is ready, e.g. “Hi {nickname}, Your table is ready at {storeName}! Please see the host so we can seat you.” {nickname} and {storeName} are replaced with the guest’s name and the store name.
-
⑤ Waitlist Confirmation SMS: the text sent automatically after a party is added (on in the screenshot). The template starts “Hi {nickname}, You have been added to the {storeName} waitlist.” and includes links to cancel and check their place in line. Below it is Waitlist Cancellation SMS (sent when an entry is cancelled).
Each item has a switch on the right; click the pencil icon to edit it. After editing a template you must Save, or the change won’t take effect.
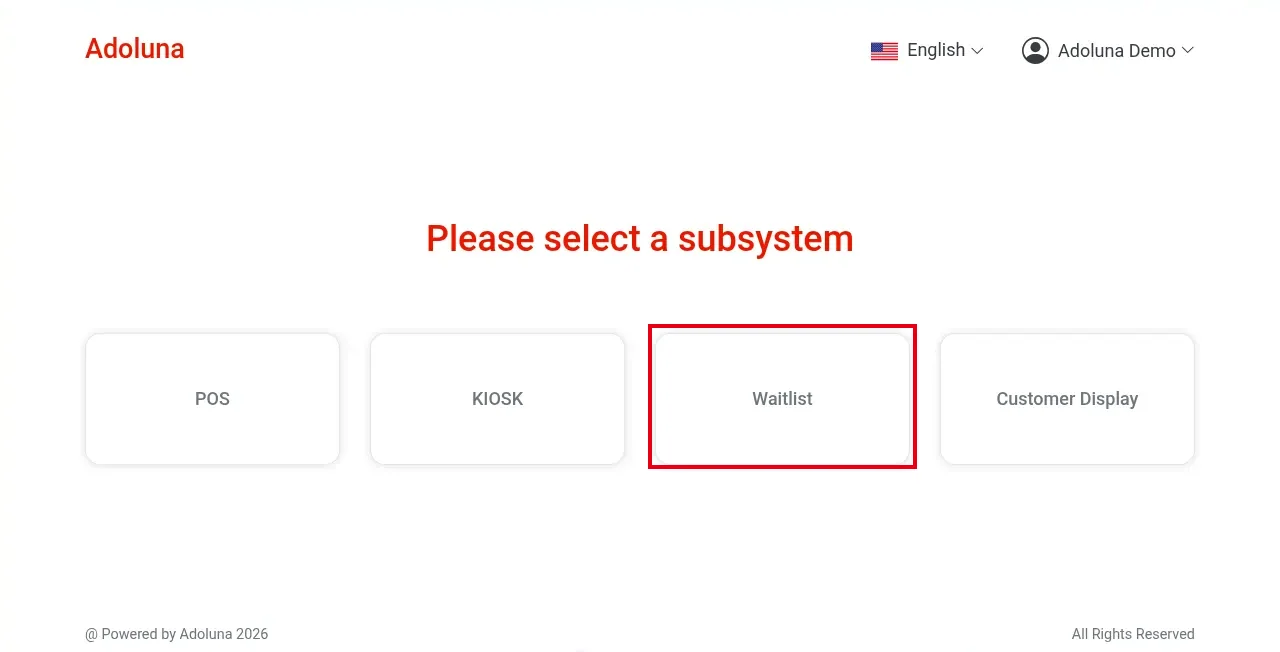
2. Set up the self check-in device: on the check-in device (a tablet or computer at the entrance), create a separate Chrome profile, open pos.adoluna.com in that profile and log in with the merchant account. After login, “Please select a subsystem” appears; choose Waitlist to open the waitlist self check-in page, Adoluna Check-In, at pos.adoluna.com/waitlistIn.html. The check-in device doesn’t need a separate license; just log in with the merchant account.
3. The gear menu at the top right of the check-in page has Refresh and Exit. Tap Refresh if the page is out of date. Staff shouldn’t tap Exit.
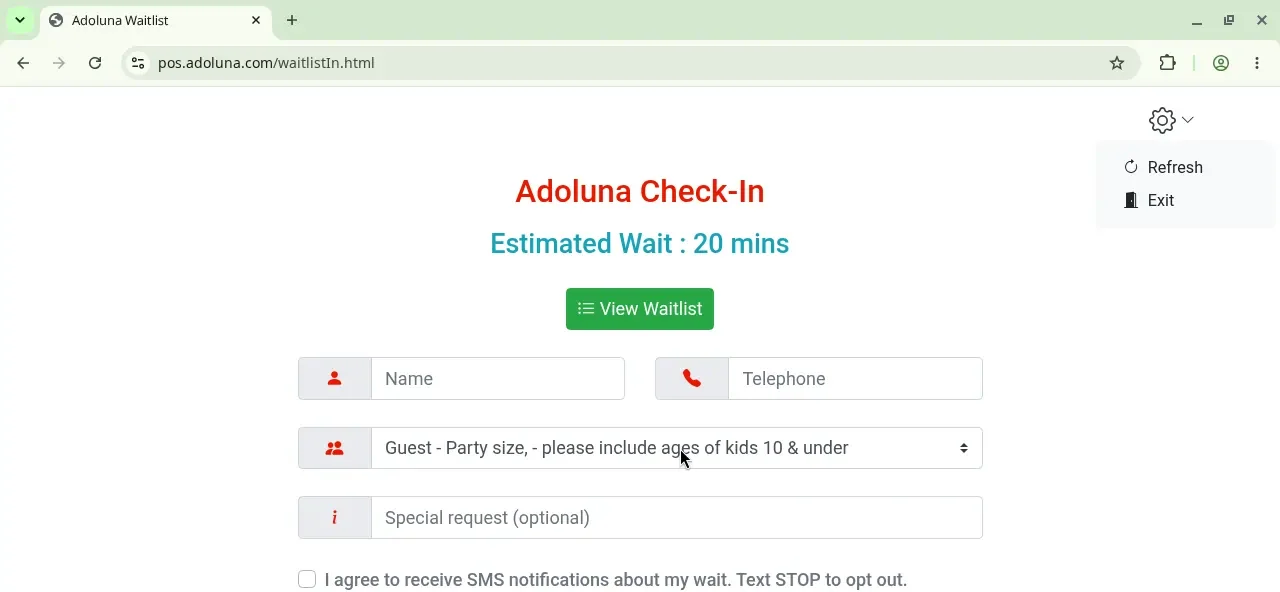
4. On the check-in page, the guest enters Name and Telephone, picks the party size (1–20) in the Guest – Party size, – please include ages of kids 10 & under dropdown, optionally fills in Special request (optional), ticks the SMS consent box (required; Add won’t register without it) and taps Add (Clear empties the form). The top of the page shows the estimated wait (e.g. Estimated Wait : 20 mins), and View Waitlist shows the line. For the guest steps in detail, see 1.7.2 How to add a party to the waitlist.
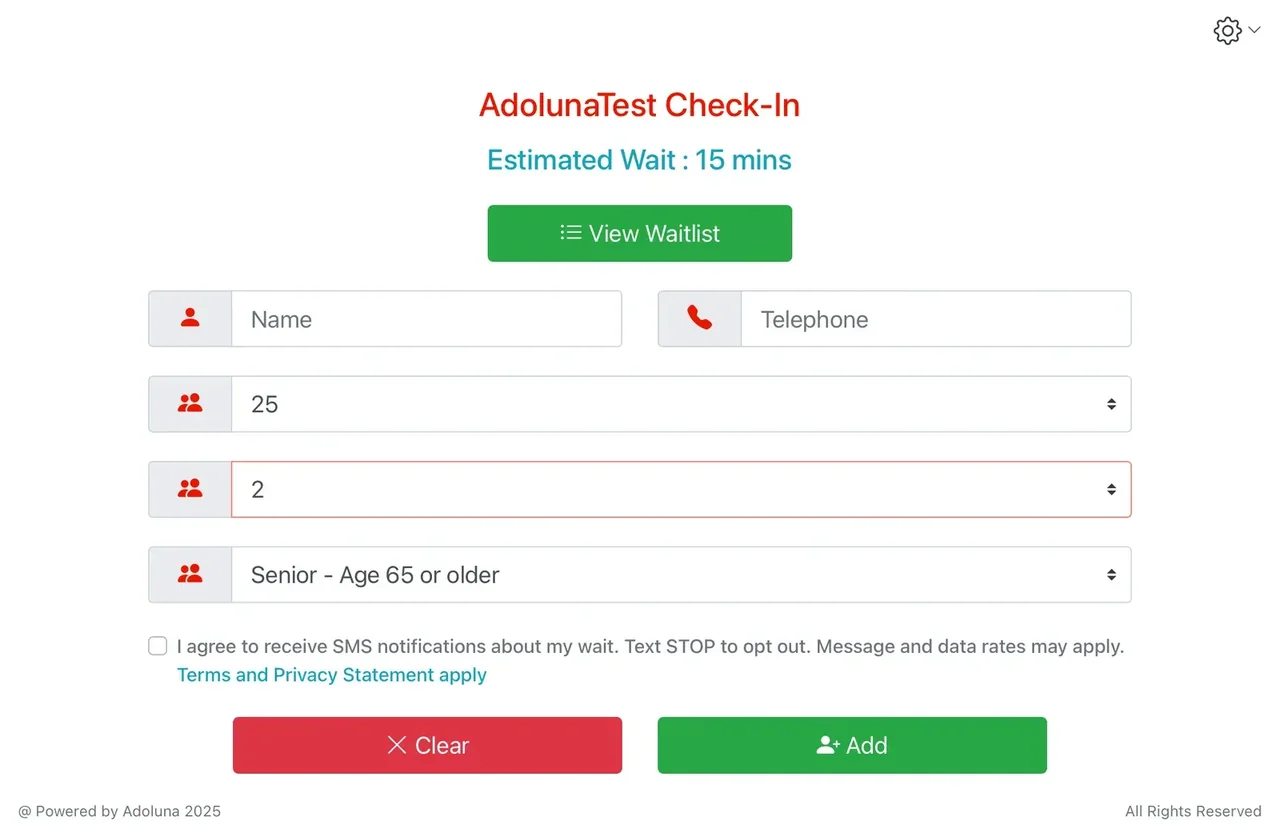
Image: waitlist self check-in screen (from the official website docs, old version)
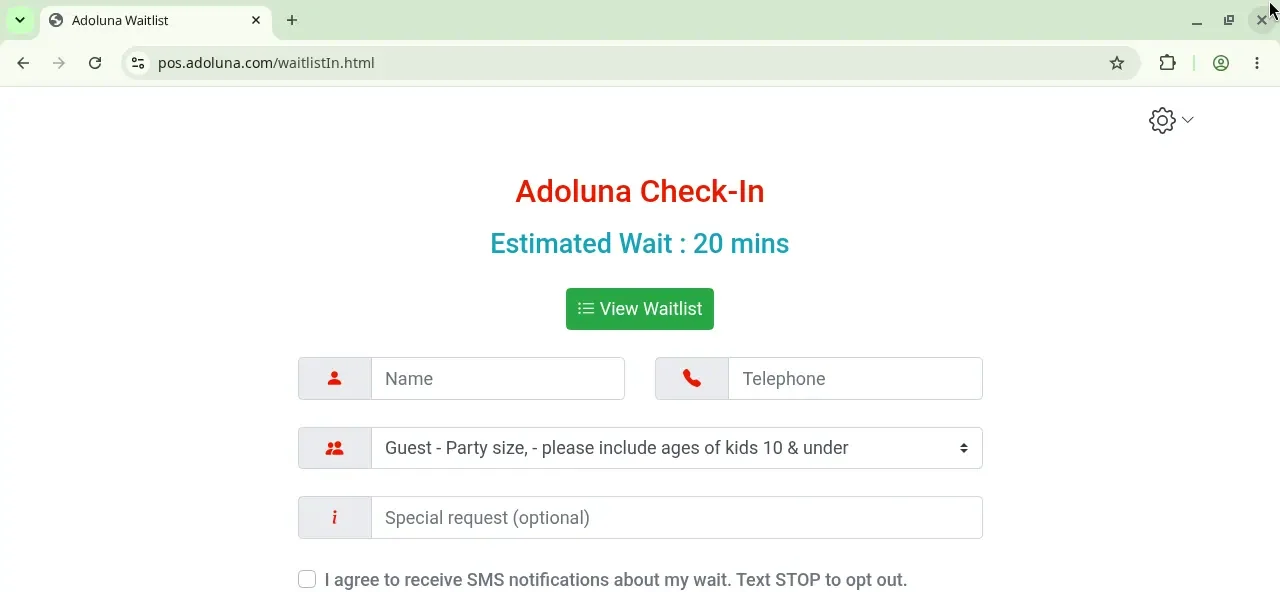
Image: the current waitlist self check-in page (Adoluna Check-In)
5. Once added, the party appears in the POS waitlist, and staff notify them as in 1.7.3 How to notify a waiting party that their table is ready.
Notes / FAQ #
-
Adding a party automatically sends a confirmation text and uses SMS credit (the POS waitlist screen shows the remaining credit at the top left, see 1.7.2 How to add a party to the waitlist). Use your own phone number when testing.
-
Staff can also add parties on the POS (see 1.7.2 How to add a party to the waitlist).
-
For the confirmation text and the waitlist page (waitlist.adoluna.com) guests get after being added, see 1.7.2 How to add a party to the waitlist.
-
For the full waitlist settings, see 2.6.1 How to set up the waitlist.


