
Purpose: Get each POS and Kiosk ready in the Backoffice (name, language, default printer, default terminal, customer display and so on) before binding it on the device. For: Adoluna onboarding staff, store managers.
Background: New POS and Kiosk devices and licenses can only be opened by Adoluna Sales in the Adoluna admin back end (manager.adoluna.com); the merchant gets an invitation email with a temporary password. Licenses are charged per device. Once opened, the devices appear under Backoffice Device > POS (or KIOSK) and you only need to edit them; the POS list page has no “new” button.
Steps (POS) #
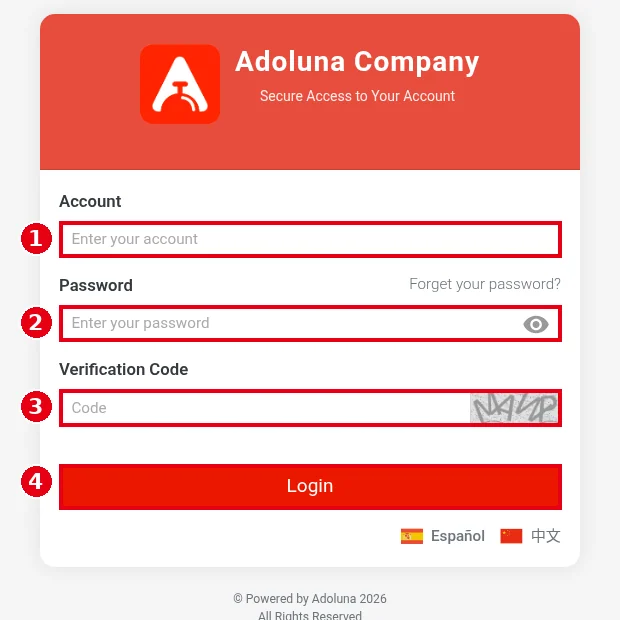
1. In a computer browser, open the Backoffice at company.adoluna.com. Enter ① Account, ② Password and ③ Verification Code, then click ④ Login (sign-in: see 2.1.1 How to sign in to the Backoffice).
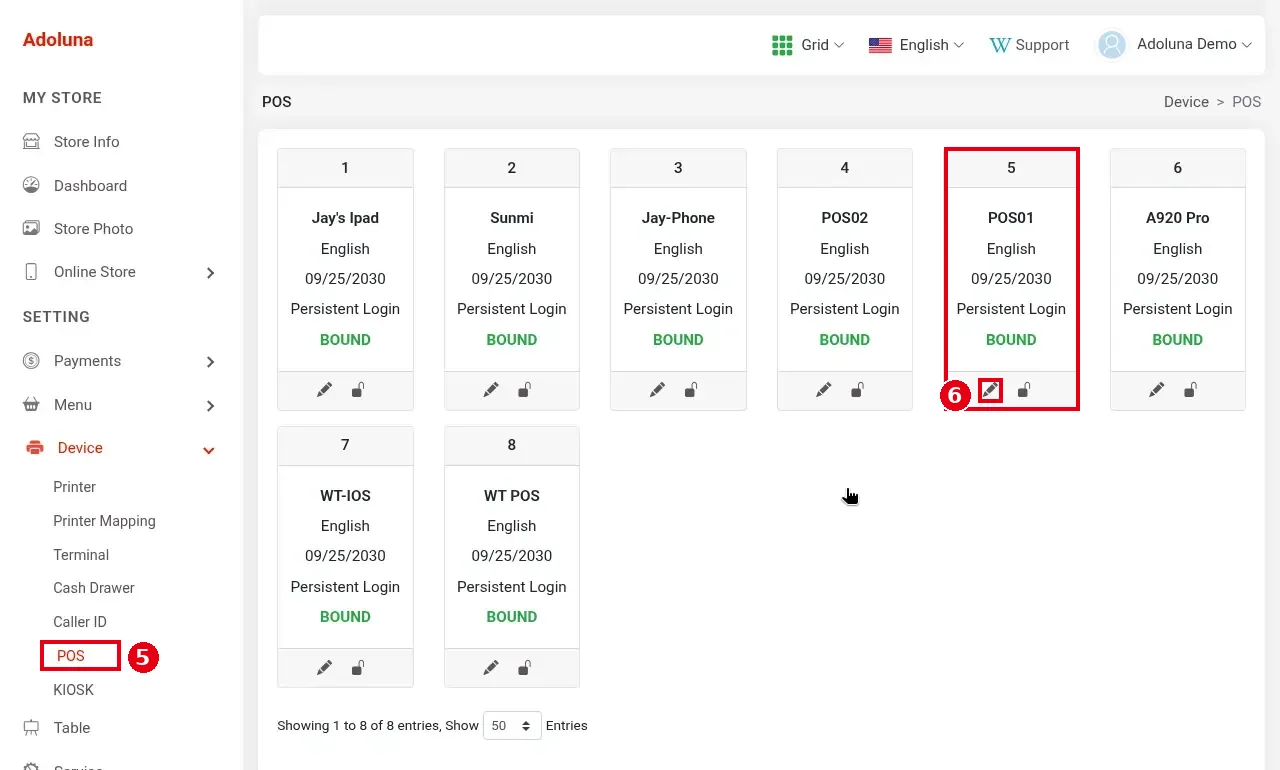
2. In the left menu click Device > ⑤ POS. Each POS shows as a card: name, language, valid-thru date, login mode (e.g. Persistent Login) and binding status (BOUND). Grid / List at the top right switches between cards and a list.
3. Click the pencil icon ⑥ under the POS card to open its edit page.
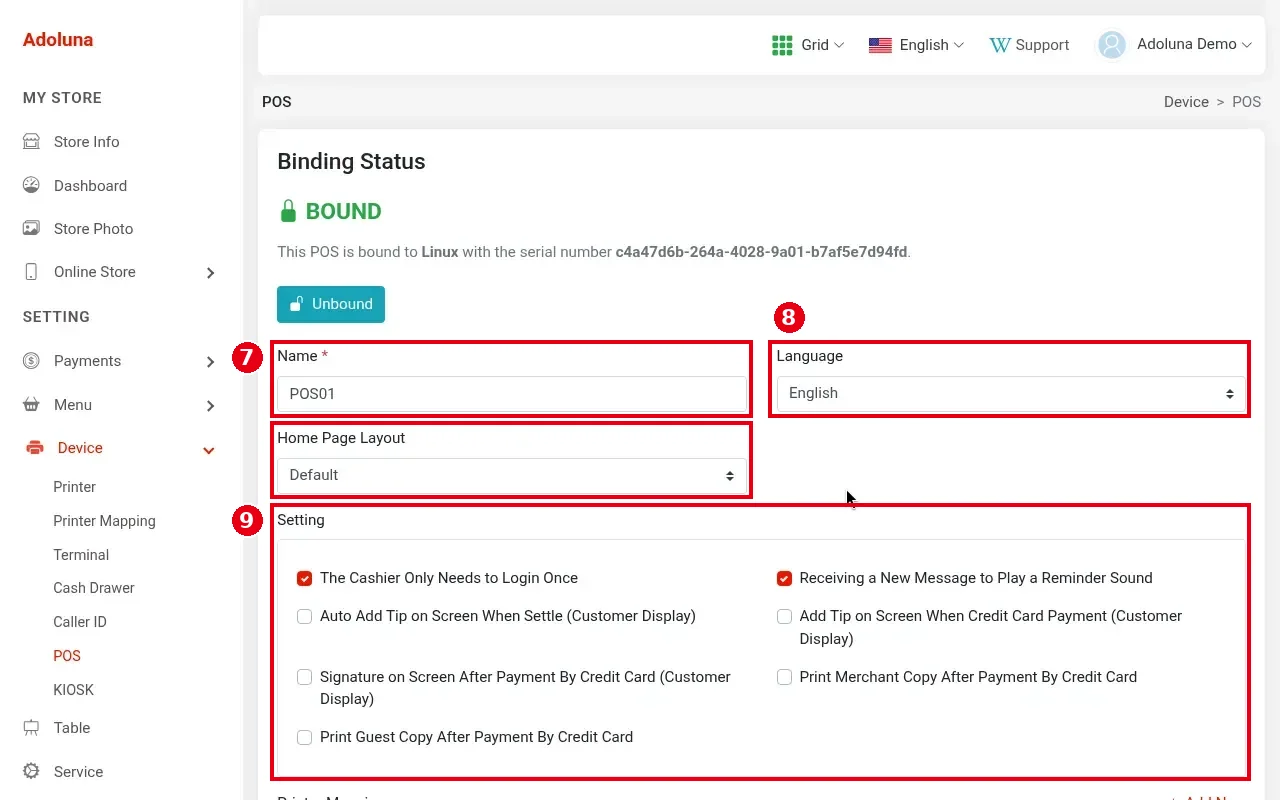
4. At the top of the edit page, fill in:
-
⑦ Name (required): the POS name. Recommended: POS01, POS02… It shows at the top left of the POS home screen (e.g. “Adoluna – POS01”).
-
⑧ Language: this POS’s default language.
-
Home Page Layout: the home-screen button layout; see 2.13.1 How to customize the POS home screen layout.
-
⑨ Setting: tick what you need:
-
The Cashier Only Needs to Login Once.
-
Receiving a New Message to Play a Reminder Sound.
-
Auto Add Tip on Screen When Settle (Customer Display), Add Tip on Screen When Credit Card Payment (Customer Display): the guest picks a tip on the customer display.
-
Signature on Screen After Payment By Credit Card (Customer Display): the guest signs on the customer display. With VP3350 / VP3300 readers, tip and signature also show on the customer display through these options (see 1.3.10 How guests add a tip and sign on the customer display).
-
Print Merchant Copy After Payment By Credit Card, Print Guest Copy After Payment By Credit Card.
-
Binding Status at the top shows whether this POS is bound (BOUND) and to which device; the Unbound button unbinds it (see 3.2.4 How to unbind or replace a device).
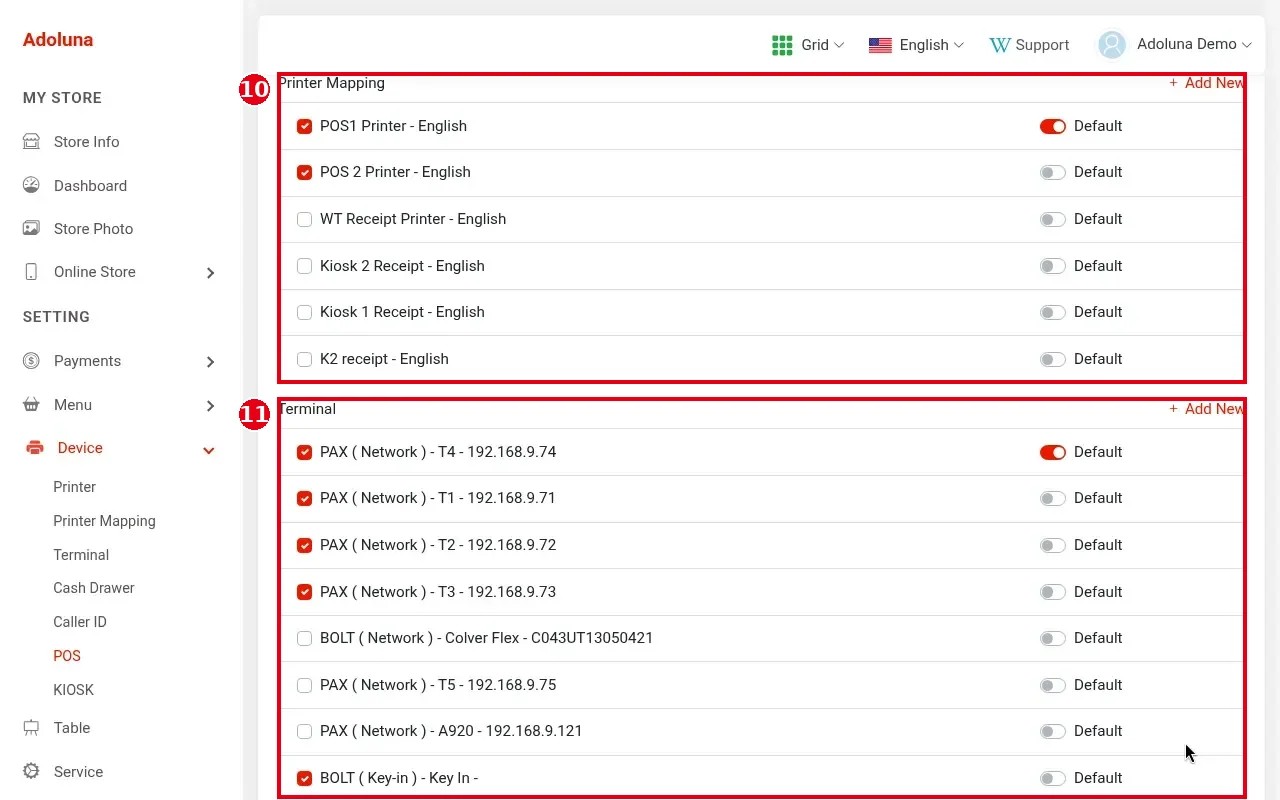
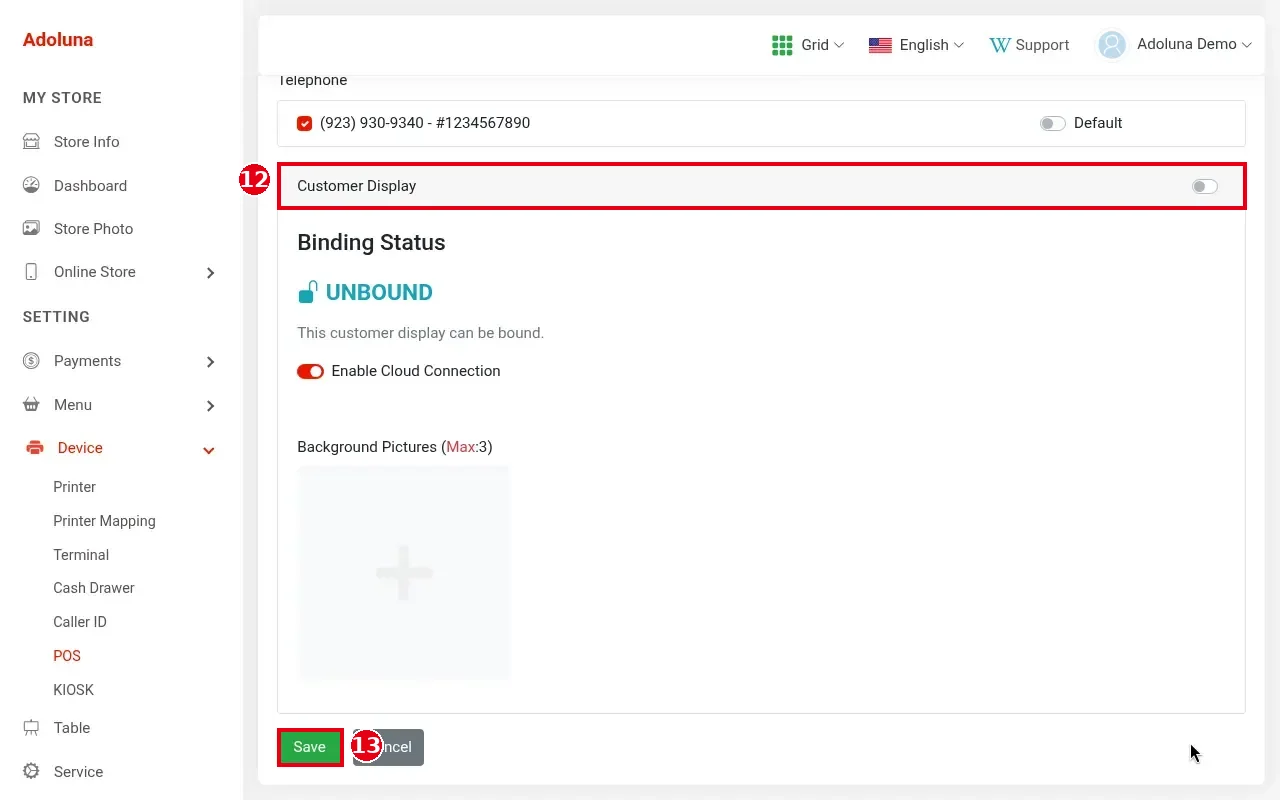
5. Scroll down to ⑩ Printer Mapping and ⑪ Terminal: tick the printers and card terminals this POS uses and turn on Default for one of each. With a default printer, jobs print there automatically; with a default terminal, it’s picked automatically for card payments; without one, the system asks you to pick. + Add New on the right creates a printer or terminal (3.3.1 How to add a printer, 3.4.1 How to add a PAX terminal).
6. Further down are Telephone (the Caller ID line; 3.5.4 How to set up Caller ID) and Customer Display. If this POS has a customer display, turn on the switch ⑫ at the right of Customer Display; this section also shows the display’s binding status, the Enable Cloud Connection switch and Background Pictures (up to 3). Details: 3.5.1 How to set up the customer display.
7. Click ⑬ Save.
Steps (Kiosk) #
1. In the left menu click Device > KIOSK and click the pencil icon for the Kiosk.
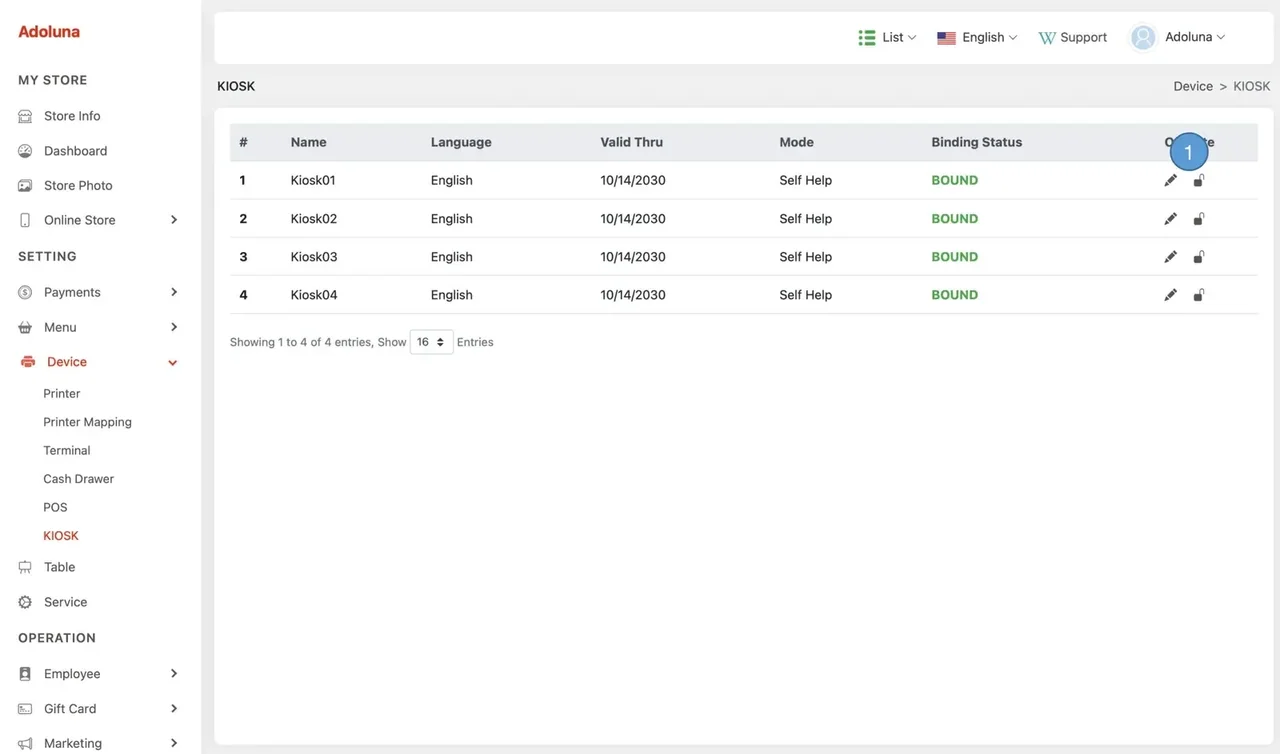
Figure: Kiosk list (official website doc image, old UI)
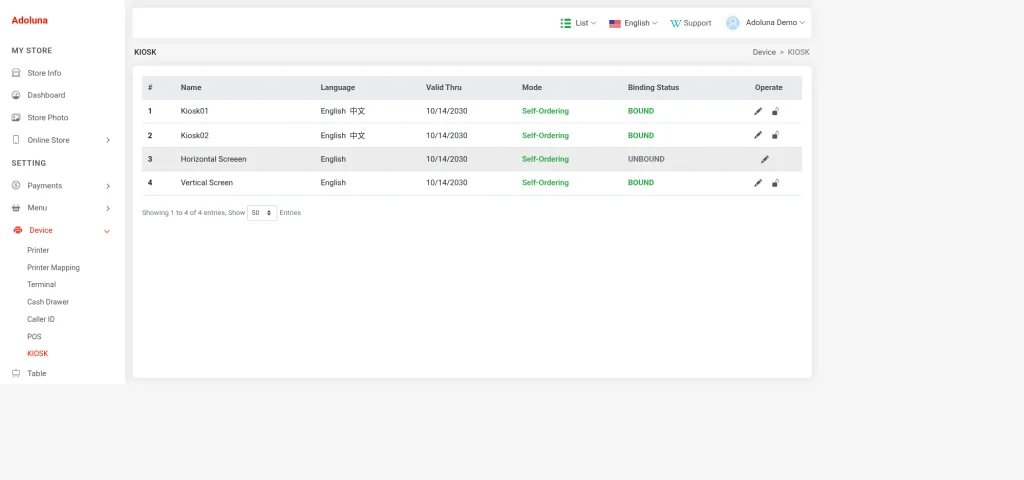
Figure: the Kiosk list in the current version. Each Kiosk shows Name, Language, Valid Thru, Mode and Binding Status; in the Operate column the pencil icon edits and the lock icon unbinds (see 3.2.4 How to unbind or replace a device). All four Kiosks in the demo store are in mode 1, shown as Self-Ordering in the list.
2. Fill in Name (e.g. Kiosk01), Auto Exit After Timeout (how long before it exits when idle), Language (tick one or more) and Mode (ordering mode), then set the printer, card terminal and payment types further down, and click Save.
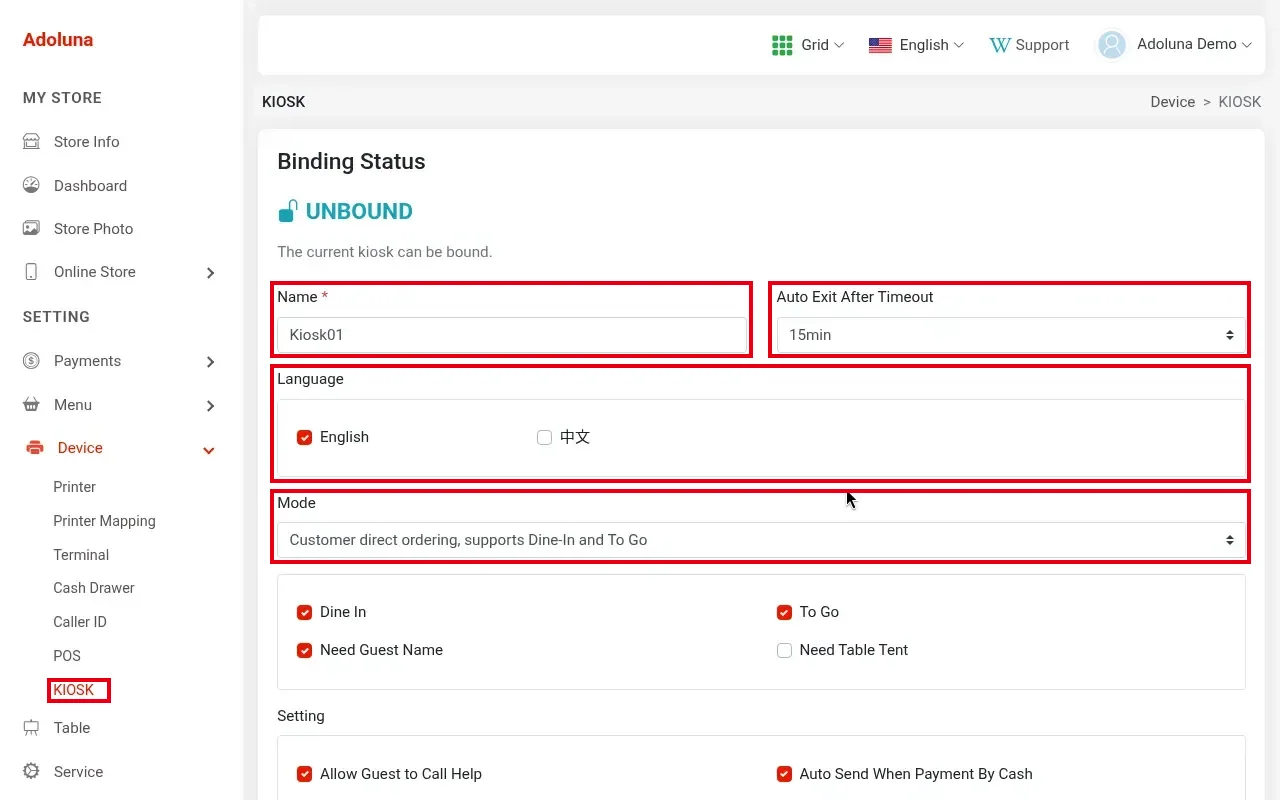
3. Kiosk mode, Dine In / To Go and the start and welcome pages are covered in 3.5.2 How to configure a Kiosk.
Notes #
-
Device setup order in the Backoffice: printers first, then card terminals and cash drawers (both point to printers), then POS / Kiosk (pointing to printers and terminals); the employee chooses the cash drawer when doing Cashier In on the POS, see 3.3.6 How to set up a cash drawer and 1.5.3 How to start a cash drawer (Cashier In); Caller ID can be set up on its own (see 3.0.1 Onboarding checklist for a new store). Each terminal’s timeout can be set separately under Backoffice Device > Terminal (3.4.1 How to add a PAX terminal).
-
When done, bind this POS / Kiosk on the device: 3.2.3 How to bind a device.


