
Purpose: Create printer mappings (print departments), link each one to a printer, and route items to the right kitchen and receipts to the front counter. For: Adoluna onboarding staff, store managers.
Before you start: a printer mapping is a named print destination, e.g. “Ramen” (ramen kitchen), “Sushi Bar” or “POS1 Printer” (front receipts). Each mapping links to one printer; several mappings can share a printer. Mapping types:
-
Kitchen: kitchen tickets. Items (or categories) assigned to this mapping print here when sent.
-
Receipt: customer receipts and guest checks. Chosen on each POS device (see step 4).
-
Packager: packager tickets (see 3.3.4 How to set up automatic printing of checks, receipts and packager tickets).
-
Bar, Label: bar tickets and labels (labels: 3.3.5 How to set up a label printer). Bar and Kitchen print the same way; the Bar type will be removed later, so use Kitchen for new mappings.
Steps #
1. Add the printer first: 3.3.1 How to add a printer.
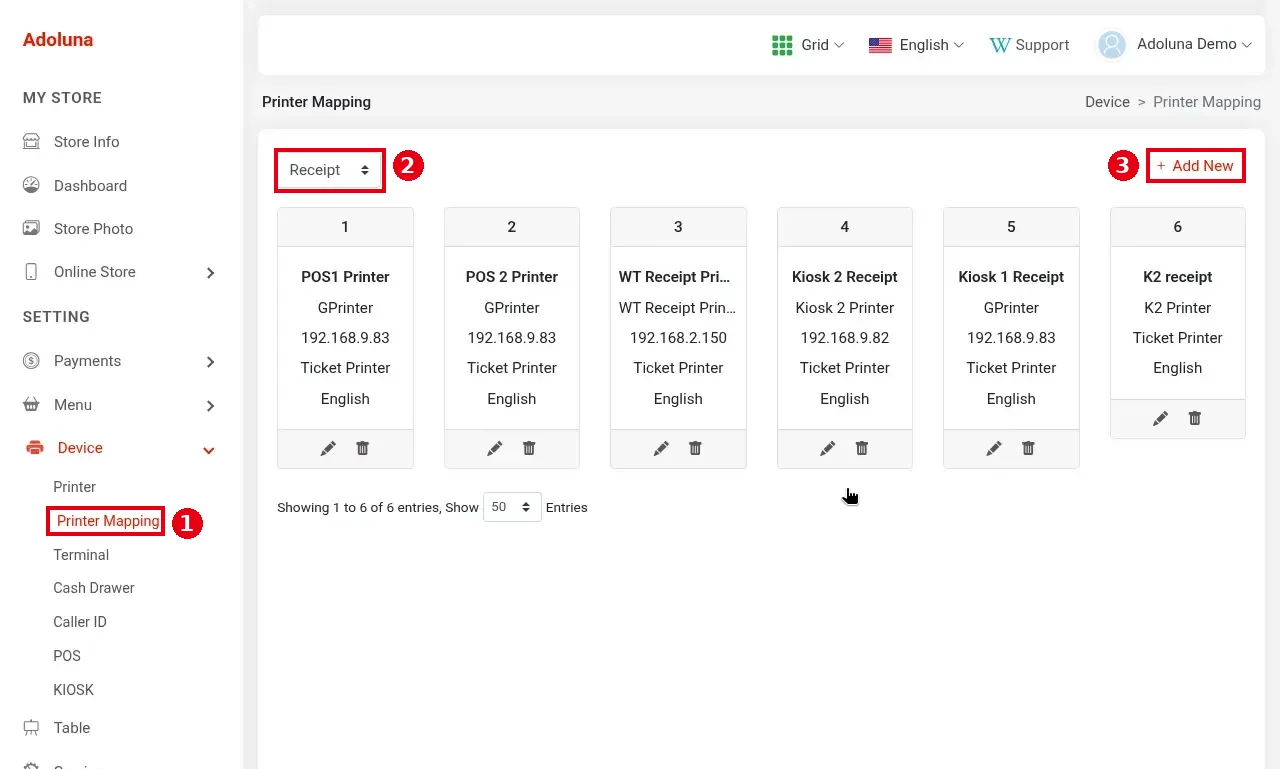
2. In the Backoffice left menu, click Device > ① Printer Mapping. Use the ② type filter to switch between Receipt, Kitchen, Bar, Label and Packager and see existing mappings. Each card shows the mapping name, printer, IP, printer type and language. Click ③ + Add New to create a mapping.
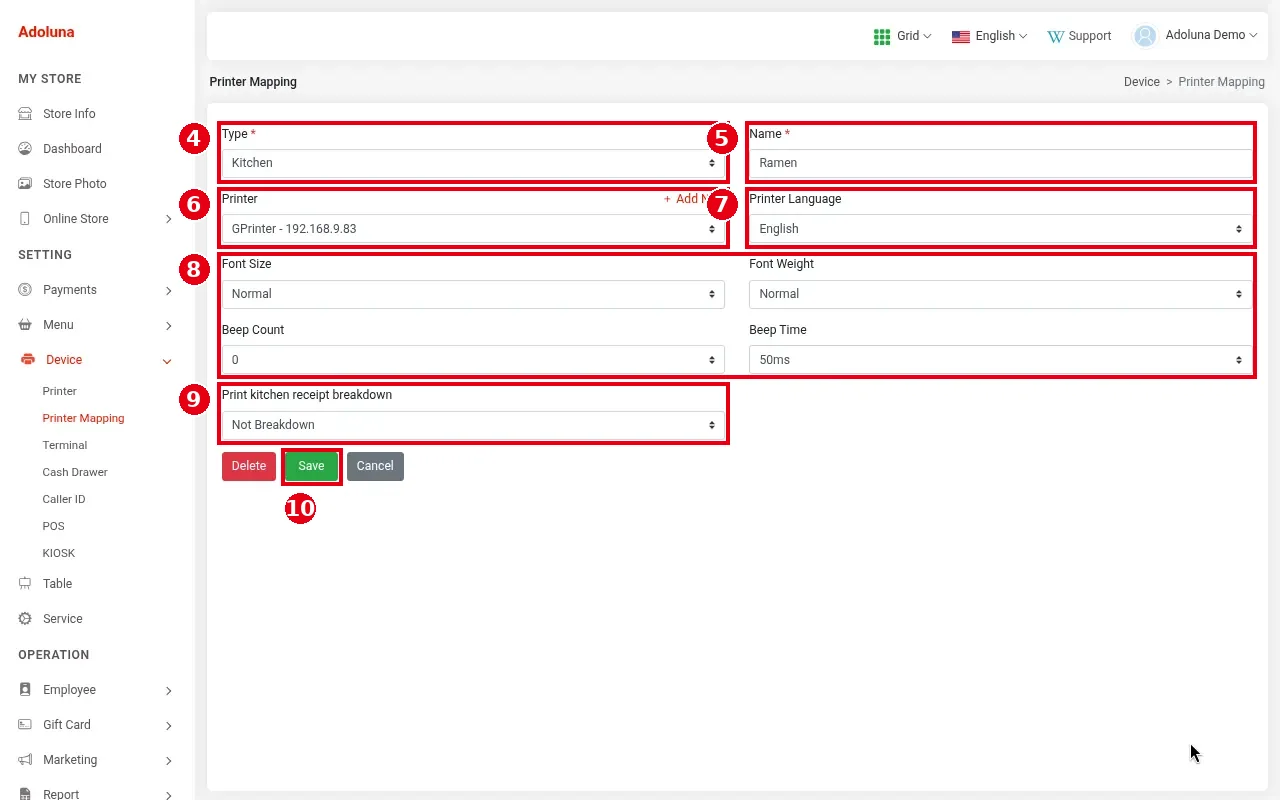
3. Fill in the mapping:
-
④ Type (required): the mapping type, see above.
-
⑤ Name (required): e.g. “Ramen” or “Grill”.
-
⑥ Printer: the printer this mapping prints to. + Add New on the right creates a printer on the spot.
-
⑦ Printer Language: the printout language (e.g. English).
-
⑧ Font Size, Font Weight: text size and weight. Beep Count, Beep Time: how many beeps after printing and the gap between them (ms). In a noisy kitchen, use a larger font and turn on beeps.
-
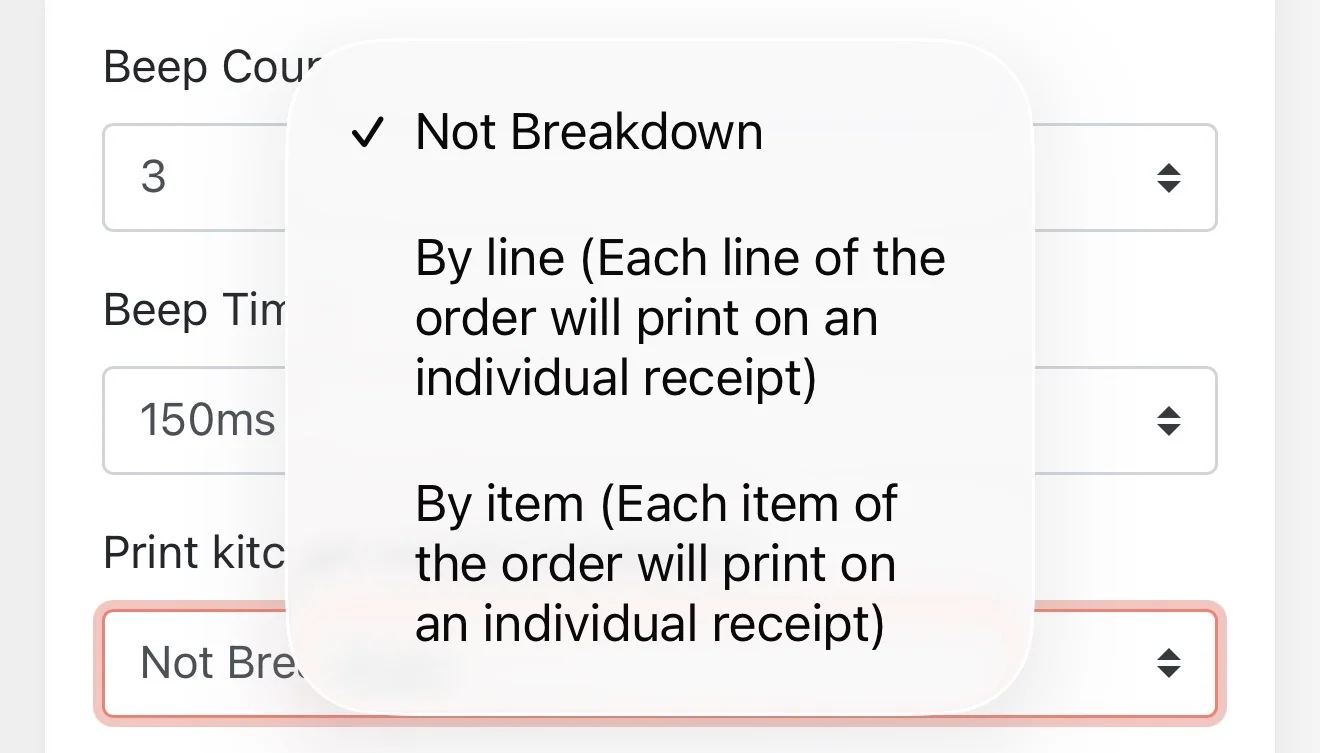
⑨ Print kitchen receipt breakdown: how kitchen tickets are split. It’s a merchant preference; the default is Not Breakdown. There are three options: Not Breakdown (no split; one ticket with all items); By line (Each line of the order will print on an individual receipt) (each order line prints on its own ticket); By item (Each item of the order will print on an individual receipt) (each single item prints on its own ticket). For example, a line of “2 × Wings” prints 1 ticket By line and 2 tickets By item.
Click ⑩ Save.
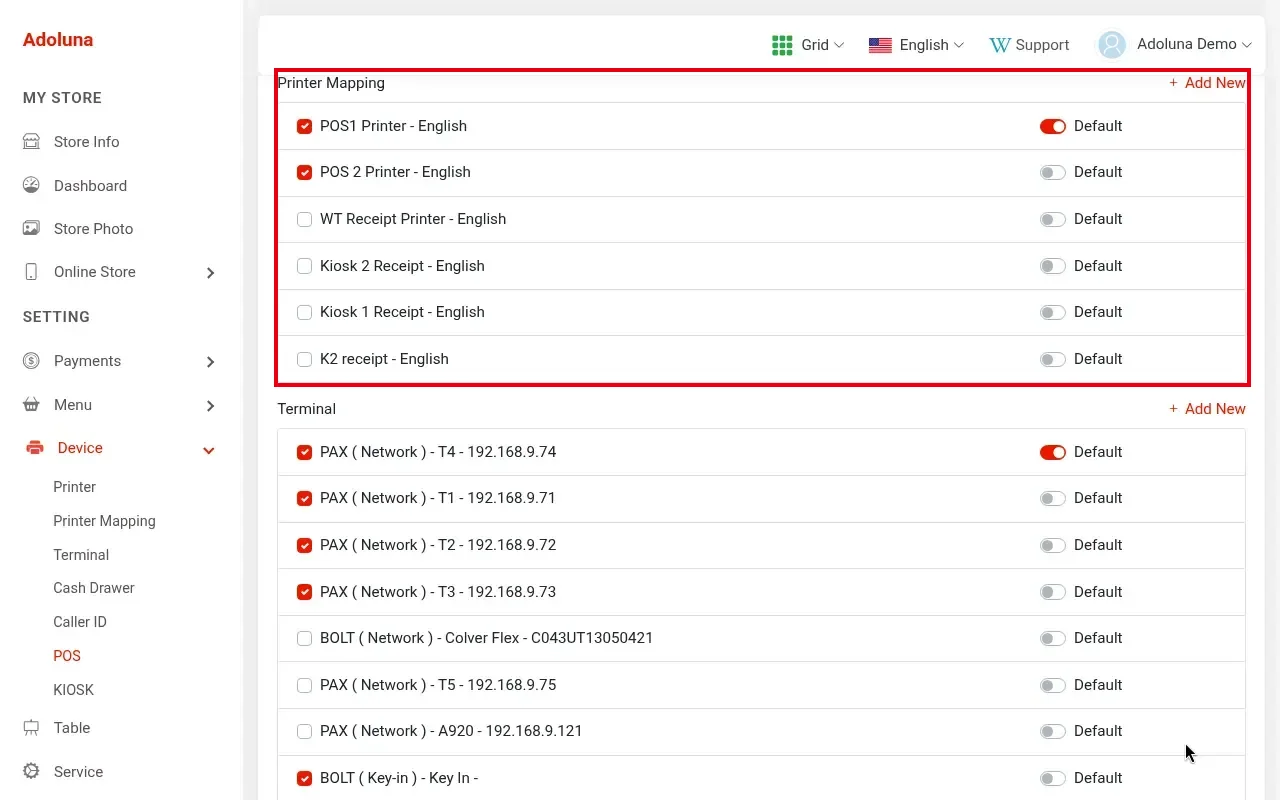
4. Choose the receipt mapping for each POS: in the Backoffice, open the POS under Device > POS, tick the Receipt mappings it uses under Printer Mapping, and turn on Default for one of them (see 3.2.2 How to create POS and Kiosk devices in the Backoffice). With a default set, that POS’s receipts print automatically to that mapping’s printer.
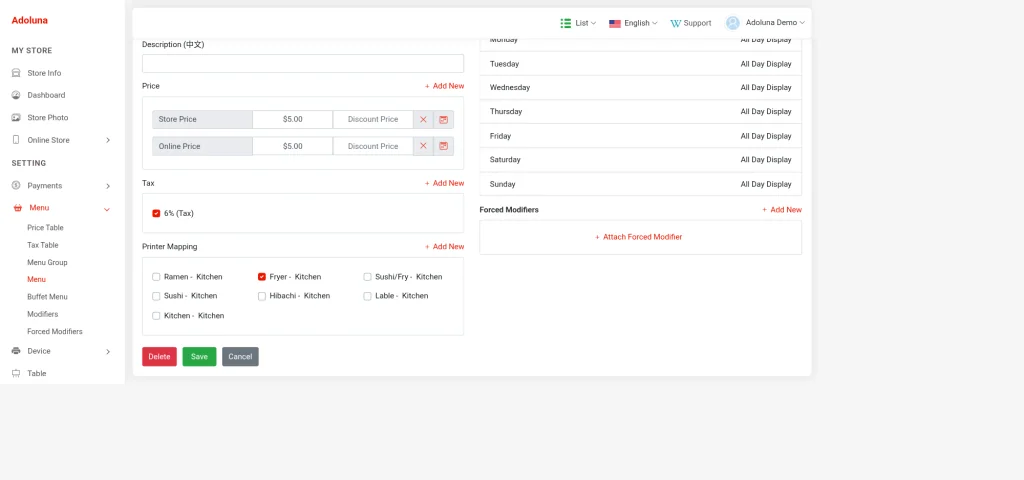
5. Assign items to kitchen mappings: each menu item has its own Printer Mapping, and one item can have several printer mappings. Each menu category also has a Default Printer Mapping, used by items created in that category; changing it doesn’t update the items already in the category (see 4.2.2 Why did an item print at the wrong kitchen printer?). Set them when editing categories and items under Menu > Menu (see 2.3.4 How to create and sort menu categories and 2.3.5 How to add menu items). In the item editor, Printer Mapping is below Tax; tick the mappings the item prints to (e.g. French Fries has Fryer – Kitchen ticked).
6. Send a test order and check that each item printed at the right kitchen and the receipt at the front (see 3.6.2 How to run a go-live test (test orders, printing, cards, Batch)). If an item prints at the wrong kitchen, see 4.2.2 Why did an item print at the wrong kitchen printer?.
Notes / FAQ #
-
Kitchen tickets follow the printer’s Timeout (s): if the printer doesn’t respond within that time, the ticket is dropped (see 3.3.1 How to add a printer).
-
When a printer goes offline, the POS warns within 5 seconds. If the printer comes back within 30 minutes, kitchen tickets reprint automatically; other tickets need a manual reprint (see 1.4.2 How to resend or reprint an order).
-
Click the pencil icon on a card to edit a mapping, or the trash icon to delete it.


