
Purpose: Connect the cash drawer to the receipt printer and set it up in the Backoffice so it opens automatically on cash payments. For: Adoluna onboarding staff, store managers. Hardware: a cash drawer, an RJ11/RJ12 drawer cable, and a receipt printer (or a POS device with a built-in printer).
Steps #
1. Connect the cash drawer to the receipt printer’s drawer port with the RJ11/RJ12 cable (see 3.1.2 How to set up the network and wire a POS station). The printer opens the drawer, so each drawer is set up with a printer.
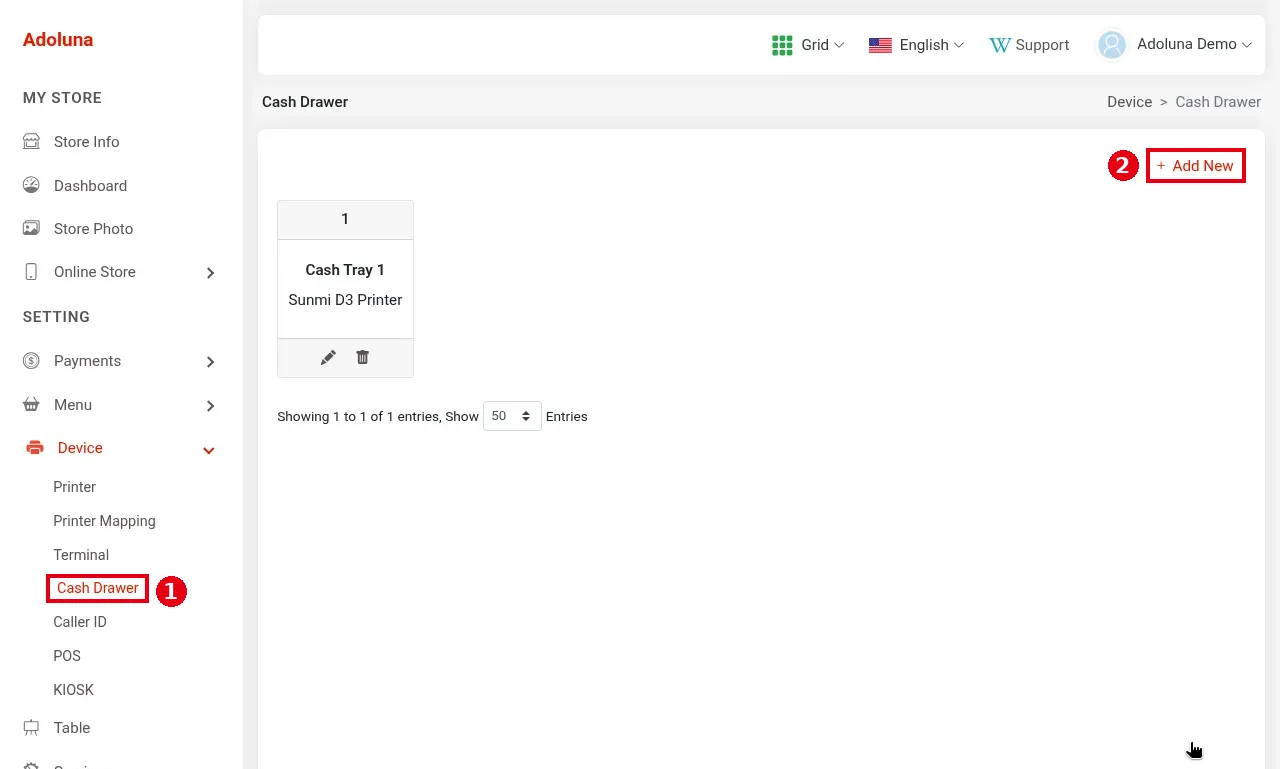
2. In the Backoffice left menu, click Device > ① Cash Drawer. Each drawer in the list shows its name and the printer it’s connected to (e.g. “Cash Tray 1 / Sunmi D3 Printer”). Click ② + Add New.
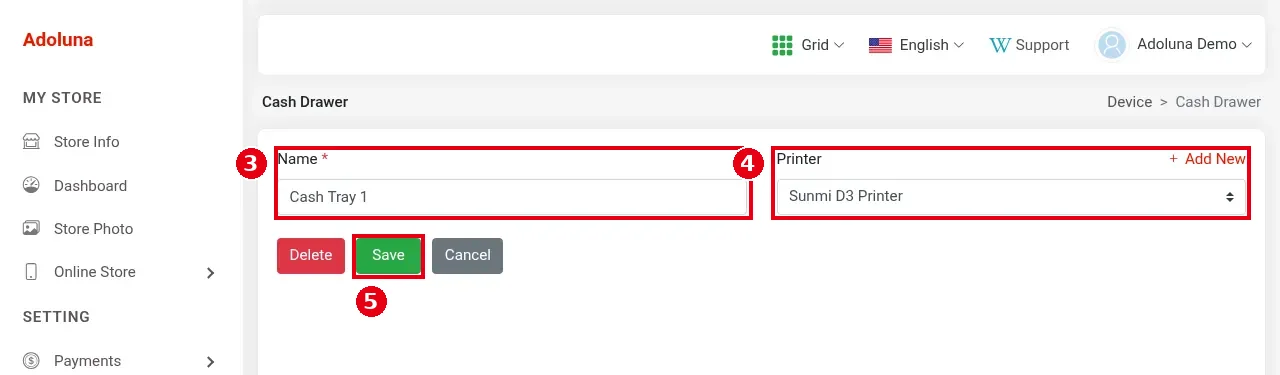
3. Enter ③ Name (required, e.g. “Cash Tray 1”), choose the printer the drawer is connected to in ④ Printer (+ Add New on the right creates a printer), and click ⑤ Save.
4. Link the cash drawer to the POS: the drawer isn’t linked in the Backoffice settings. The employee chooses it on the POS when doing Cashier In: the drawer tapped at Cashier In is the one this POS uses (see step 3 of 1.5.3 How to start a cash drawer (Cashier In)). The drawer itself still opens through the printer chosen in the previous step. For the device setup order in the Backoffice, see 3.0.1 Onboarding checklist for a new store.
5. Test on the POS: the employee first does Cashier In on this POS and chooses this drawer (see 1.5.3 How to start a cash drawer (Cashier In)), then settles a test order in cash. The drawer should open. To open the drawer without a sale, see 1.5.5 How to open the cash drawer without a sale.
Notes / FAQ #
-
If the drawer doesn’t open, check that the cable is in the printer’s drawer port and the printer is online, then check the Printer chosen in the Backoffice and that this drawer was chosen at Cashier In on this POS (step 4).
-
Cashier In must be done first, or the drawer won’t open on cash payments (see 1.5.3 How to start a cash drawer (Cashier In)).
-
Click the pencil icon on a card to edit it, or the trash icon to delete it. The edit page also has a Delete button.


