
Purpose: Wire a Kiosk self-ordering station (Kiosk machine, Kiosk printer, card terminal). For: Adoluna onboarding staff, store managers. Hardware: Kiosk machine, switch, receipt printer, card terminal; optional: a Clover Go 3 (Bluetooth) or VP3350 (USB) card reader.

Figure: Kiosk station wiring (official website doc image)
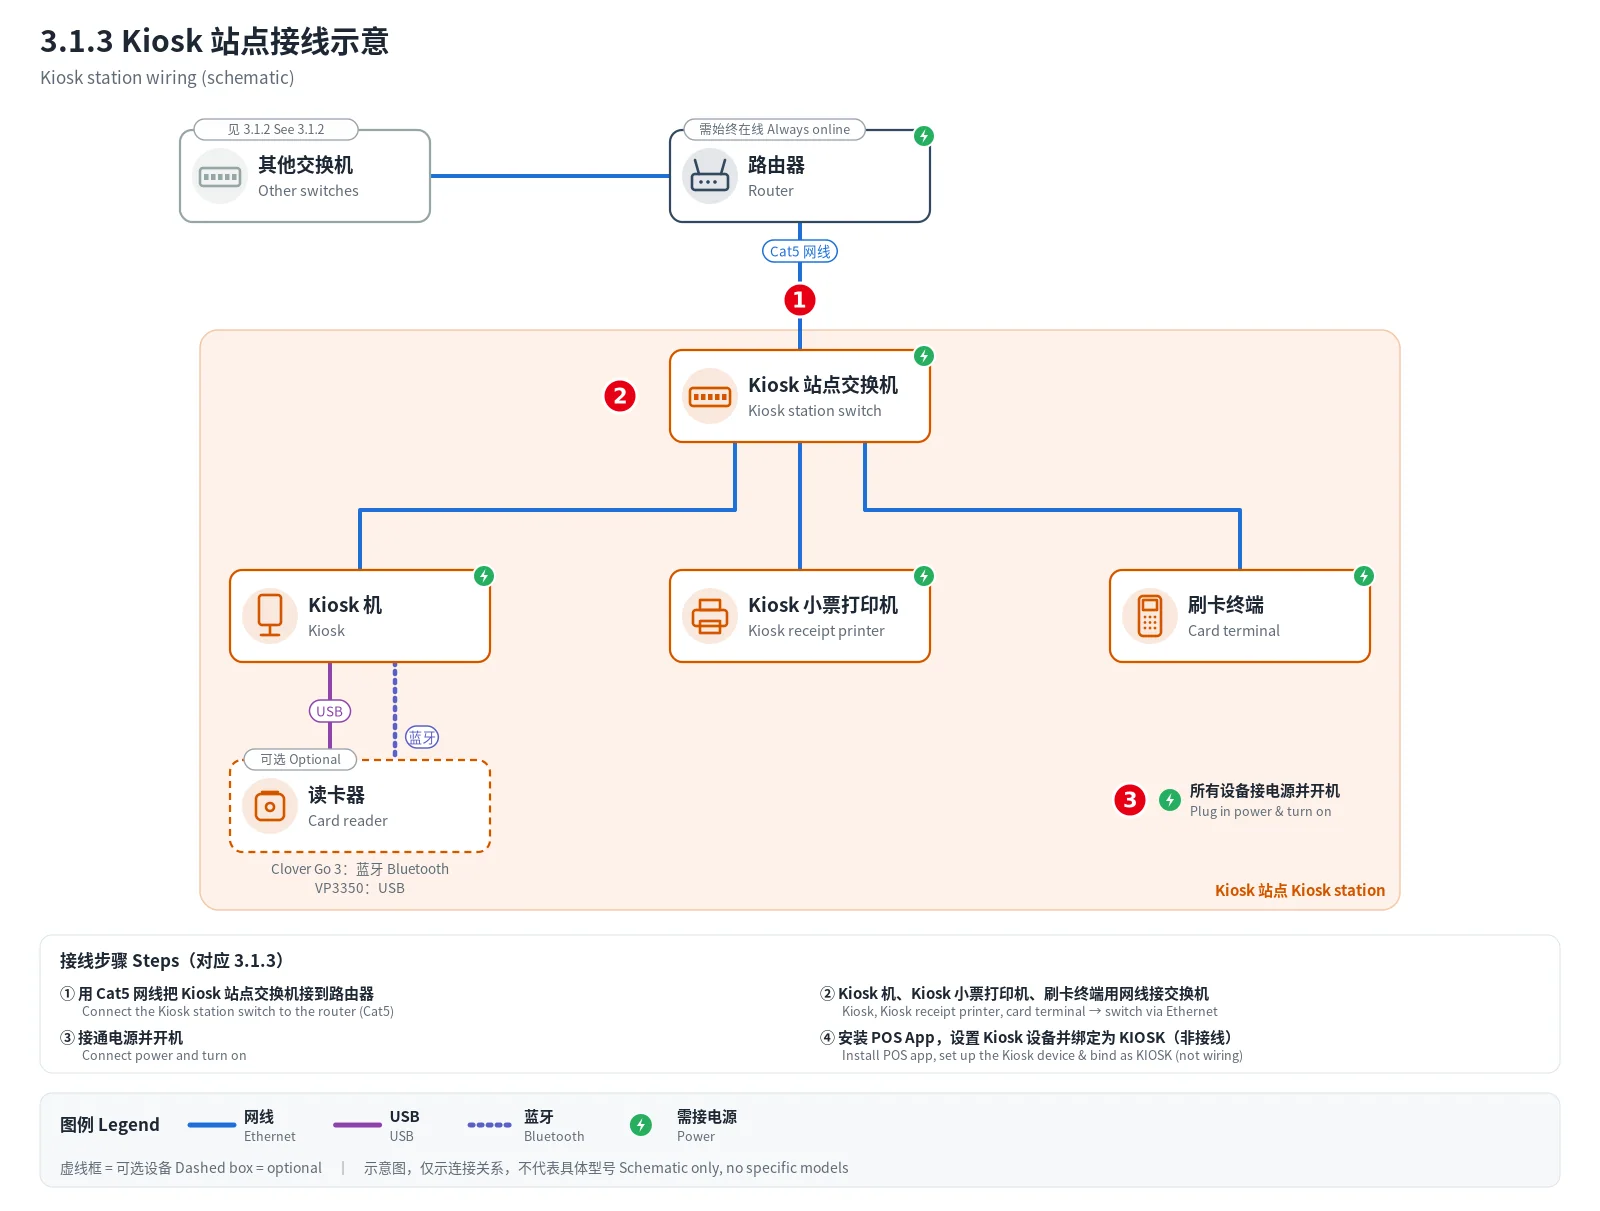
Figure: Kiosk station wiring diagram (drawn 2026-10-05). ①–③ match steps 1–3 below; dashed boxes are optional devices.
Steps #
1. Connect the Kiosk station switch to the router with an Ethernet cable (Cat 5) (recommended switch: TP-Link TL-SG105 (5-port) or TL-SG108 (8-port); network layout: 3.1.2 How to set up the network and wire a POS station).
2. Connect the Kiosk machine, receipt printer and card terminal to the switch with Ethernet cables, using the ports shown above.
3. Plug in the power and turn everything on.
4. Install Adoluna POS on the Kiosk machine (3.2.1 How to install Adoluna POS on each platform), set up the Kiosk device in the Backoffice (3.2.2 How to create POS and Kiosk devices in the Backoffice), then choose KIOSK when binding (3.2.3 How to bind a device). Kiosk mode, languages, payment types and so on are in 3.5.2 How to configure a Kiosk.
Notes #
-
Seat every cable firmly and check the ports against the diagram.
-
Optional: a Kiosk can also use a card reader: the Clover Go 3 connects by Bluetooth, and the VP3350 plugs into the Kiosk machine by USB cable (setup: 3.4.3 How to connect a Clover Go 3 / VP3350 card reader).


