Purpose: Give a POS a customer display so guests can see their order and choose a tip and sign on it. For: Adoluna onboarding staff, store managers. Hardware: a device with Adoluna POS installed (e.g. a tablet), or a Sunmi dual-screen POS device.
Before you start: any device with Adoluna POS installed can be a customer display once it’s bound as Customer Display. On a Sunmi dual-screen POS device, the second screen is the customer display and needs no separate install. With VP3350 / VP3300 readers, tip and signature show on the customer display (see 3.4.3 How to connect a Clover Go 3 / VP3350 card reader).
Steps #
1. Install Adoluna POS on the device that will be the customer display (see 3.2.1 How to install Adoluna POS on each platform) and connect it to the store network. Skip this step for Sunmi dual-screen devices.
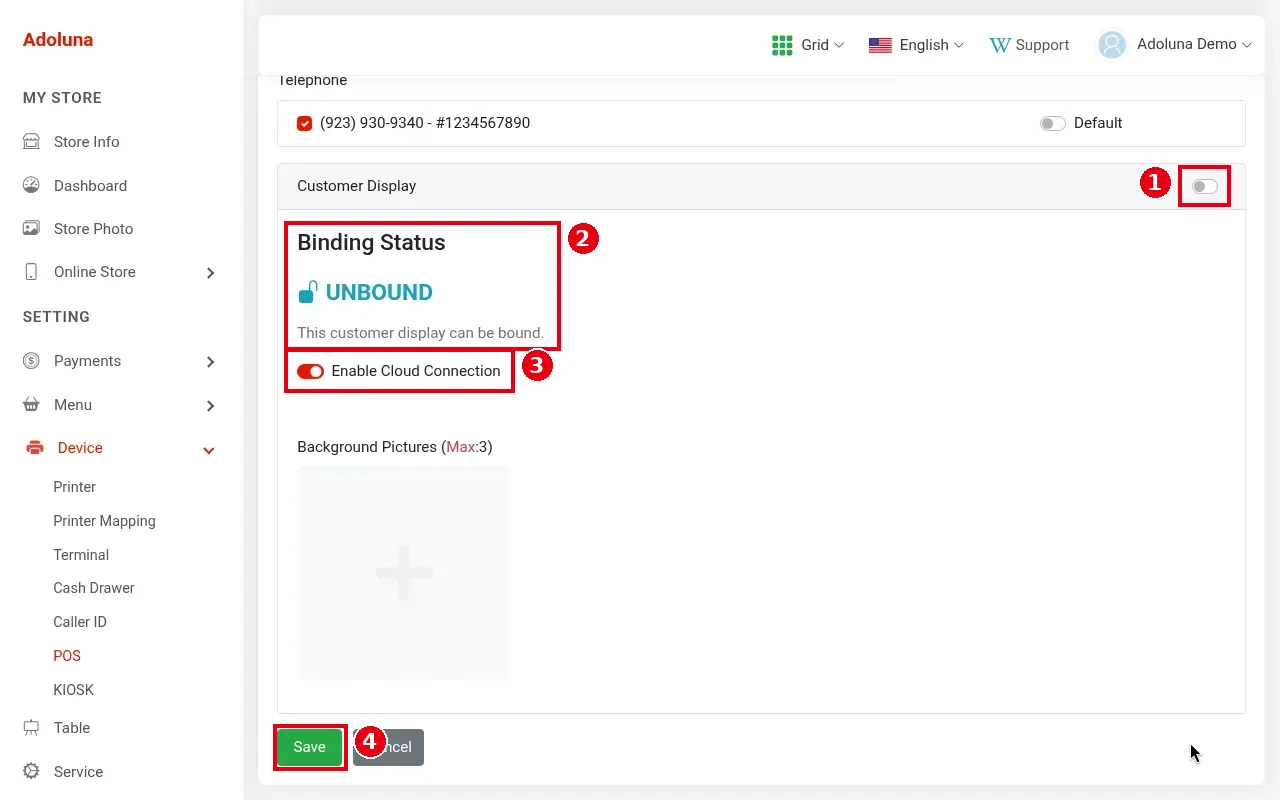
2. In the Backoffice, open the POS under Device > POS (see 3.2.2 How to create POS and Kiosk devices in the Backoffice) and scroll down to Customer Display:
-
① Turn on the switch on the right.
-
② Binding Status: UNBOUND (“This customer display can be bound”) means no customer display is bound to this POS yet; it shows BOUND once one is.
-
③ Enable Cloud Connection: the cloud connection switch, on by default (on in the screenshot). With it on, the customer display connects through the cloud: it doesn’t need to be on the same network as the POS and Local Server, and doesn’t depend on the Local Server. With it off, it goes through the Local Server (see 4.4.2 What to do when the customer display won’t connect). Turn it off only if the store’s internet is extremely slow.
-
Background Pictures (Max:3): up to 3 pictures shown when the customer display is idle.
Click ④ Save.
3. On the customer display device, open Adoluna POS, log in with the Backoffice account and choose Customer Display. Every POS with Customer Display turned on in the Backoffice shows as a card; choose the POS to pair with and tap Confirm (see 3.2.3 How to bind a device).
4. Set up tip and signature: on the same POS edit page, tick the Setting options marked “(Customer Display)” (tip on the customer display, signature on the customer display after card payment; see step 4 of 3.2.2 How to create POS and Kiosk devices in the Backoffice). With a VP3350 / VP3300, also tick Tip Selection on the POS and Require Signature on the POS in the terminal settings (see 3.4.3 How to connect a Clover Go 3 / VP3350 card reader). Guests choose the tip first and go straight to payment, with no second confirmation.
5. Test: add a few items on the POS and check they show on the customer display; at checkout, check the tip and signature screens (see 1.3.10 How guests add a tip and sign on the customer display).
Notes / FAQ #
-
If the customer display won’t connect, see 4.4.2 What to do when the customer display won’t connect.
-
Each POS has one customer display. When replacing the device, unbind it first (see 3.2.4 How to unbind or replace a device).
-
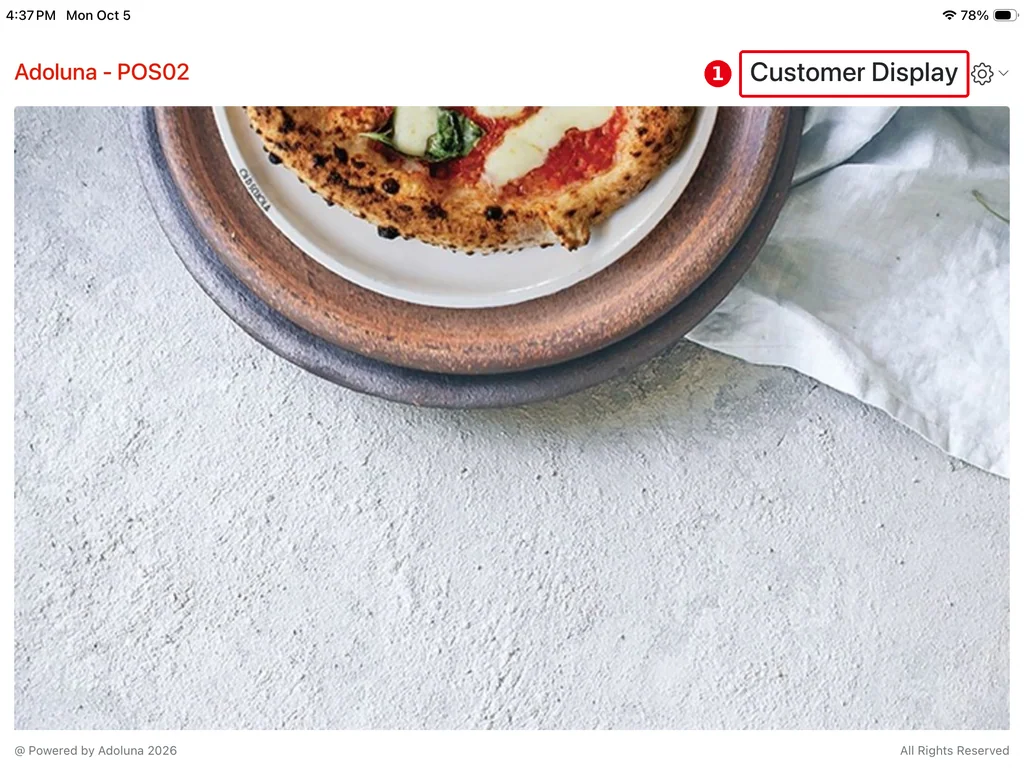
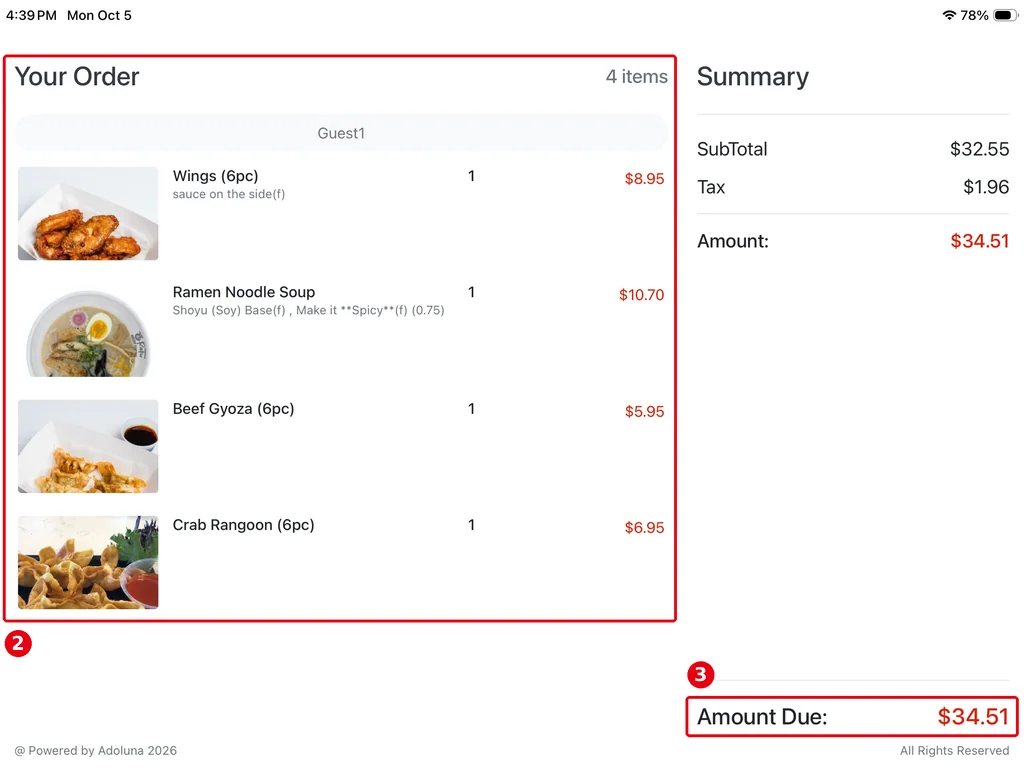
When idle it shows the uploaded background pictures (① Customer Display); with an order it shows Your Order (②) and Amount Due (③).