
Purpose: When building a new store’s menu for the first time, set up price tables, tax tables, menu groups, categories, items and modifiers in the right order so you don’t have to redo work. For: Adoluna onboarding staff, store managers.
Before you start: the Backoffice Menu submenu lists Price Table, Tax Table, Menu Group, Menu, Buffet Menu, Modifiers and Forced Modifiers, in that order. Items need a price table, tax and menu group, so create those first. Section 2.3 of Part 2 (2.3.1 How to set up price tables to 2.3.12 How to import and export the menu with Excel) covers each step in detail; this article covers only the order and key points.
Steps #
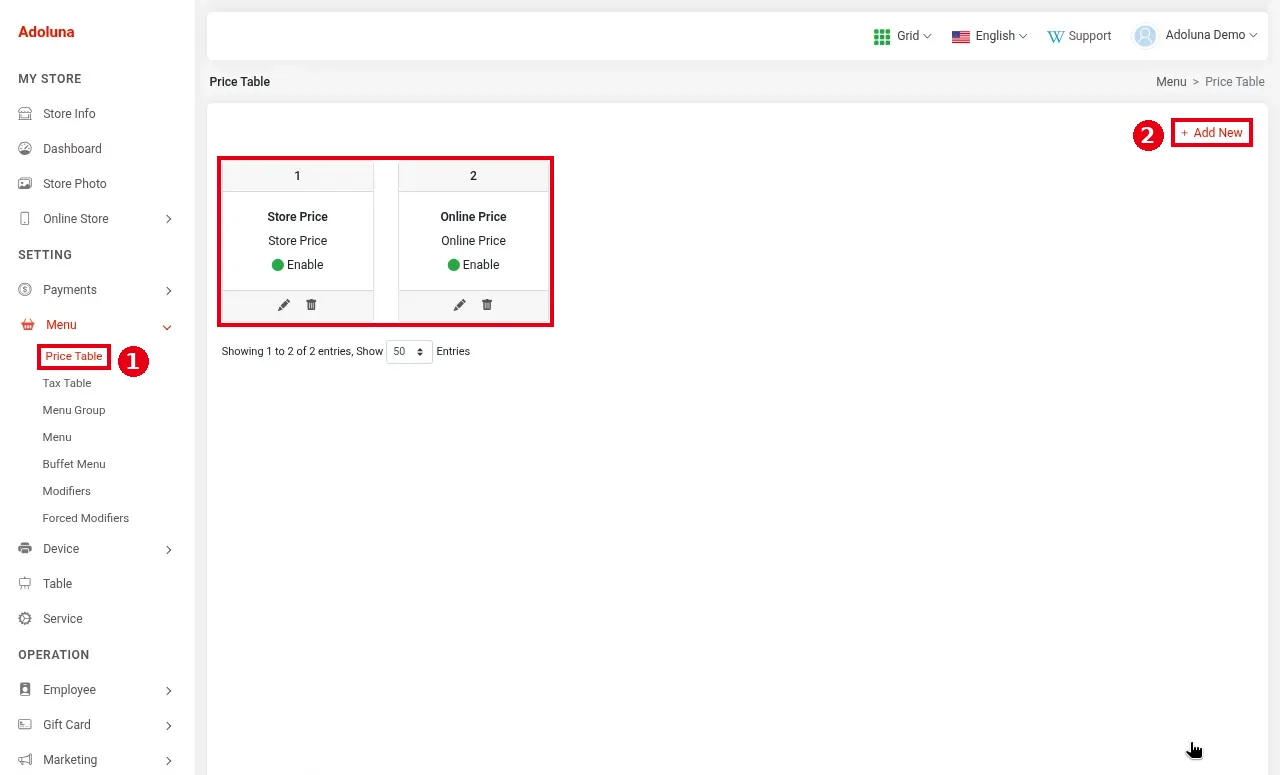
1. Price tables: click Menu > ① Price Table. The screenshot has two price tables, Store Price and Online Price, both enabled (Enable). Click ② + Add New for a new one. If no price table is enabled or selected, item prices show as $0.00. Details: 2.3.1 How to set up price tables; for troubleshooting $0.00 prices, see 4.3.1 Why do item prices show $0.00?.
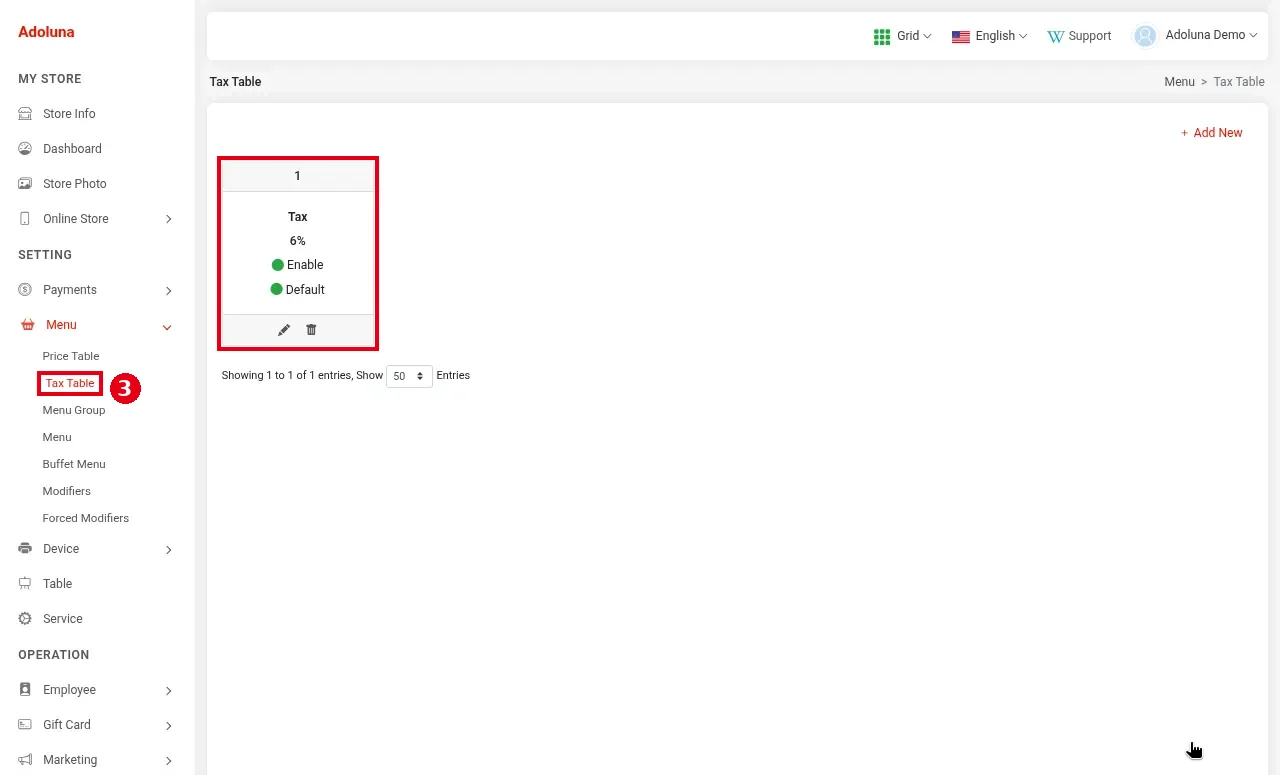
2. Tax tables: click ③ Tax Table and create the store’s tax rates (Tax 6% in the screenshot, marked Default). The Default tax applies to custom items added while ordering (see 1.2.8 How to add a custom menu item). Details: 2.3.2 How to set up tax tables.
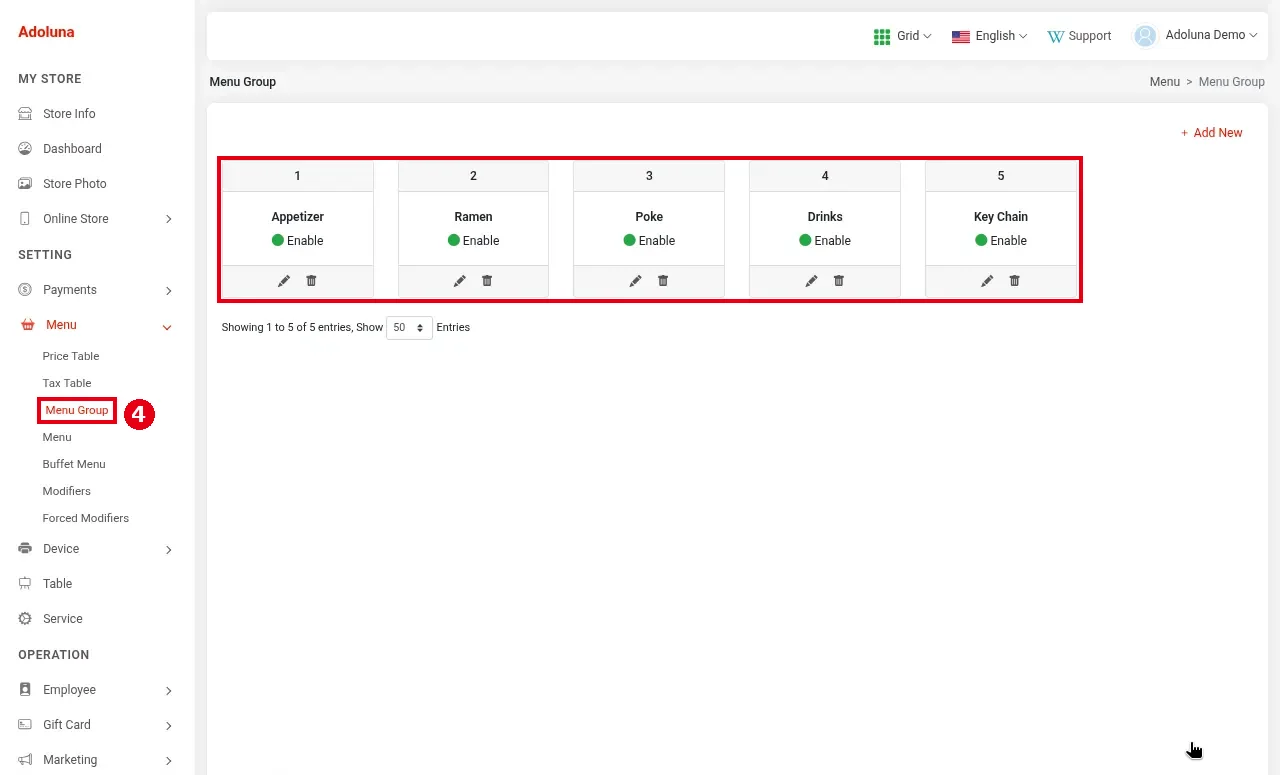
3. Menu groups: click ④ Menu Group and create reporting groups (Appetizer, Ramen, Poke, Drinks and Key Chain in the screenshot). Menu groups are used only to group sales reports and don’t change how the POS ordering screen looks. Details: 2.3.3 How to set up menu groups for reporting.
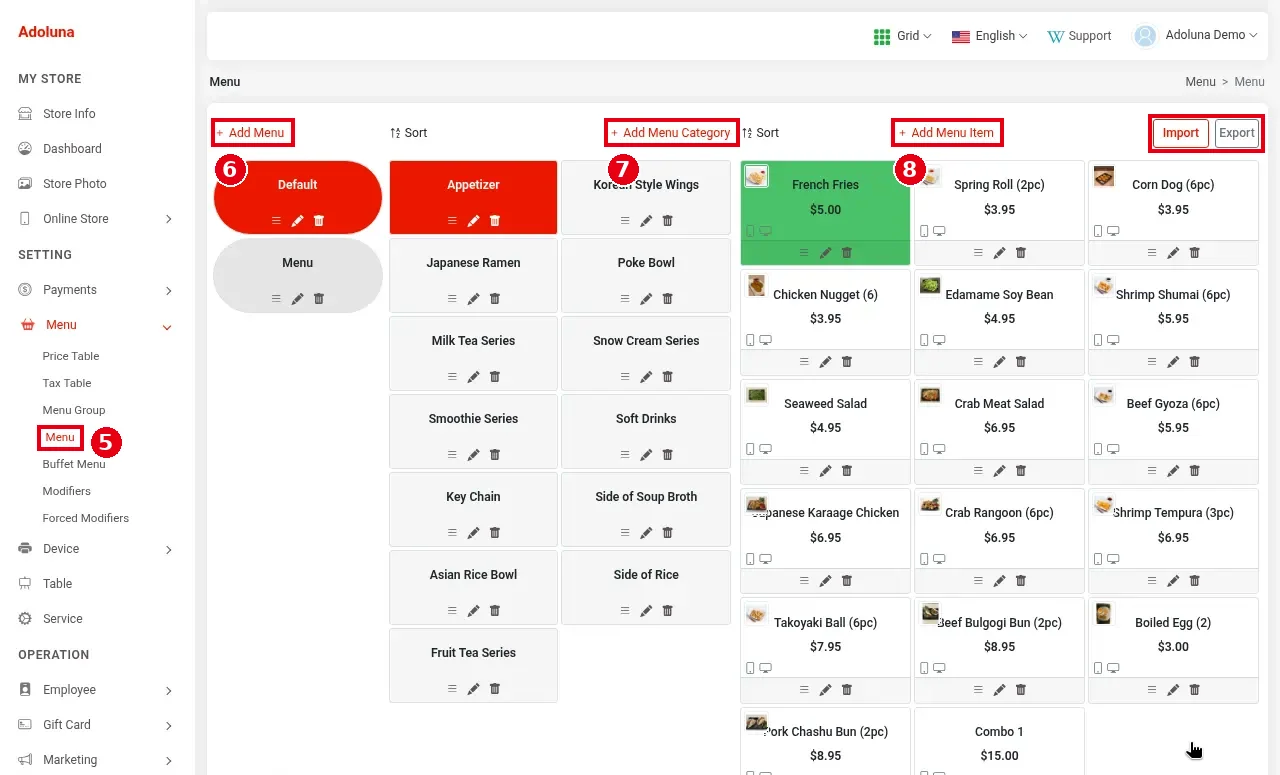
4. Menus, categories and items: click ⑤ Menu. The page has three columns: menus on the left (Default and Menu in the screenshot), categories in the middle, and the items in the selected category on the right.
-
⑥ + Add Menu: create a menu.
-
⑦ + Add Menu Category: create a category (e.g. Appetizer, Japanese Ramen). A category can have a default tax and a default printer mapping; changing the default printer mapping doesn’t update the items already in the category. Details: 2.3.4 How to create and sort menu categories.
-
⑧ + Add Menu Item: create an item in the selected category and choose its price, tax, menu group and printer mapping (printer mappings: 3.3.3 How to set up printer mapping and route items to kitchen printers). The item type (Normal Item / Combo Item / Parent Item / Sub Item / Sub Combo Item) can’t be changed after creation, so decide before you create it. Details: 2.3.5 How to add menu items.
-
Import / Export at the top right are for Excel import and export. This feature still needs work and isn’t recommended for merchants for now; create items one by one in the Backoffice instead (see 2.3.12 How to import and export the menu with Excel).
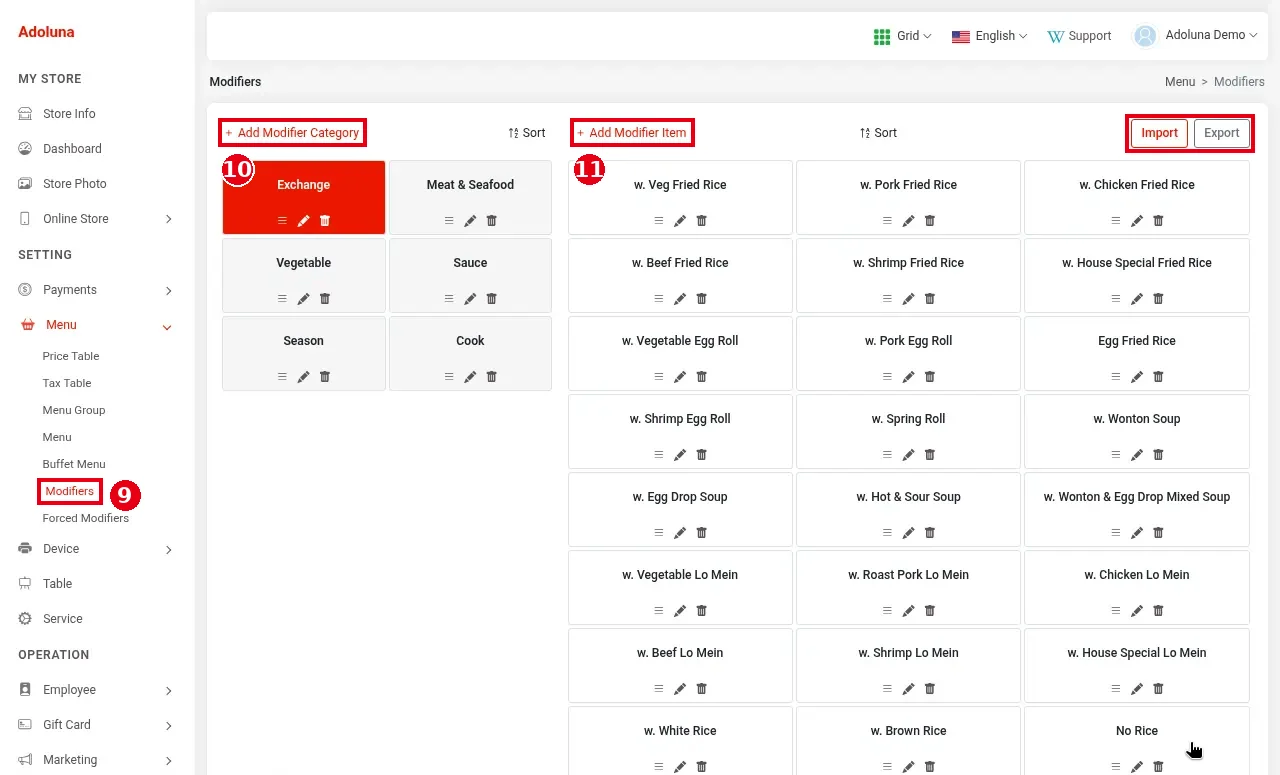
5. Modifiers: click ⑨ Modifiers, create modifier categories with ⑩ + Add Modifier Category, then modifiers with ⑪ + Add Modifier Item. Forced modifiers have their own submenu, Forced Modifiers. Details: 2.3.6 How to set up modifiers and 2.3.7 How to set up forced modifiers and default choices.
6. Check on the POS: open a test order and check categories, items, prices, tax and modifiers, and that items print at the right kitchen (see 3.6.2 How to run a go-live test (test orders, printing, cards, Batch)).
Notes / FAQ #
-
The order matters: price table → tax table → menu group → category → item → modifiers. If you create items first and add price or tax tables later, you have to go back and edit each item.
-
If item prices show $0.00, first check that the price table is enabled and the item has a price table selected. Which price table the POS uses isn’t set on the POS or device; it’s configured for each Service under Service in the Backoffice. For full troubleshooting steps, see 4.3.1 Why do item prices show $0.00?.
-
Buffet menus are set up separately under Buffet Menu; see 2.3.13 How to set up an All You Can Eat (buffet) menu.


