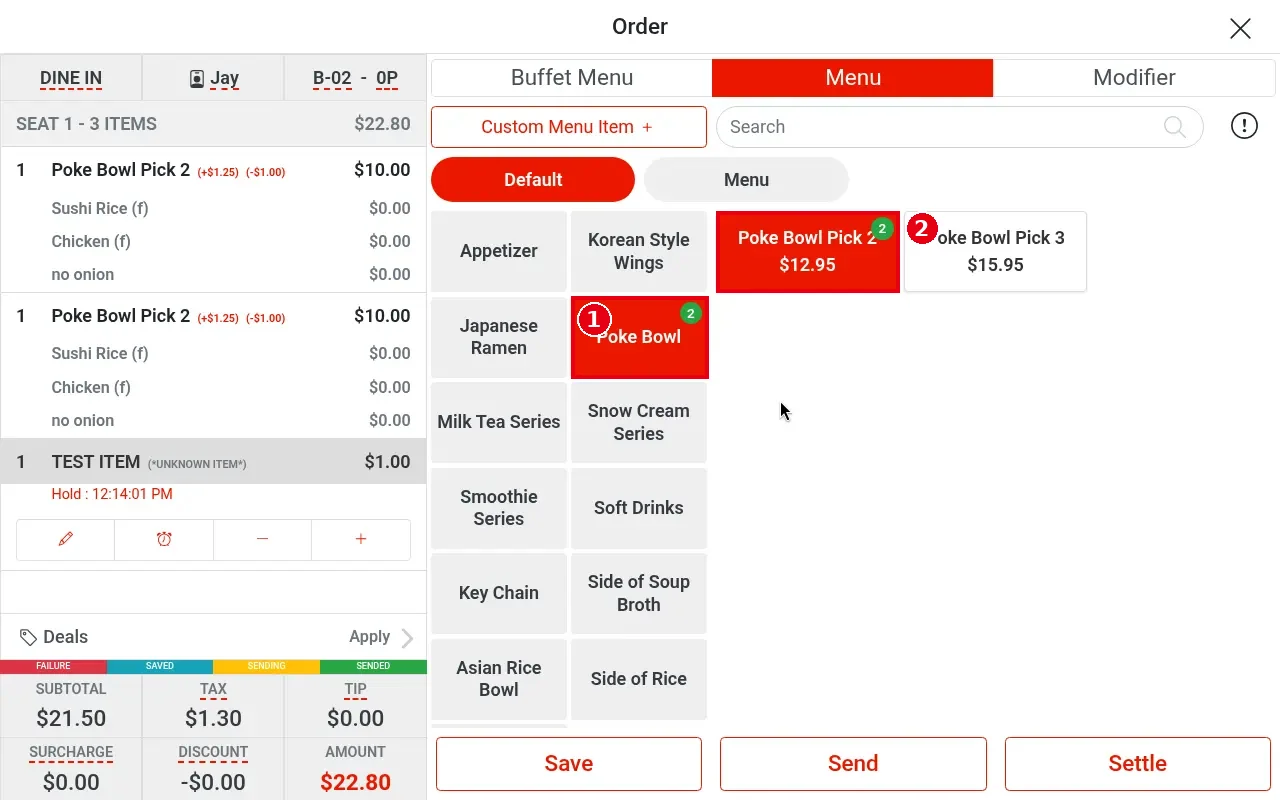
Purpose: Add modifiers to an item, or type a custom modifier that is not on the menu (e.g. “no onion”). For: servers.
Steps #
1. On the Menu tab pick a category (e.g. Poke Bowl).
2. Tap an item that has modifier options (e.g. Poke Bowl Pick 2).
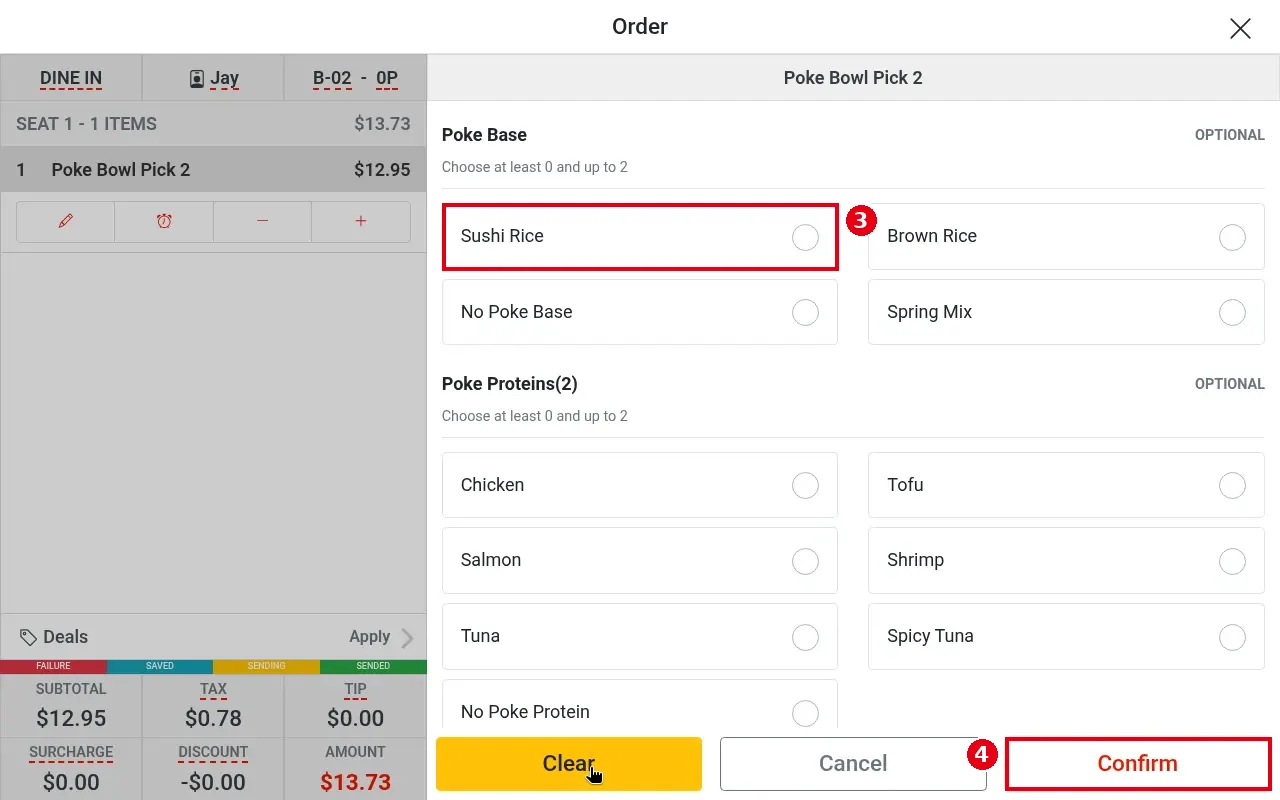
3. The item’s modifier page opens. Tap options in each group (e.g. Sushi Rice under Poke Base). OPTIONAL on a group means it can be skipped; “Choose at least 0 and up to 2” shows how many you may pick.
4. Tap Confirm (Clear clears the picks, Cancel cancels).
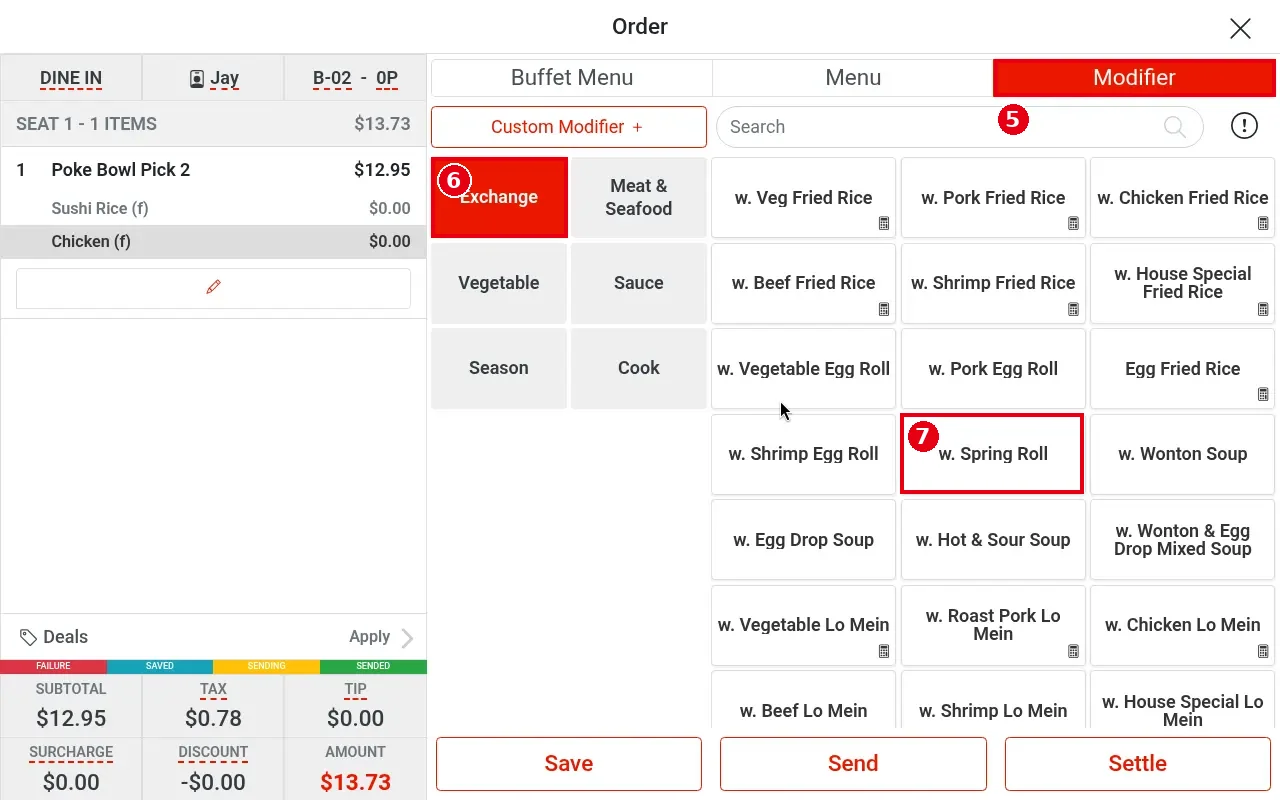
5. To add more modifiers later: select the item in the ticket on the left, then tap the Modifier tab.
6. Pick a modifier category on the left (e.g. Exchange, Meat & Seafood, Vegetable, Sauce, Season, Cook).
7. Tap a modifier button on the right (e.g. w. Spring Roll).
8. A small option bubble pops up next to the button (e.g. Exchange $0.00). Tap it to apply; the modifier then shows under the item (e.g. Exchange w. Spring Roll $0.00).
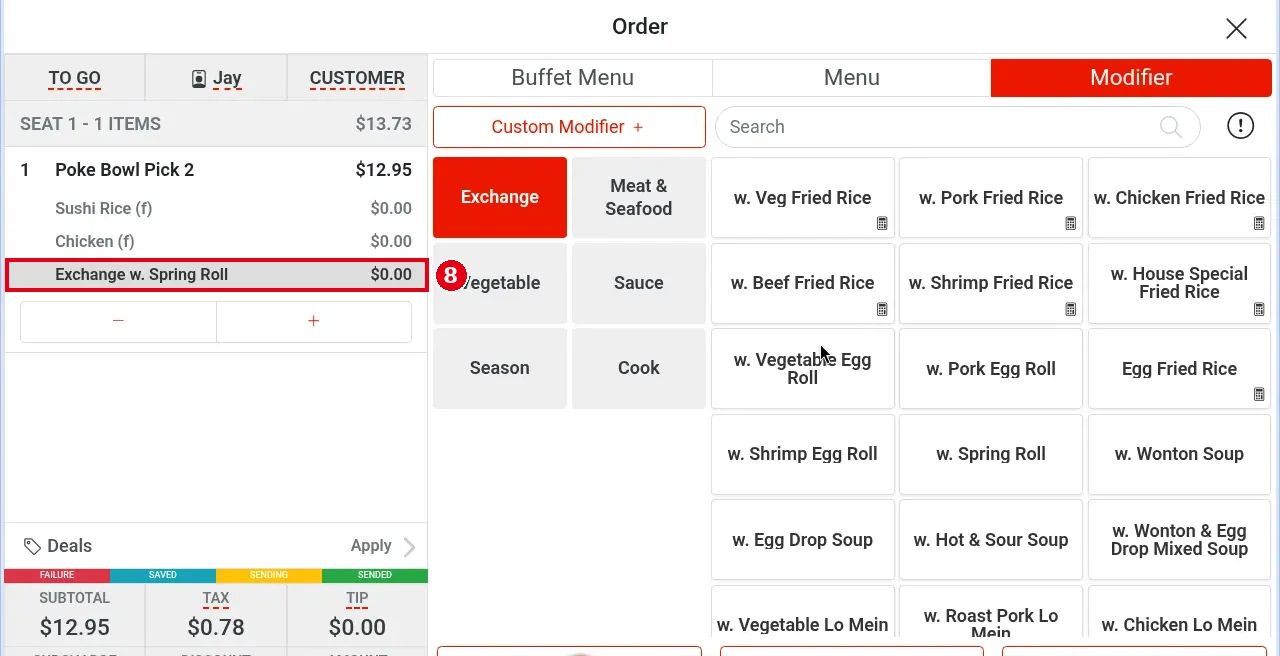
9. For a modifier that is not on the menu, tap Custom Modifier +.
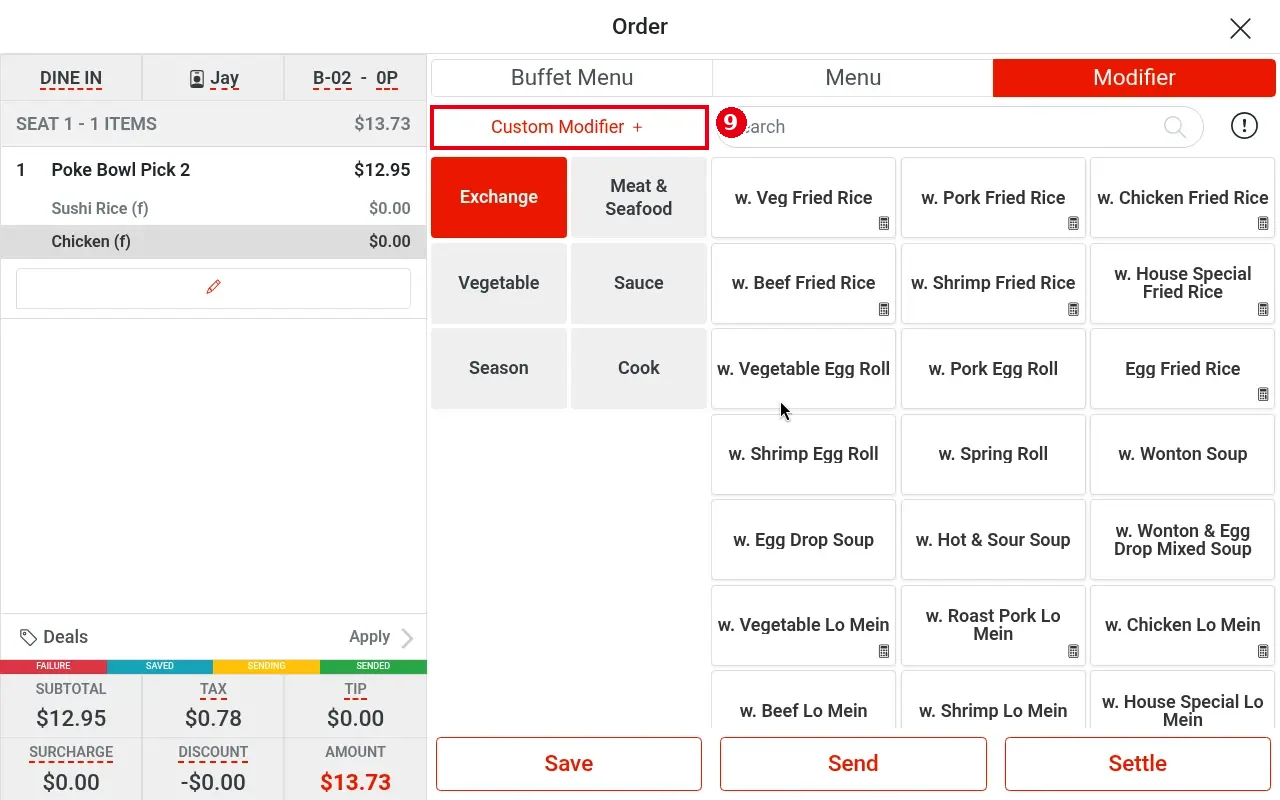
10. Fill in Name (English)*, Name (中文)*, Price*, Quantity* (e.g. no onion, price 0.00, quantity 1).
11. Tap Confirm.
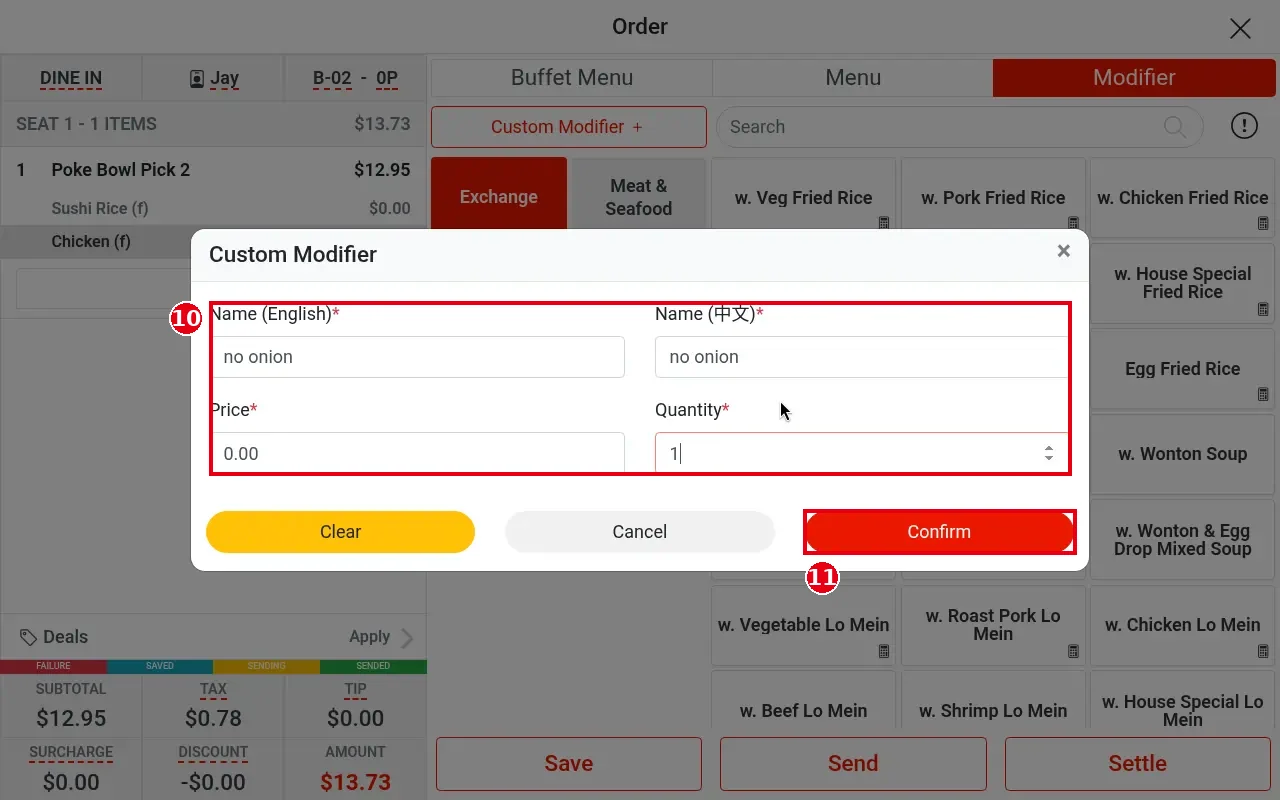
12. The modifiers show under the item (e.g. Sushi Rice (f) $0.00, Chicken (f) $0.00, no onion $0.00).
Notes / FAQ #
-
(f) after a modifier means it is free, not that it is forced/required.
-
An item with modifiers (forced or regular) always shows each portion as a separate line; it is never merged with the same item (see 1.2.7).
-
When you select a modifier line in the ticket, only the pencil (edit) button appears.
-
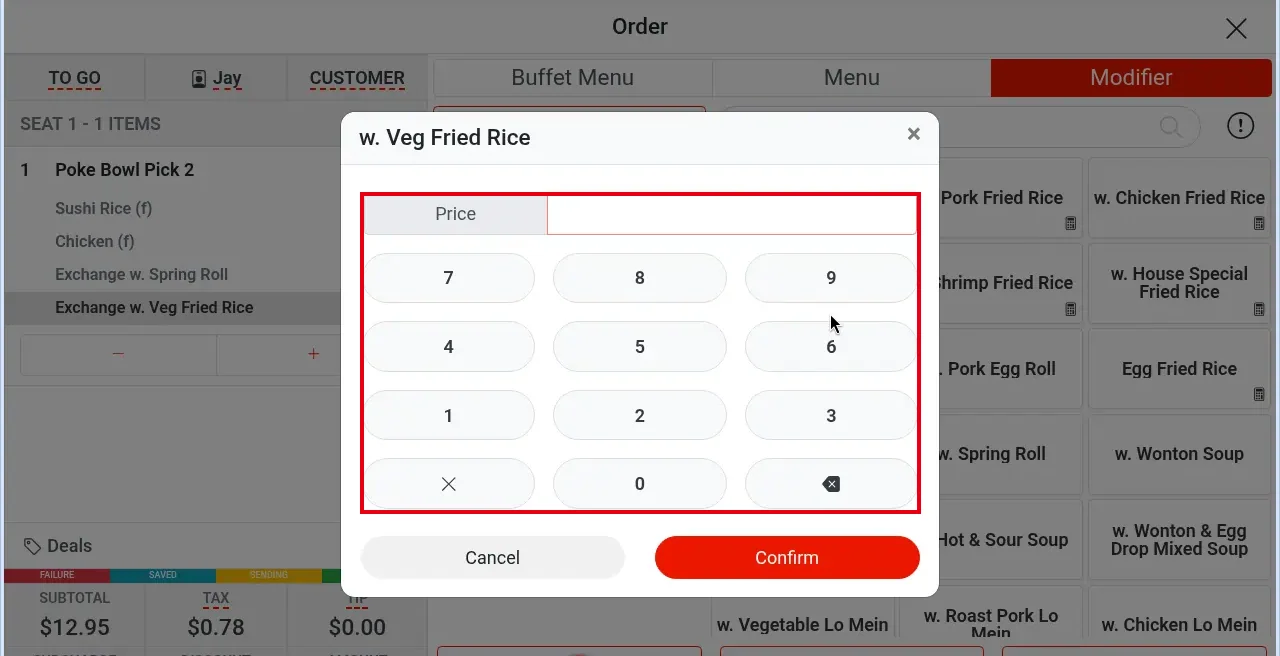
Some modifier buttons have a small document icon at the bottom right. It means you must enter an amount or weight after tapping that modifier. This is set in the back office under Menu > Modifiers by turning on Prompt for Price or Prompt for Weight on the modifier (see 2.3.6 How to set up modifiers). Tapping such a modifier opens a window titled with the modifier’s name (e.g. w. Veg Fried Rice); type the value into Price on the keypad and tap Confirm (Cancel to cancel).
-
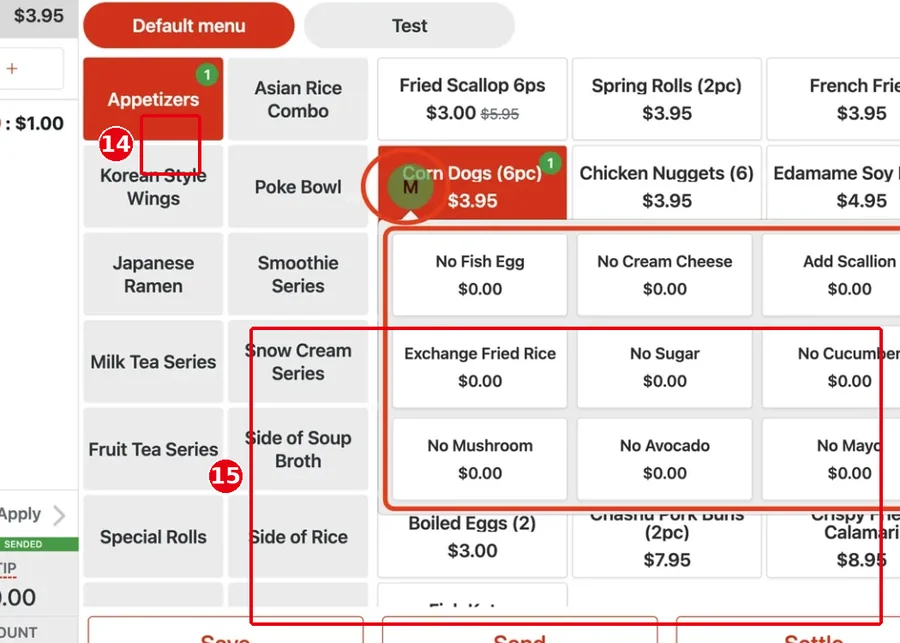
Modifier memory (Ⓜ): the system records the modifiers chosen for each item (e.g. Add, No). If an item has a modifier history, an Ⓜ icon appears above the button when you select the item; tap Ⓜ to see that item’s 9 most-used modifiers. Items with no history show no Ⓜ.
-
Forced modifiers (modifier groups with a minimum number of picks) can have default options set in the back office (Default Option, see 2.3.7 How to set up forced modifiers and default choices); they are ticked automatically when ordering and staff can still change them.
-
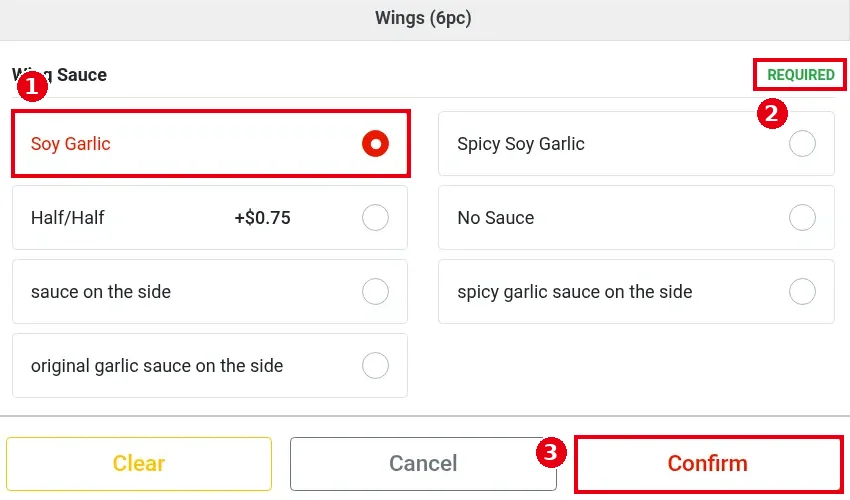
Default option example (item Wings (6pc)): tapping the item opens the modifier page. The Wing Sauce group is marked REQUIRED (2 in the image), and the default option Soy Garlic is already selected (red outline, 1). Tap Confirm (3) to keep the default; to choose something else (e.g. Spicy Soy Garlic, Half/Half +$0.75), just tap that option.
-
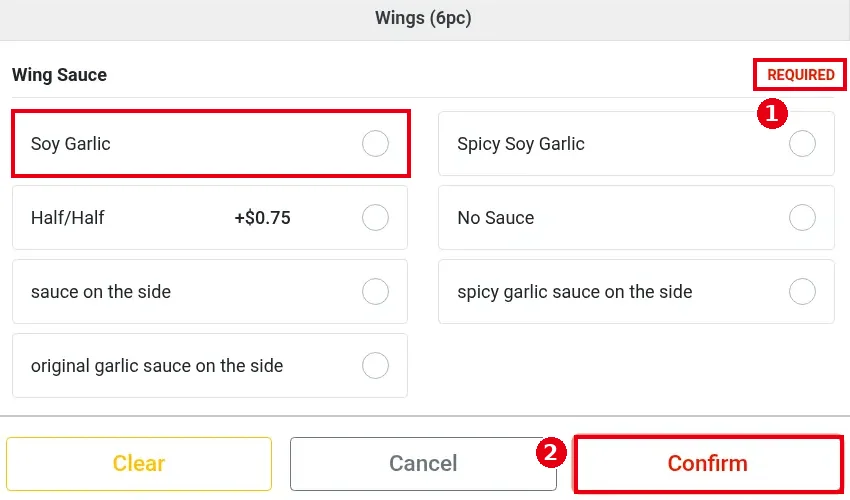
A required group can’t be left empty: if you tap the default to deselect it, REQUIRED turns red (1), and Confirm (2) does not close the window (there is no text message) until you pick an option.
-
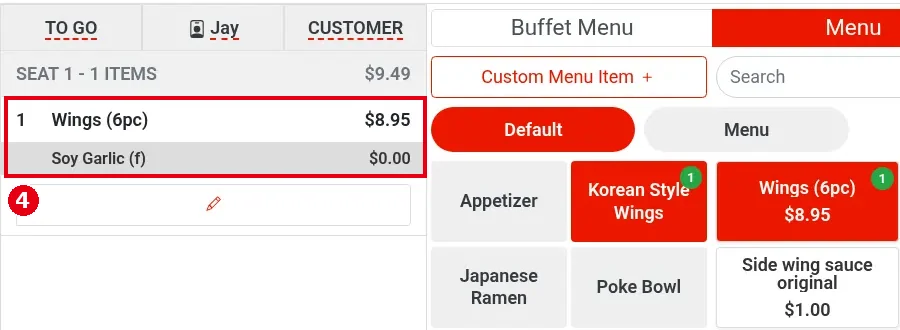
After Confirm, the modifier shows under the item (4, e.g. Soy Garlic (f) $0.00 under Wings (6pc) $8.95).
-
Example of the Ⓜ modifier-memory icon (⑭ Ⓜ on the item button; ⑮ remembered modifiers after you tap it):